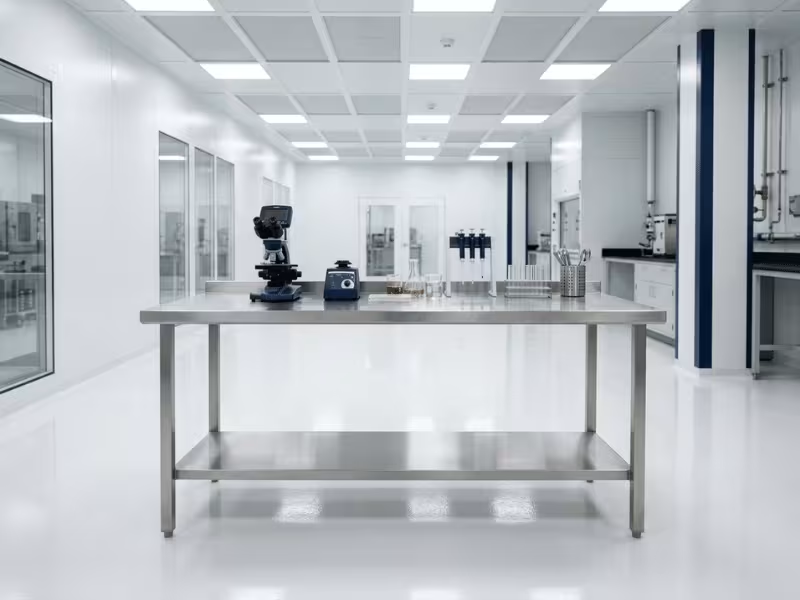
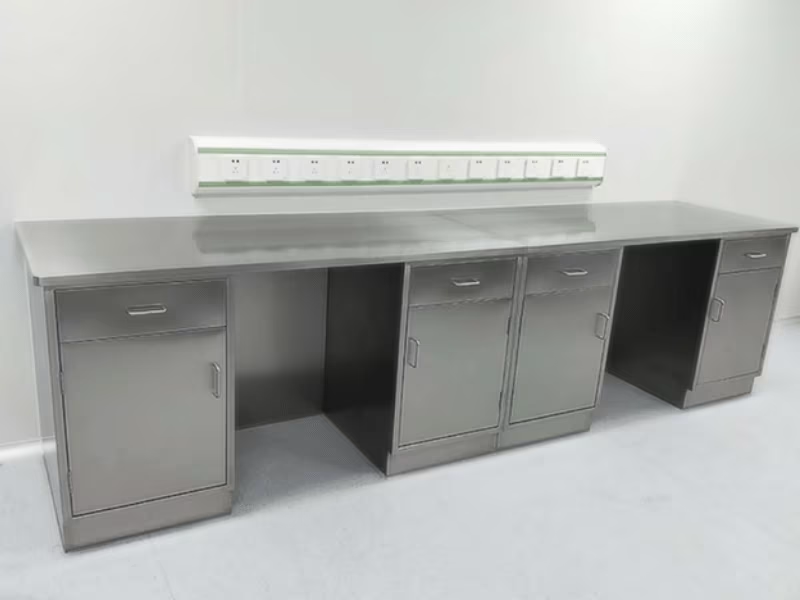
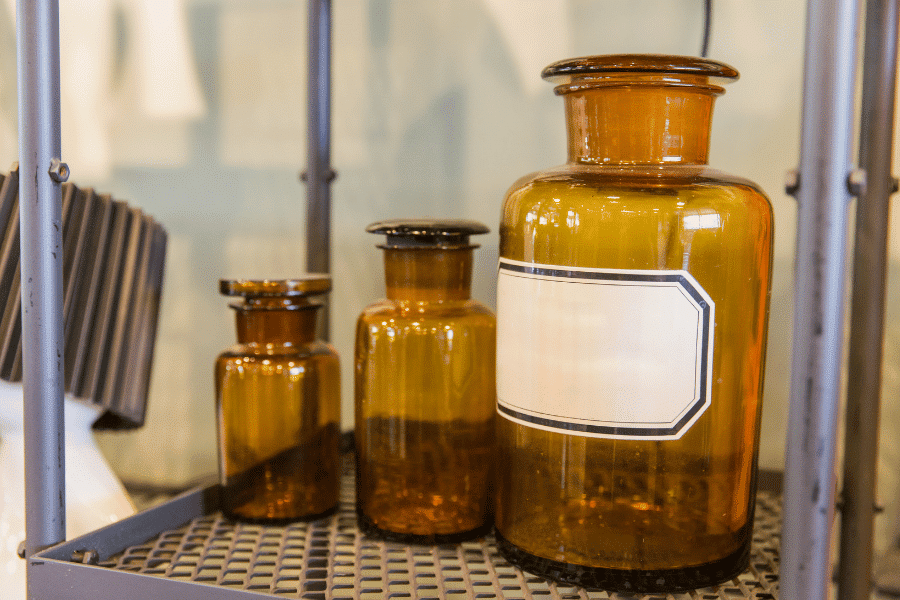
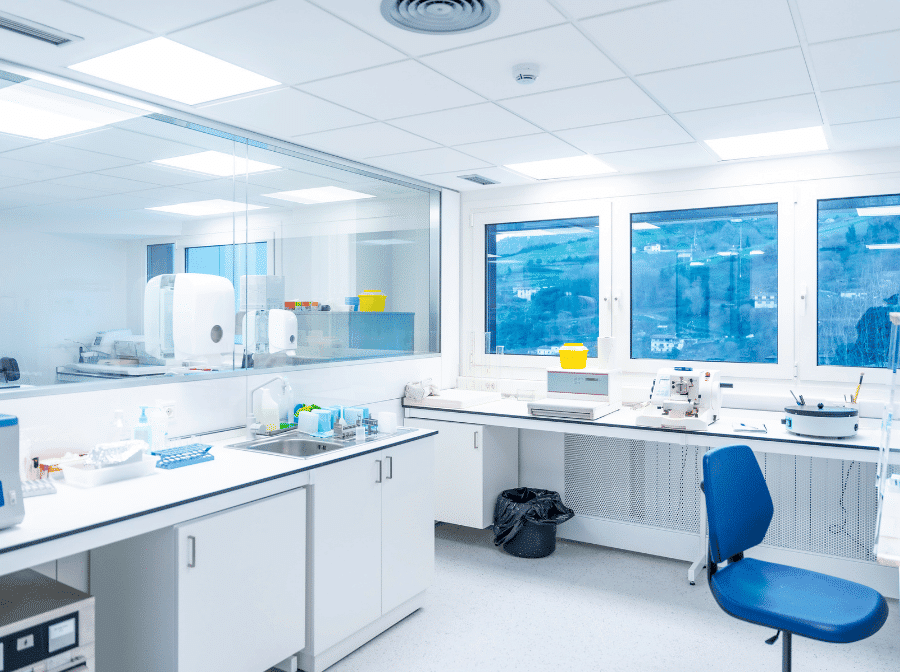
Laboratory design and planning is the process of turning a lab’s scientific, safety, workflow, and utility requirements into a space that is functional, compliant, and practical to operate. Done well, it reduces costly redesigns, supports safer workflows, and lowers long-term operating costs.
This guide explains the key decisions that shape a successful lab project—from layout and ventilation to casework, utilities, and future flexibility—so project teams can make better choices before construction begins.
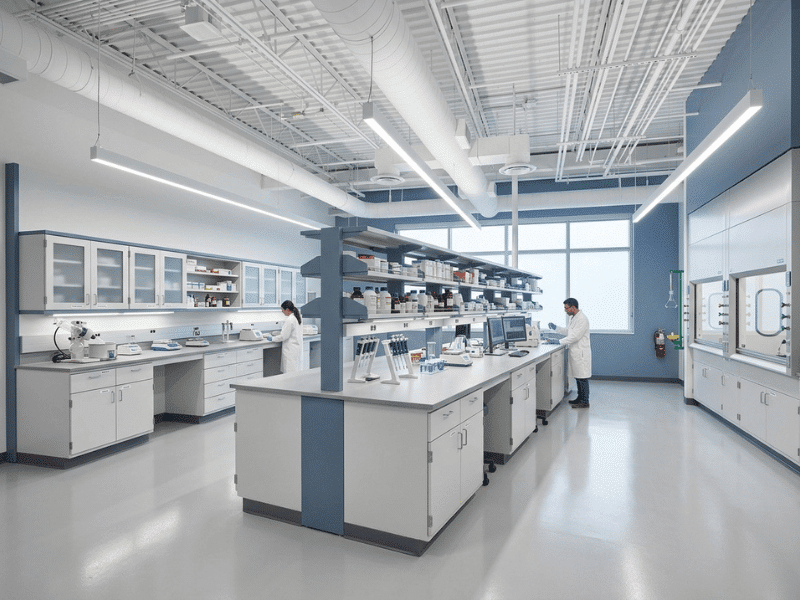
What Does Laboratory Design and Planning Include?
Laboratory design and planning is not a single discipline. It draws together architectural space planning, mechanical and electrical engineering, safety compliance, equipment coordination, and furniture and casework specification into a single cohesive process.
At a project level, it typically covers:
- Space programming: determining how much space each function requires and how those functions relate to one another
- Zoning and layout: organizing the lab to support workflow, minimize contamination risk, and meet egress and safety requirements
- Ventilation and environmental control: designing the air handling systems that govern safety, containment, and energy use
- Safety systems: integrating emergency equipment, chemical storage, fire suppression, and access control
- Casework and furniture: selecting, configuring, and integrating the physical infrastructure of the working environment
- Utilities and services: routing electrical, gas, water, drainage, and data to where they are actually needed
- Flexibility planning: building in the capacity to adapt without full demolition
These elements are deeply interdependent. A decision made in casework—say, the choice between fixed and modular benching—has direct consequences for how utilities are routed, how the room can be reconfigured in the future, and what the lifecycle cost of the installation will be. That’s why project teams that treat furniture as a late-stage procurement item, rather than an early design input, consistently run into problems.
Start With the Lab’s Purpose and Risk Profile
Before any layout gets drawn, the project team needs to establish what kind of laboratory is being built and what hazards it will contain. These two factors—lab type and risk profile—determine almost everything else.
What are the main laboratory types and their design implications?
Different lab types carry fundamentally different design requirements. The table below summarizes the key distinctions:
|
Lab Type |
Key Hazard Profile |
Ventilation Priority |
Casework Typical Spec |
Worktop Priority |
|---|---|---|---|---|
|
Chemistry / Analytical |
Chemical vapors, corrosives, solvents |
High — fume hoods, VAV, full exhaust |
Steel or steel-wood, chemical-resistant |
Epoxy resin or phenolic resin |
|
Microbiology / Life Science |
Biological agents, contamination |
Moderate-high — biosafety cabinets, pressure control |
Steel, easy to clean |
Stainless steel or epoxy resin |
|
Pharmaceutical / GMP |
Cross-contamination, sterility |
High — cleanroom classification, HVAC precision |
Cleanroom-compatible, smooth surfaces |
Stainless steel |
|
Physical / Instrumentation |
Vibration, EMI, precision measurement |
Moderate — temperature/humidity stability |
Anti-vibration tables, stable frames |
Varies by instrument |
|
School / Teaching |
General chemical use, high occupancy |
Moderate — fume hoods, general ventilation |
Steel-wood, durable, cost-conscious |
Phenolic resin or HPL |
|
Environmental Testing |
Varied chemical loads |
Moderate-high |
Chemical-resistant casework |
Epoxy or phenolic resin |
Biosafety classification—often referenced using frameworks like the WHO or CDC/NIH biosafety level system—adds another layer. A BSL-1 or BSL-2 space has very different containment, pressure, and access requirements compared to a BSL-3 facility. Similarly, chemical risk levels (flammables, corrosives, oxidizers, toxics) determine storage requirements, ventilation loads, electrical classifications, and emergency equipment placement.
Establishing the risk profile at the programming stage prevents expensive retrofits later. A space designed for low-hazard general chemistry that gets repurposed for high-toxicity analytical work will almost always need to be substantially rebuilt.
Recommended Sequence for Laboratory Design Planning
Laboratory projects that run into trouble usually do so because critical decisions were made out of sequence. The following order reflects how successful lab projects are structured:
- Programming — Define the scientific function, user count, equipment list, and hazard profile
- Schematic design — Establish zoning, circulation, and relationship of spaces
- Design development — Finalize layout, ventilation strategy, safety systems, and casework configuration
- Utility coordination — Route electrical, gas, water, data in alignment with casework layout
- Specification and procurement — Select and specify furniture, equipment, and fit-out materials
- Construction and installation — Sequence casework installation with building work
- Commissioning — Test all systems, including fume hood containment, before handover
The most important thing to note here: casework and furniture decisions belong in step 3, not step 5. Selecting bench configurations and worktop materials after utilities are already roughed-in forces compromises. The reverse—letting casework inform utility routing—produces a more functional and cost-effective result.
Space Planning and Layout Principles
Good laboratory layout is not simply an exercise in fitting equipment into a room. It’s about controlling movement, managing contamination risk, and creating an environment where work can be done safely and efficiently.
How should a lab be zoned for workflow and contamination control?
The foundational principle of laboratory layout is the dirty-to-clean gradient. Work moves from areas of highest contamination risk toward areas of lowest risk—never in the opposite direction. Sample receipt, hazardous procedures, and waste handling should be spatially separated from analytical work, data areas, and clean storage.
This translates into distinct zones:
- Wet/chemical zone: benches with sinks, fume hoods, reagent storage—requires highest ventilation and chemical-resistant surfaces
- Instrument zone: dedicated space for analytical equipment, often requiring stable temperatures and vibration isolation
- Dry/write-up zone: for data entry, microscopy, non-hazardous tasks—can use lower-specification surfaces and general ventilation
- Support zone: cold storage, consumables, PPE, waste—accessible but separated from active work areas
What circulation and aisle widths are needed in a laboratory?
Circulation planning is partly a safety requirement and partly a workflow issue. Primary aisles—those used for emergency egress—need to remain unobstructed at all times. Minimum aisle widths vary by jurisdiction and lab classification, but a working standard used in many international projects is 1.5 meters for primary aisles and around 1.0–1.2 meters for secondary access aisles between benches.
Storage is often underplanned. Labs that lack designated storage rapidly accumulate equipment and consumables on bench surfaces, which reduces usable workspace, compromises safety, and creates cleaning difficulties. Plan dedicated storage—both under-bench and wall-mounted—as part of the original layout, not as an afterthought.
Ventilation and Environmental Control
Ventilation is the most safety-critical mechanical system in a hazardous laboratory. It controls vapor dilution, maintains pressure relationships between spaces, and—when designed around fume hoods—provides primary containment for hazardous chemical work.
What is the difference between VAV and CAV laboratory ventilation systems?
Constant Air Volume (CAV) systems supply and exhaust a fixed volume of air regardless of activity level or fume hood sash position. They are simpler to design and install, but consume significant energy even when the lab is unoccupied or fume hoods are closed.
Variable Air Volume (VAV) systems modulate airflow in response to sash position, occupancy, and air quality sensors. When a fume hood sash is lowered, the exhaust volume reduces proportionally—maintaining safe face velocity while cutting energy consumption. For projects with multiple fume hoods and extended operating hours, VAV systems typically deliver meaningful energy savings over their operational life, even though they carry a higher initial cost.
The right choice depends on lab type, regulatory environment, operating hours, and budget. Many projects in regions with high energy costs or sustainability requirements now default to VAV for any lab with active fume hood use.
Where should fume hoods be positioned to maintain containment?
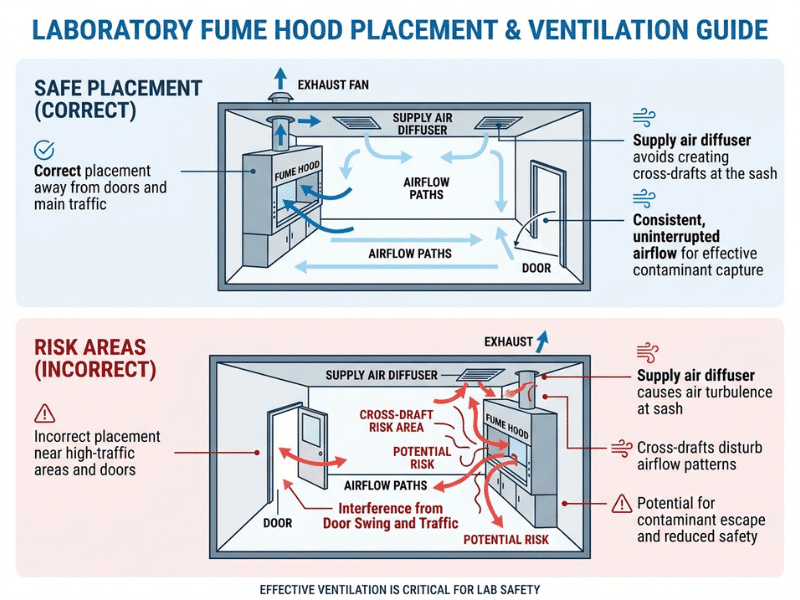
Fume hood placement is one of the most consequential layout decisions in a chemistry or analytical lab. Hoods placed near frequently used doors, in high-traffic corridors, or directly beneath high-velocity supply air diffusers are vulnerable to cross-drafts that disrupt the protective air curtain at the sash face.
Best practice positions fume hoods:
- Away from main circulation paths and door swings
- Clear of high-velocity HVAC supply diffusers
- Along exterior or dedicated exhaust walls where duct runs are shortest
- With adequate clearance on both sides for safe access and emergency egress
What pressure relationships should be maintained between laboratory spaces?
Hazardous labs are typically maintained at negative pressure relative to adjacent corridors and support spaces. This ensures that any air movement is from clean to dirty—not the reverse. The magnitude of the pressure differential required varies by lab classification and applicable standards; the key design principle is that it must be actively maintained and monitored, particularly when fume hood sashes are opened or closed rapidly.
Safety Systems and Compliance Considerations
Safety systems must be integrated from the earliest design stages. Retrofitting emergency equipment, chemical storage, or fire suppression after the layout is fixed is invariably more expensive and often produces suboptimal outcomes.
What emergency equipment is required in a laboratory, and where should it be located?
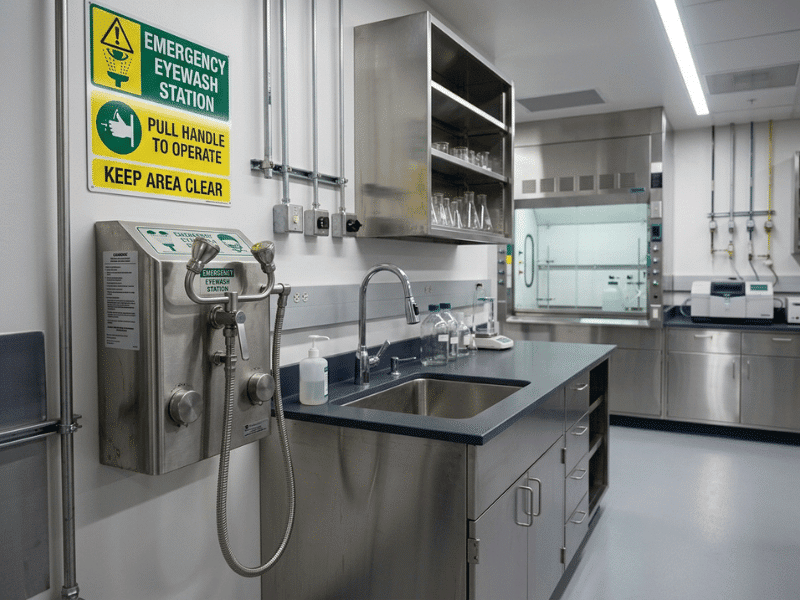
Emergency eyewash stations and safety showers are required in any laboratory where personnel may be exposed to hazardous chemicals. Standards such as ANSI Z358.1 (referenced widely outside the US as a benchmark) specify that these units should be reachable within approximately 10 seconds of travel time from the hazard, along an unobstructed path. Water temperature should be tepid—neither cold enough to cause hypothermia during a 15-minute flush nor warm enough to accelerate chemical absorption.
The exact requirements—distance, temperature range, flow rate, and maintenance intervals—vary by jurisdiction. Always verify against the applicable local or national standard.
How should chemical storage rooms be designed?
Chemical storage design is driven by incompatibility. Flammable liquids, corrosives, oxidizers, and toxics cannot be stored together. The design implications include:
- Flammable storage cabinets: double-walled steel construction, self-closing doors, grounding provisions—built to relevant fire codes
- Corrosive/acid cabinets: polypropylene or poly-lined interiors to prevent acid vapor degradation of metal hardware
- Separation: incompatible chemical classes must be physically segregated, not simply labeled
Chemical storage rooms on exterior walls allow for explosion-venting or pressure-relief panels that direct force away from occupied spaces—a configuration that is strongly preferred for high-volume flammable storage.
Access control, whether card-based or keyed, is increasingly standard even for non-BSL facilities. It protects both personnel and inventory.
How Laboratory Furniture Decisions Affect Layout, Utilities, and Long-Term Flexibility
This section deserves its own emphasis, because it’s where the most expensive late-stage design mistakes originate.
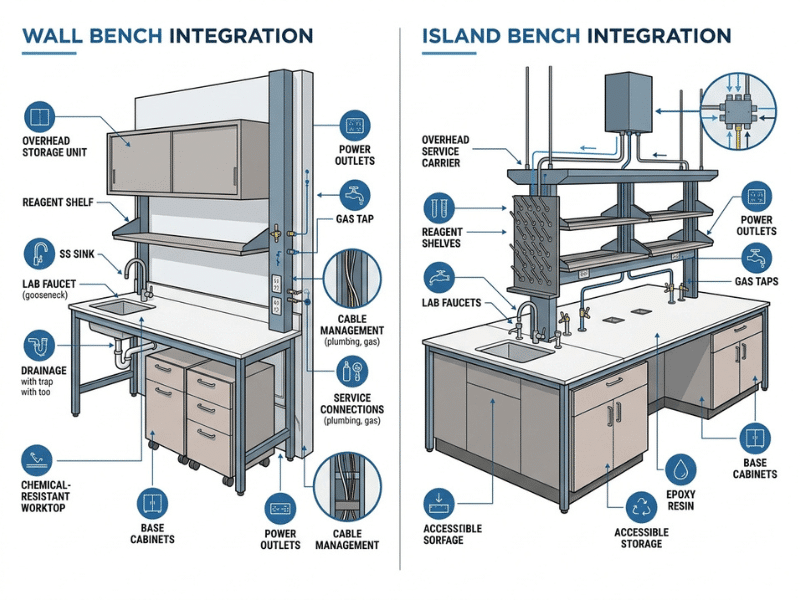
Casework and furniture are not decorative or functional accessories fitted into a finished lab. They are structural and service elements whose dimensions, configuration, and material specification directly affect:
- Where utilities can be routed and how they terminate at the bench
- Whether future layout changes require partial demolition or can be achieved by rearrangement
- What worktop materials are appropriate, and therefore what chemical processes can be safely carried out
- How much storage the lab has, and where it is located
- The long-term maintenance burden and lifecycle replacement cost
A project team that finalizes the mechanical, electrical, and plumbing (MEP) design before the casework configuration is locked will frequently discover that utility drops or service spines are in the wrong position relative to the bench layout. Moving them at that stage is costly. Getting the casework supplier involved before MEP routing is finalized is a straightforward way to avoid this.
Laboratory Furniture and Casework Planning
Fixed versus modular laboratory casework: which is right for your project?
The choice between fixed (built-in) and modular casework is fundamentally a question about how much flexibility you expect to need—and over what timeframe.
Fixed casework is built into the room, typically attached to walls and floor. It is generally more rigid structurally, can be specified for very high load capacities, and is familiar to traditional construction contractors. The drawback is that any layout change typically requires demolition and reconstruction, with attendant disruption and cost.
Modular casework uses freestanding frames with demountable storage units, mobile under-bench pedestals, and overhead service spines that integrate utilities without penetrating walls. Stations can be reconfigured without specialist trades in many cases. The initial cost may be higher than basic fixed construction, but the lifecycle cost advantage over a 15–20 year horizon is usually significant for labs that undergo periodic reorganization.
Many projects use a hybrid approach: fixed casework for wet zones and high-load instrument areas, modular systems for general bench areas that are more likely to be reconfigured.
What are the main bench types used in laboratory design?
|
Bench Type |
Description |
Typical Use |
|---|---|---|
|
Wall bench (side bench) |
Fixed to perimeter wall, typically with overhead cabinets |
General chemistry, preparation |
|
Island bench (central bench) |
Freestanding, accessible from both sides |
Teaching labs, shared workstations |
|
Peninsula bench |
Connects to wall on one end, open on three sides |
Efficient use of perimeter walls |
|
Instrument bench |
Reinforced, often vibration-isolated |
Analytical equipment, balances |
|
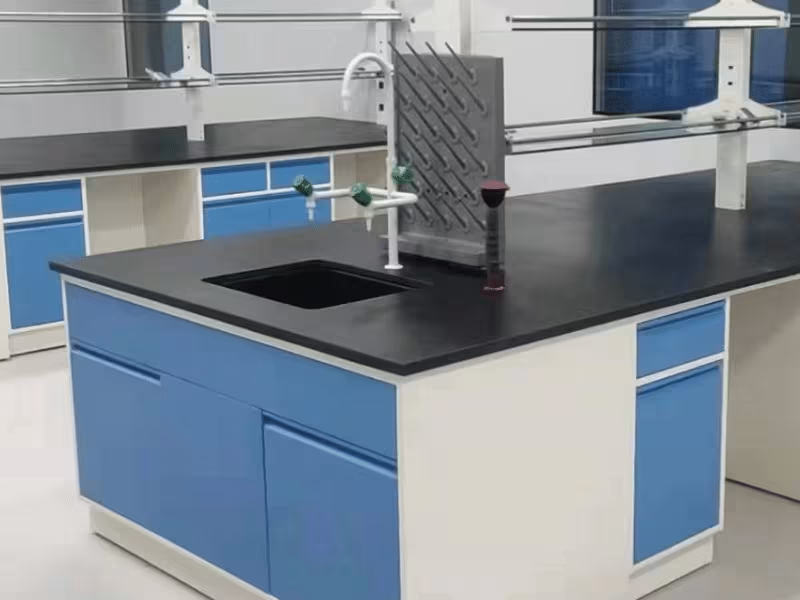
Sink bench |
Integrated sink, chemical-resistant worktop and cabinet |
Wash-up, wet chemistry |
|
Mobile bench |
Caster-mounted, repositionable |
Flexible/modular lab environments |
What worktop materials should be specified for different laboratory types?
Worktop selection is driven by the chemical environment, cleaning requirements, thermal exposure, and budget. The main options:
- Epoxy resin: Excellent chemical, heat, and moisture resistance. Standard specification for chemistry and analytical labs. Higher cost, but durable over decades.
- Phenolic resin: Good chemical resistance, lighter than epoxy, lower cost. Suitable for teaching labs and general purpose environments with moderate chemical exposure.
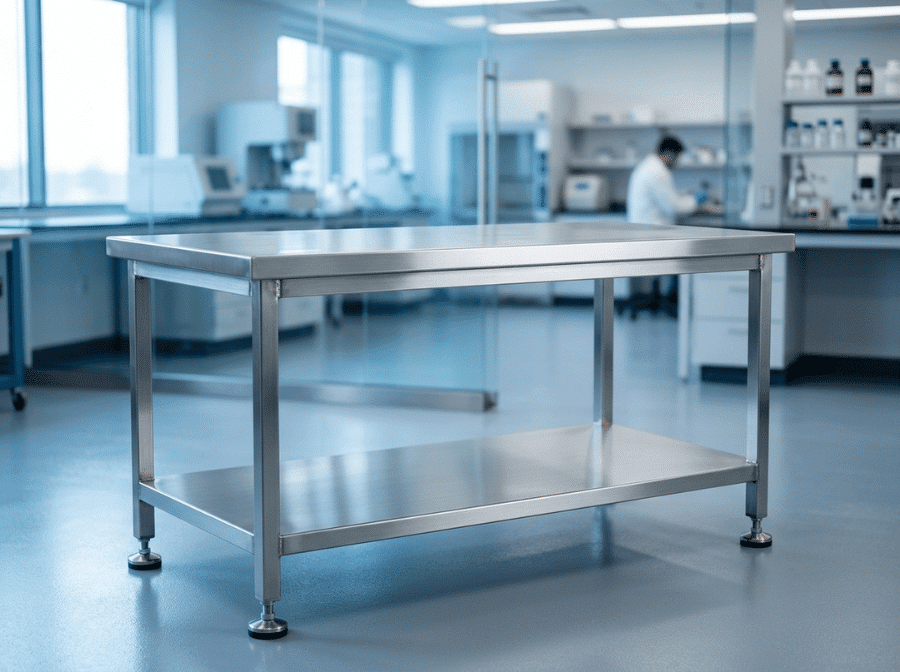
- Stainless steel: Cleanable, non-porous, excellent for microbiological and pharmaceutical environments. Susceptible to certain chemicals (particularly chlorides) and scratching.
- Ceramic/glazed tile or solid ceramic: Very high heat and chemical resistance. Heavy, and grout lines can present contamination risks in high-hygiene environments.
- HPL (High-Pressure Laminate): Low cost, good for dry environments and teaching labs. Not suitable for heavy chemical use.
- Solid wood: Used in teaching labs and heritage institutions. Limited chemical resistance; requires sealing and regular maintenance.
The table in the following section maps these materials to specific lab types as a procurement reference.
What storage types should be included in a laboratory?
- Base cabinets (under-bench): Drawers and doors for consumables, glassware, and non-hazardous equipment
- Wall cabinets (overhead): Reagent shelves, general storage above bench height
- Tall storage units: Full-height cabinets for larger items, PPE, or equipment not in constant use
- Flammable storage cabinets: Dedicated, compliant units for flammable liquid storage
- Acid/corrosive cabinets: PP or poly-lined units for corrosive chemical storage
- Under-fume-hood cabinets: Corrosive-resistant cabinets below fume hoods, often acid-lined
Utilities and Service Planning
How should electrical, gas, water, and data services be integrated into laboratory casework?
Laboratory utilities should be planned in coordination with casework layout, not independently of it. The most common failure mode is routing utility drops to positions that don’t align with where benches actually end up.
Key considerations by service type:
Electrical: Lab-grade outlets (with appropriate rating for the equipment load) should be positioned at bench level or above, not at floor level. Circuits should be sized for actual equipment loads, not generic assumptions. Dedicated circuits for analytical instruments are standard.
Gas: Gas tap positions should reflect where the gas is actually needed—typically at fume hoods and along the bench face. Color-coded handles and port markings aid identification. All gas fittings should be pressure-tested before handover.
Water and drainage: Sink positions drive drainage routing. PP (polypropylene) waste lines are standard for corrosive environments. Plan for adequate drainage capacity if multiple sinks are close together.
Data and networking: Data drops are often undersupplied in early designs. Plan for instrument connectivity, PC workstations, and future IoT sensor integration. Overhead cable management trays integrated into the casework service spine keep runs organized and accessible.
Future expansion: Where budget allows, stub-out unused service connections during initial installation. Adding a capped gas tap or an unused electrical circuit during construction is cheap. Adding it after the lab is operational is not.
Planning for Flexibility and Long-Term Cost
What design strategies support long-term laboratory flexibility?
The labs that age best are those designed with change anticipated rather than ignored. Specific strategies:
- Modular casework with mobile under-bench units: Allows station reconfiguration without trades involvement
- Overhead service spines: Carry utilities across the room independently of bench position, allowing bench relocation without rerouting services
- Raised access floors: Allow utility re-routing beneath the floor without breaking concrete
- Generous floor-to-ceiling heights: Accommodate future ventilation additions or overhead equipment without compromising headroom
- Neutral structural grid: Avoid designing equipment into structural bays in ways that lock the layout permanently
How does lifecycle cost compare to first cost in laboratory furniture procurement?
First cost—the purchase price—is the most visible number in a procurement decision. Lifecycle cost is the more meaningful figure.
A low-cost worktop material that degrades under regular chemical cleaning and requires replacement at year 7 is not cheaper than a higher-cost material that performs for 20 years. Similarly, fixed casework that requires demolition and reconstruction when the lab is reorganized carries a substantial hidden cost that never appears in the original procurement budget.
For procurement teams under budget pressure, the practical approach is to prioritize lifecycle cost in the elements most likely to be stressed: worktops, casework frames, and storage in wet zones. Standard-specification HPL worktops and light-duty bases are a reasonable economy in a dry writing area. In a chemistry lab, they are a false economy.
How to Choose Lab Worktop Material by Project Type
|
Project Type |
Recommended Worktop Material |
Rationale |
|---|---|---|
|
General chemistry lab |
Epoxy resin |
Broad chemical resistance, heat-resistant, long service life |
|
Analytical / instrumentation lab |
Epoxy resin or stainless steel |
Stable surface, easy to clean, compatible with instrument bases |
|
Pharmaceutical / GMP |
Stainless steel |
Non-porous, fully cleanable, compatible with validation protocols |
|
Microbiology / life science |
Stainless steel or epoxy resin |
Hygienic, chemical-resistant, autoclave-compatible edges |
|
Environmental testing |
Epoxy resin or phenolic resin |
Moderate-high chemical resistance, cost-effective |
|
School / teaching lab |
Phenolic resin or HPL |
Good durability for moderate use, cost-conscious specification |
|
Corrosive acid / HF work |
Solid polypropylene (PP) |
Exceptional resistance to acids, including hydrofluoric |
|
Physical / electronics lab |
HPL or stainless steel |
Minimal chemical exposure; prioritize ESD properties where needed |
Common Mistakes in Laboratory Design and Planning
1. Treating casework as a late procurement item. Furniture and utility routing need to be coordinated in design development—not after MEP is finalized.
2. Under-specifying storage. Labs without adequate storage will accumulate clutter on bench surfaces. Plan storage at 1:1 with bench area as a minimum starting point.
3. Choosing worktop materials based on price alone. A worktop that degrades in the chemical environment it was designed for will need early replacement. Match material specification to actual chemical exposure.
4. Ignoring the dirty-to-clean flow. Layouts that create crossing traffic between clean and contaminated areas increase both contamination risk and inefficiency.
5. Placing fume hoods in cross-draft zones. Near doors, under supply air diffusers, or in high-traffic corridors—all compromise containment performance.
6. Locking in fixed casework across the entire lab. Even if most of the lab is relatively stable, designing at least some areas with modular or reconfigurable casework costs little upfront and saves significantly if the layout ever needs to change.
7. Under-sizing electrical capacity. Analytical equipment loads are frequently higher than generic planning assumptions. Get actual equipment load data before finalizing electrical design.
8. Ordering from multiple uncoordinated suppliers. Benches, worktops, sinks, faucets, and gas taps from different vendors rarely integrate cleanly. Coordinating across categories from a single manufacturer eliminates this problem.
Laboratory Planning Checklist
Use this checklist as a project team reference across the key decision stages:
Programming
- Lab type and scientific function defined
- Biosafety level or chemical risk classification determined
- User count and equipment list documented
- Applicable local standards and authority having jurisdiction identified
Layout and Zoning
- Dirty-to-clean flow mapped
- Zone boundaries defined (wet/dry/instrument/support)
- Primary and secondary aisle widths planned
- Emergency egress routes confirmed unobstructed
- Storage volume planned and located
Ventilation
- VAV vs CAV decision made with mechanical engineer
- Fume hood positions confirmed away from cross-draft zones
- Pressure relationships defined (negative vs positive by space)
- Air changes per hour established by zone and lab type
Safety Systems
- Emergency eyewash and safety shower locations confirmed
- Chemical storage cabinets specified by hazard class
- Electrical classification determined for flammable storage areas
- Fire suppression and detection coordinated with layout
- Access control requirements defined
Casework and Furniture
- Fixed vs modular decision made per zone
- Bench types and configurations documented per space
- Worktop materials specified per zone and chemical exposure profile
- Storage types and volumes confirmed
- Casework dimensions confirmed against room dimensions (including custom sizes)
Utilities
- Electrical circuit loads calculated per zone
- Gas tap positions confirmed at bench face
- Sink positions confirmed and drainage routing planned
- Data drops planned for instruments and workstations
- Future stub-outs identified and included
Procurement and Manufacturing
- Casework supplier engaged and drawings reviewed
- Material samples reviewed and approved
- Lead times confirmed against construction program
- OEM/private label requirements communicated if applicable
- Export documentation requirements identified
Frequently Asked Questions
What is the difference between laboratory design and laboratory planning?
Laboratory planning typically refers to the early-stage programming work—defining what the lab needs to do, how many people will use it, what equipment it will contain, and what hazard classification applies. Laboratory design translates that brief into a physical environment: layout, ventilation, casework, utilities, and safety systems. In practice, the two overlap significantly and are best treated as a continuous process rather than sequential stages.
How early should laboratory furniture and casework suppliers be involved in the design process?
Casework suppliers should be engaged during design development—before MEP (mechanical, electrical, and plumbing) routing is finalized. Bench dimensions, utility termination points, and worktop cutouts all affect where services need to be brought to. Involving the manufacturer at this stage allows utility routing to be coordinated with the actual casework layout, preventing expensive misalignments during construction.
What is the most important factor in selecting laboratory worktop material?
Chemical compatibility with the actual reagents used in the lab is the primary selection criterion. A worktop material that cannot withstand regular exposure to the chemicals in use will degrade prematurely—regardless of how competitive its purchase price was. Epoxy resin is the most broadly specified material for chemistry environments; stainless steel is preferred in pharmaceutical and microbiological settings; phenolic resin and HPL offer cost-effective options for lower-hazard teaching and general purpose labs.
What is the difference between fixed and modular laboratory casework, and which should I specify?
Fixed casework is built into the room and cannot be relocated without demolition. Modular casework uses freestanding frames with demountable components that can be reconfigured without specialist trades. Fixed casework is appropriate for spaces unlikely to change—high-containment zones, wet chemistry areas with complex utility integration. Modular casework is preferred for general bench areas, teaching labs, and any space where workflow changes are anticipated within the facility’s lifetime.
Can laboratory furniture be manufactured to custom dimensions?
Yes. Standard furniture dimensions rarely match real room dimensions without gaps, overhangs, or forced compromises. Reputable laboratory furniture manufacturers will produce custom-dimension casework, worktops, and storage units as part of their standard offering—not as a premium add-on. This is particularly important for non-rectangular rooms, existing buildings with irregular structural grids, or projects where the room dimensions are fixed by the structure.
How does fume hood placement affect the overall laboratory layout?
Fume hood placement is a primary layout driver in chemistry labs, not a secondary one. Hoods need to be positioned against walls with short exhaust duct runs, away from high-traffic zones and door swings, and clear of high-velocity supply air diffusers. These constraints—combined with the requirement for adequate clearance on each side—effectively determine how the rest of the bench layout is organized. Designing the layout without resolving fume hood placement first results in hoods ending up in positions that compromise containment performance.
What ventilation approach is recommended for a laboratory with multiple fume hoods?
For labs with multiple active fume hoods, Variable Air Volume (VAV) systems are generally preferred over Constant Air Volume (CAV) systems because they modulate exhaust flow in response to sash position, reducing energy consumption when hoods are partially or fully closed. The appropriate approach depends on the number of hoods, their expected usage patterns, energy costs at the project location, and any applicable regulatory requirements. A mechanical engineer with laboratory ventilation experience should be involved in this decision.
Work With Glorylab From the Design Stage
Laboratory furniture is not a commodity item selected from a catalog at the end of a project. The decisions made about bench configuration, worktop material, utility integration, and casework flexibility affect the lab’s safety, usability, and cost of ownership for decades.
Glorylab is a factory-based laboratory furniture manufacturer in Jiangsu Province, China, supplying directly to institutions, contractors, distributors, and procurement teams across 30+ countries. There are no agents or intermediaries—when you contact Glorylab, you’re speaking with the people who will manufacture your furniture.
Here’s where Glorylab can add the most value to your project:
Drawings and specification review: Submit your technical drawings or room layouts early. Glorylab’s team will review them for fit, flag potential casework-utility conflicts, and advise on configuration options before anything is finalized.
Material selection support: Worktop material selection is one of the most consequential specification decisions in a lab project. Glorylab’s team can advise on the most appropriate resin, surface, and frame materials based on your lab’s chemical environment and budget.
Multi-category coordination: Glorylab manufactures across nine product categories—benches, casework, worktops, sinks, faucets, gas taps, fume hoods, storage cabinets, and lab chairs. Ordering across categories from a single manufacturer eliminates the integration problems that arise when components are sourced from multiple vendors. Production schedules are coordinated so your complete order ships together.
Custom dimensions at no extra cost: Custom bench lengths, worktop cutout positions, and non-standard cabinet heights are part of Glorylab’s standard process—not a premium service. This matters for projects in existing buildings or rooms with non-standard dimensions.
OEM and private label capability: For distributors and contractors with their own brand requirements, Glorylab supports OEM manufacturing and private-label packaging.
Export documentation: Glorylab prepares all necessary export documentation for international clearance, reducing the administrative burden on your procurement team.
If you have a project in early design, bring Glorylab in now—not at the procurement stage. The earlier the casework supplier is part of the conversation, the fewer compromises you’ll be managing at installation. Contact Glorylab to submit your project drawings or start a material selection discussion.