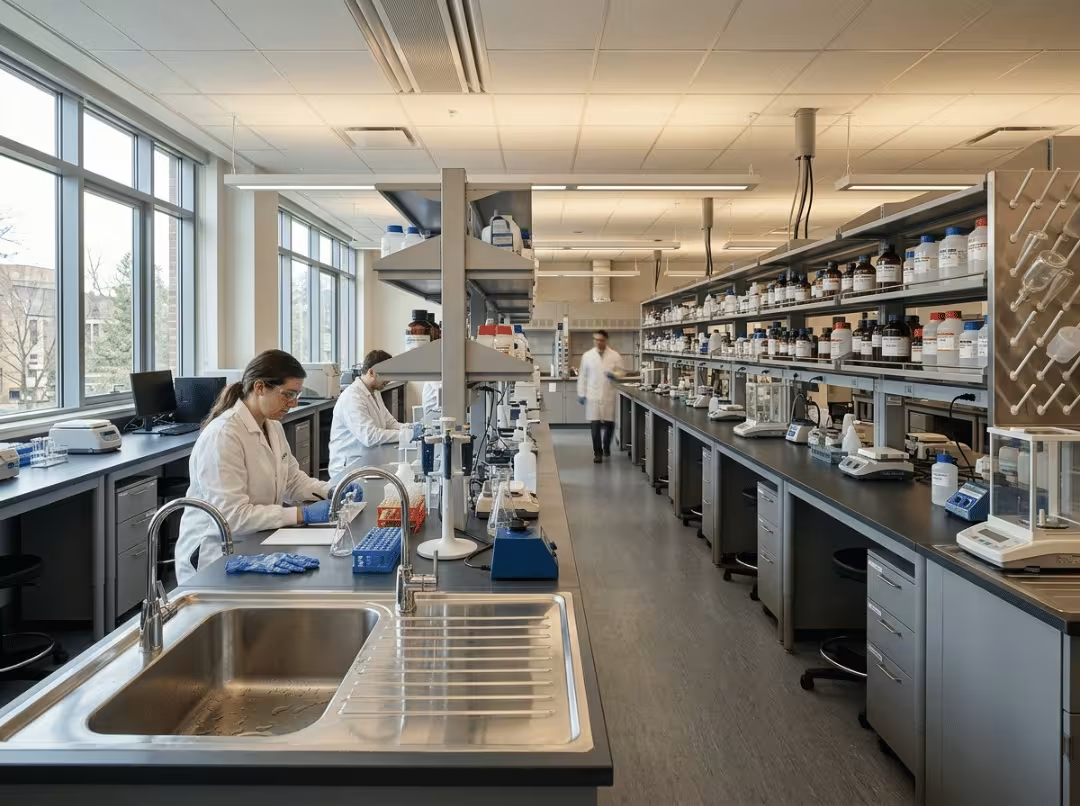
Ask ten lab managers what belongs in a “full set” of laboratory equipment, and you’ll get ten different lists. That’s not because anyone is wrong. It’s because the phrase itself is misleading. A chemistry lab, a microbiology lab, a school science room, and a pharmaceutical QC suite share maybe 40% of their equipment. The rest is dictated by what actually happens on the bench.
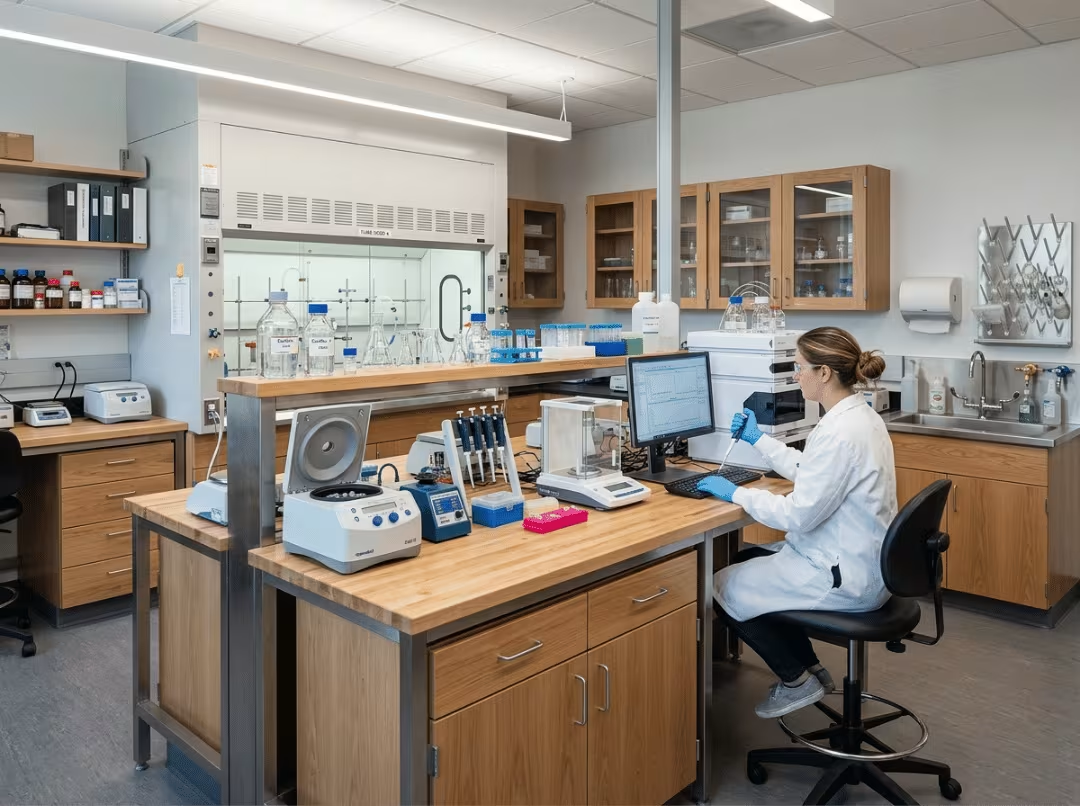
So instead of handing you a generic shopping list that half applies to your project, this guide gives you a framework you can reason with. A complete laboratory equipment set is divided into three layers: the furniture and workspace on which everything else sits, the safety and ventilation systems that keep people alive, and the analytical instruments that do the science. Get the layering right, and nothing important slips through the gaps.
Below, we go deep on the furniture layer (because that’s the foundation most people underestimate), keep the safety layer practical, and treat instruments as a category-by-category decision rather than an exhaustive catalog. By the end, you’ll be able to build your own checklist that fits your lab, not someone else’s.
The Three Layers of a Full Laboratory Equipment Set
Before listing anything, define the structure. Every piece of equipment in a working lab falls into one of three layers:
Layer 1 — Lab furniture and workspace infrastructure. Benches, worktops, storage cabinets, sinks, service fittings, seating, and vibration control. This is the physical platform. It rarely changes once installed, and it’s expensive to fix later.
Layer 2 — Safety and ventilation systems. Fume hoods, biosafety cabinets, eyewash stations, emergency showers, and personal protective equipment. Non-negotiable wherever hazards exist. Cutting here causes projects to fail inspections and hurt people.
Layer 3 — Analytical instruments. Balances, pH meters, centrifuges, spectrophotometers, microscopes, and the specialized tools that define the lab’s output. This layer is the most variable, and often the most talked about, yet it depends entirely on the first two being right.
Why this order matters: instruments get all the attention because they’re exciting and costly. But a $60,000 analytical balance is useless on a bench that vibrates, and a solvent-heavy workflow without a fume hood is a liability no instrument can offset. Build from the platform up.
The rest of this article works through each layer, then shows how the mix shifts across lab types.
Layer 1 — Lab Furniture and Workspace Infrastructure
This is the layer people rush and regret. Furniture defines your workflow, safety zones, and maintenance costs for the next 10 to 15 years. Spend the thinking time here.
Lab Benches and Workstations
The bench is the structural backbone of the lab. Everything else — storage, utilities, instruments — organizes around it. There are five configurations worth knowing, each solving a different spatial problem.
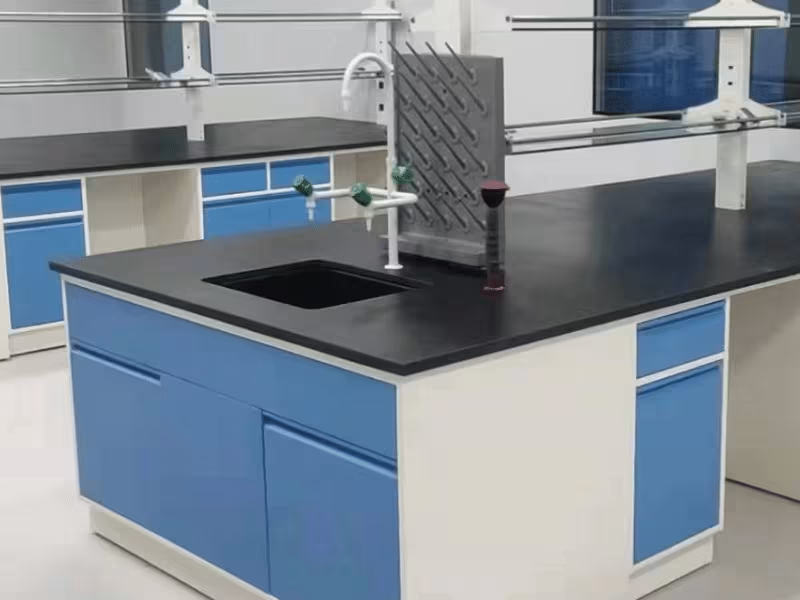
- Floor-mounted benches are the default. A steel cabinet sits on the floor, carries heavy loads, and offers maximum storage. Best for general-purpose and high-traffic labs.
- Wall benches (H-frame) suspend the cabinet off a frame, leaving open floor space underneath. Easier to clean, easier to reconfigure. Good for labs where hygiene or flexibility matters.
- Corner benches (C-frame) recover the dead space that rectangular layouts waste. If your room has awkward corners, turn them into workstations.
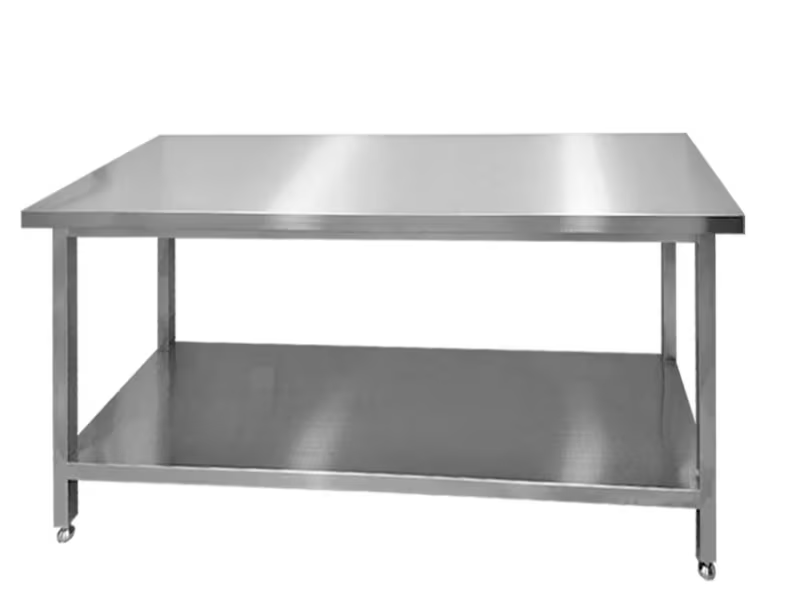
- Mobile benches ride on lockable casters and can be repositioned without tools. Two placed face-to-face form a temporary island. Ideal for teaching labs and shared research spaces that often change layout.
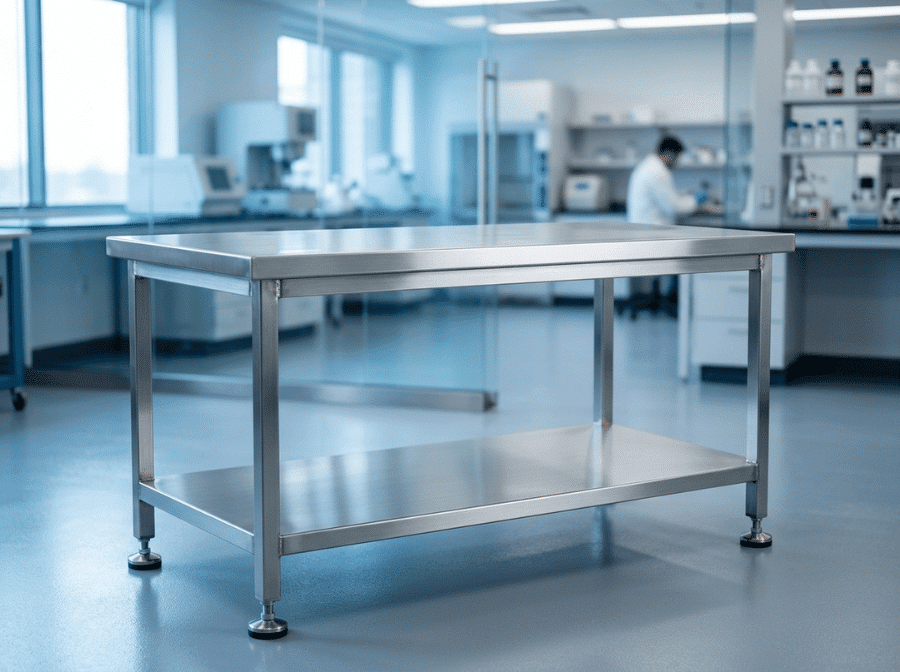
- Stainless steel workstations are the specification for pharmaceutical, cleanroom, and food environments where surfaces must be sanitized and chemically resistant.
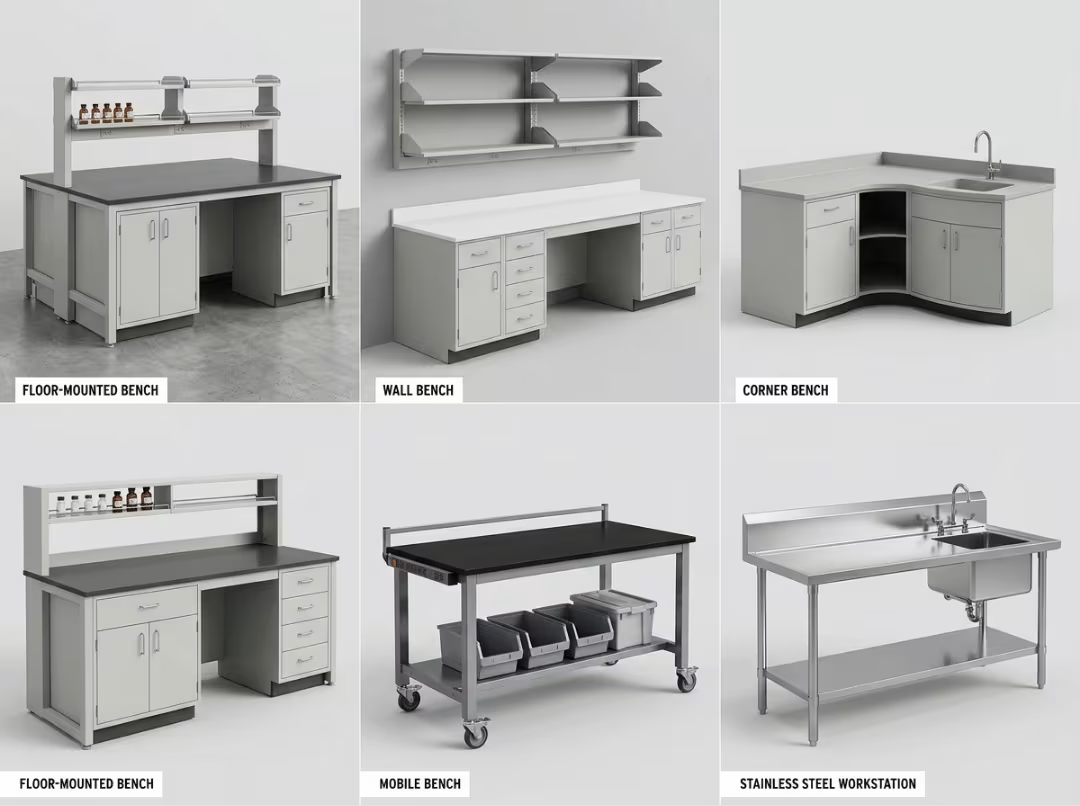
The decision usually comes down to your floor plan and how often the layout will change. Fixed benches maximize storage and stability; mobile benches buy flexibility. You can see how these configurations compare across Glorylab’s lab benches and workstations.
One practical rule: decide utility integration (gas, water, power) at the bench design stage. Retrofitting service fittings into an installed bench is far more expensive than specifying them up front.
Worktop Materials — the Decision That Outlasts Everything
The worktop is the single most performance-critical surface in the lab, and it’s the one people most often get wrong. Match the material to the chemicals, heat, and cleaning routine it will face daily — not to the lowest quote.
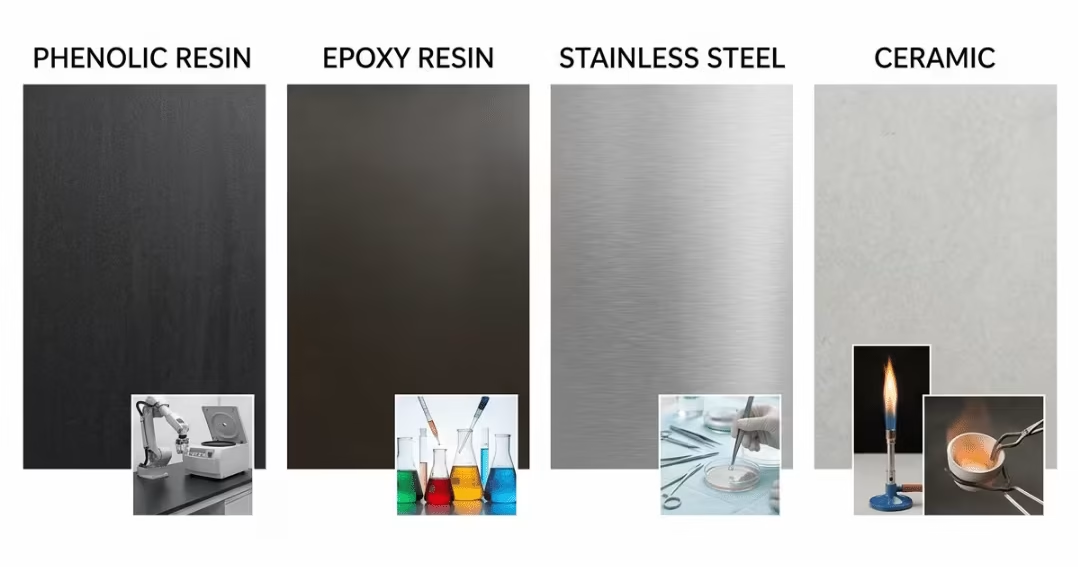
Here’s how the main materials actually differ:
|
Worktop Material |
Heat Resistance |
Chemical Resistance |
Best Fit |
|---|---|---|---|
|
Phenolic resin |
~135°C |
Good — solvents, bases, dilute acids |
Teaching labs, general research, budget-conscious fit-outs |
|
Epoxy resin |
~300°C |
Excellent — solvents, oxidants, most acids |
Chemistry and analytical labs, hazardous handling |
|
Stainless steel |
~180°C |
Very good; 316 grade for chlorides |
Clinical, sterile, and wet-intensive areas |
|
Ceramic |
~800°C |
Broadest — resists strong acids (except HF) |
High-heat work, fume hood surfaces, acid-heavy chemistry |
A few scenarios to make this concrete:
- A school chemistry lab rarely needs ceramic. Phenolic resin handles student-level reagents and survives constant cleaning at a practical price.
- An analytical chemistry lab running solvents and concentrated acids should default to epoxy resin. It’s monolithic, refinishable, and shrugs off spills.
- A microbiology or clinical lab benefits from stainless steel — seamless, non-porous, and easy to sanitize.
- A high-temperature or acid-digestion bench justifies ceramic, especially inside a fume hood.
Epoxy resin is also the only surface here you can sand and refinish after damage, which extends its working life in demanding rooms. If you’re weighing options, the lab countertops and worktops page breaks down each material with heat and chemical ratings.
Choosing a worktop is a 15-year decision. Overspend slightly here rather than replace a degraded surface in year three.
Storage Cabinets — Three Distinct Jobs
Storage is not one problem. It’s three, and using the wrong cabinet for the job creates contamination risk or safety violations.
- General storage cabinets hold reagents, consumables, and equipment. Glass-door versions provide visibility; solid doors protect light-sensitive stock.
- Glassware and vessel cabinets use perforated or slotted shelving that holds flasks and bottles upright so they don’t tip or roll during retrieval. Underrated until you’ve swept up a broken volumetric flask.
- Chemical safety cabinets are a separate category with real regulatory weight. Flammable solvents, corrosives, and oxidizers each need dedicated, code-compliant storage — often with ventilation and spill containment. This is not the place to improvise.
Plan storage by content type, not by leftover floor space. Explore the options on the lab storage cabinets page, and if you handle flammables or strong acids, confirm the cabinet meets your country’s safety standard before ordering.
Wet Area Fittings — Sinks, Faucets, and Gas Taps
Any bench that touches water, gas, or vacuum needs matched service fittings. This layer is easy to forget in a spec and painful to add later.
- Sinks come in polypropylene (chemical resistance), stainless steel (hygiene), and epoxy resin (heat plus chemical tolerance). Match the sink to what goes down it — a PP sink handles aggressive reagents that would corrode stainless.
- Faucets range from single cold-water taps to hot/cold mixers and distilled-water outlets. Specify by the actual water services at that station.
- Gas taps and valves deliver natural gas, compressed air, nitrogen, or vacuum. Multi-outlet fittings and remote fume-hood valves should be included in the plan from day one, color-coded to facility standards.
Sourcing wet-area fittings as a coordinated package with your benches avoids the classic mismatch of drilling patterns and thread sizes that don’t line up on site.
Anti-Vibration Tables for Precision Instruments
If your lab runs an analytical balance, microscope, or any instrument sensitive to micro-vibration, a standard bench isn’t enough. Foot traffic, HVAC, and nearby equipment introduce vibration that degrades measurement accuracy.
Anti-vibration (balance) tables isolate the instrument with a heavy, damped mass — often a marble or granite slab — that decouples it from floor movement. They need no power and pay for themselves the first time your weighing results stop drifting. Any lab weighing to four decimal places or better should treat these as essential, not optional.
Lab Chairs and Stools
Seating is the last item on most lists and the first thing users complain about. The choice hinges on how people work: seated, semi-seated, or standing at bar-height benches.
Specify by function. Wet or chemical labs need chemical-resistant, wipeable surfaces. ESD-sensitive electronics work needs anti-static seating. Clinical and pharmaceutical rooms favor cleanable materials like PU or stainless steel. Match seat height and footring to bench height, and confirm the base suits your flooring. Ergonomics here directly affect fatigue and productivity over an eight-hour shift.
Layer 2 — Safety and Ventilation Systems
This layer is where budget cuts become dangerous. The selection logic matters more than the equipment names, so focus on when each item is required.
Fume Hoods — When They’re Mandatory
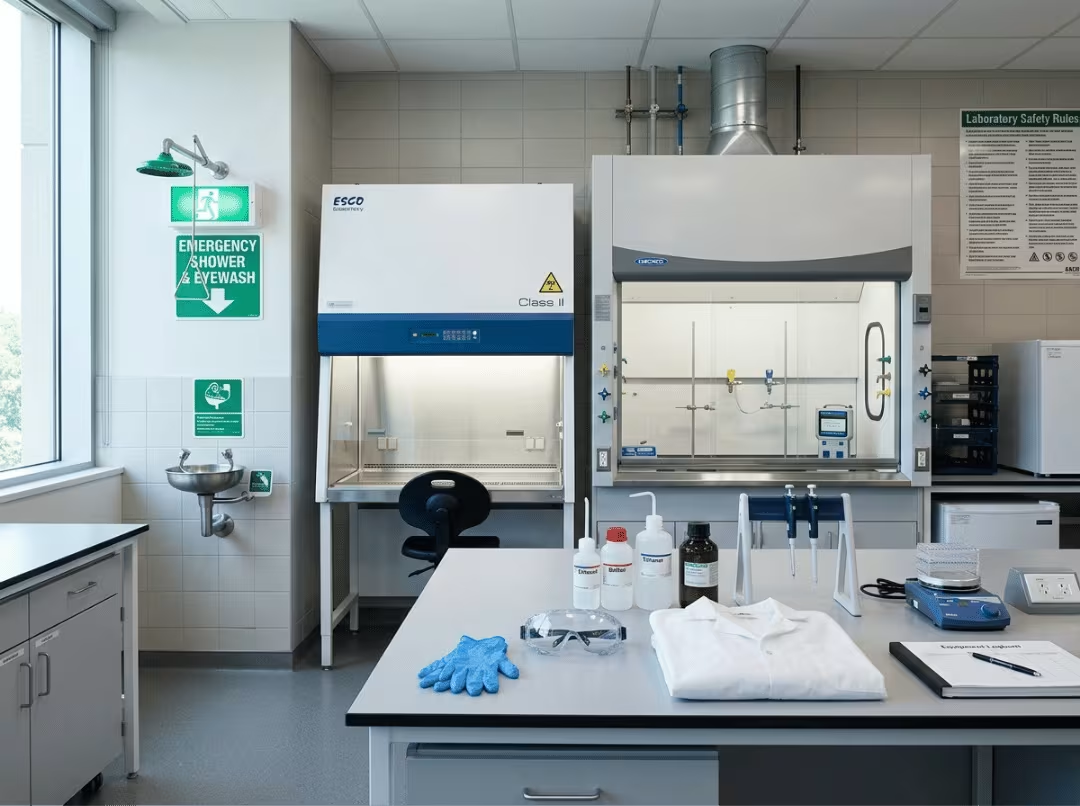
A fume hood captures and exhausts hazardous vapors, fumes, and dusts. The question isn’t whether fume hoods are useful; it’s whether your work legally and practically requires one.
You need a fume hood whenever you handle volatile solvents, generate toxic or corrosive vapors, work with volatile acids, or run reactions that release fumes. If that describes your workflow, a fume hood is non-negotiable — no amount of general room ventilation can substitute for source capture. Match the hood type (bench-top, floor-standing, all-steel, or PP for acid digestion) to the chemistry and duty cycle.
Biosafety Cabinets — a Different Purpose
People confuse biosafety cabinets with fume hoods. They’re not interchangeable. A fume hood protects the user from chemical fumes. A biosafety cabinet protects the sample, the user, or both from biological contamination, using HEPA-filtered airflow.
If you work with cell cultures, infectious agents, or anything requiring sterile technique, you need the right class of biosafety cabinet — not a fume hood. Choosing wrong here compromises either safety or your results.
Emergency Equipment — Eyewash and Safety Showers
Wherever corrosive or hazardous chemicals are used, eyewash stations and emergency showers are code requirements, not upgrades. The standard rule is accessibility within roughly 10 seconds of any hazard. Place them on the unobstructed path out of the work zone, and test them on a schedule. This is one of the first things an inspector checks.
PPE Essentials
Personal protective equipment is the last line of defense, not the first. A working baseline includes lab coats, safety goggles, face shields where splash risk is high, and gloves matched to the chemicals handled. Glove material is not generic — nitrile, neoprene, and butyl each resist different chemical families, and the wrong glove can dissolve on contact. Match the glove to the hazard, and replace PPE on condition, not on convenience.
The principle across this whole layer is that engineering controls (fume hoods, cabinets) come first, emergency equipment second, and PPE third. Never let PPE compensate for a missing engineering control.
Layer 3 — Analytical Instruments
Instruments are the most lab-specific layer, so rather than listing specifications, focus on which lab category needs what. The goal is to cover the basics before chasing specialized hardware.
- Balances — analytical and precision balances are near-universal. Almost every quantitative lab needs one, paired with an anti-vibration table.
- pH meters and conductivity meters — standard in chemistry, environmental, and life-science labs for routine sample checks.
- Centrifuges — essential in biology, clinical, and pharmaceutical labs for separating cells, precipitates, and samples. Refrigerated versions handle temperature-sensitive material.
- Spectrophotometers (UV-Vis, IR) — core to analytical and chemistry labs for identifying and quantifying compounds. Atomic absorption and mass spectrometry sit at the more specialized, higher-budget end.
- Microscopes — the backbone of biology and materials labs. Compound scopes for thin samples, stereo scopes for larger objects, inverted scopes for cell culture.
The practical rule: cover your everyday measurement needs first — balance, pH, basic separation — then invest in specialized instruments as the workflow genuinely demands them. Buying a mass spectrometer before you’ve sorted reliable weighing and storage is a common, expensive inversion of priorities.
How the Equipment Set Changes by Lab Type
Here’s where the “full set” idea earns its keep. The same three layers apply everywhere, but the weight shifts dramatically. This table shows what dominates each lab type and what’s genuinely non-negotiable.
|
Lab Type |
Furniture Emphasis |
Safety Priority |
Instrument Focus |
Non-Negotiable |
|---|---|---|---|---|
|
Chemistry / Analytical |
Epoxy or ceramic worktops, solvent-resistant benches, chemical cabinets |
Fume hoods, flammable storage |
Spectrophotometers, balances, chromatography |
Fume hood + rated storage |
|
Biology / Life Science |
Stainless steel benches, sterile-friendly surfaces |
Biosafety cabinets, autoclave access |
Centrifuges, microscopes, cold storage |
Biosafety cabinet + sterile technique tools |
|
School / Teaching |
Durable phenolic benches, mobile and reconfigurable layouts, robust seating |
Basic ventilation, eyewash, student-safe storage |
Entry-level balances, microscopes, pH meters |
Durability + student safety fittings |
|
Pharmaceutical / Cleanroom |
Stainless steel casework, seamless surfaces, GMP-aligned construction |
HEPA filtration, controlled airflow |
Automated analyzers, calibrated instruments |
Cleanability + traceability compliance |
A few things worth calling out:
- Chemistry labs live and die by ventilation and worktop chemistry. Skimp on either and you’ll be replacing surfaces or failing safety audits.
- Biology labs shift the safety burden from chemical fumes to biological containment. The fume hood matters less; the biosafety cabinet and autoclave matter more.
- School labs optimize for durability, reconfigurability, and student safety over analytical sophistication. Wet-chemistry depth is minimal.
- Pharmaceutical and cleanroom labs add a compliance layer — every surface, joint, and material must support decontamination and documentation.
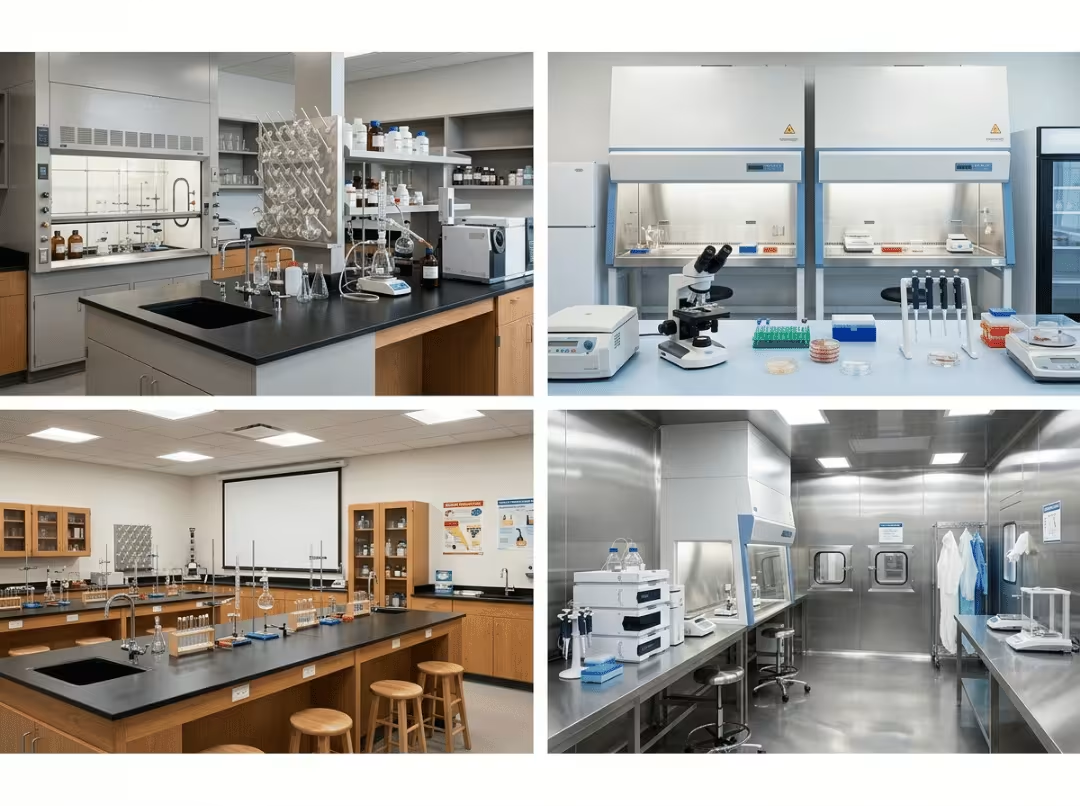
The lesson: don’t copy another lab’s equipment list unless it does the same work you do.
How to Build Your Own Equipment Checklist
A checklist that starts from a product catalog will always miss something. Start from your work instead. This four-step method catches gaps before they become budget surprises.
1. Start From Your Workflow
Write down every procedure the lab will actually run — sample intake, prep, reaction, measurement, cleanup, storage. Be specific. Each step implies equipment. “Weigh reagent” implies a balance and, likely, an anti-vibration table. “Handle volatile solvent” implies a fume hood and flammable storage.
2. Map Each Step to the Three Layers
For every procedure, ask: what furniture does this need, what safety controls, what instruments? This is where the three-layer framework does its job. It forces you to notice that a task needs a fume hood and a chemical-resistant worktop and a specific sink — not just the instrument you were focused on.
3. Run a Gap Check Against the Layers
Once your list feels complete, review it layer by layer. Labs almost always over-specify instruments and under-specify furniture and safety. If your safety layer looks thin next to your instrument layer, you’ve found the gap most projects discover too late.
4. Prioritize Basics Before Specialized Instruments
Buy the platform and the everyday tools first: benches, worktops, storage, ventilation, balance, pH meter. Then add specialized instruments as the workload justifies them. Most labs grow into their full set over time — starting with the essentials is the disciplined path, not the cheap one.
Common Budgeting Mistakes to Avoid
- Cutting safety equipment to fund instruments. This is the most dangerous trade-off and the first thing inspectors flag. Safety is not the flexible line item.
- Ignoring utility integration costs. Gas lines, water, drainage, and exhaust connections cost real money and are far cheaper to plan than to retrofit.
- Buying specialized instruments before the basics are covered. A high-end analyzer sitting next to unreliable weighing or storage is wasted capital.
- Under-specifying the worktop. Choosing a cheaper surface that can’t handle your chemistry means replacing it within a few years — at full cost, plus downtime.
Frequently Asked Questions
What is included in a complete laboratory equipment set?
A complete set spans three layers: furniture and workspace infrastructure (benches, worktops, storage, sinks, fittings, seating, anti-vibration tables), safety and ventilation systems (fume hoods, biosafety cabinets, eyewash stations, emergency showers, PPE), and analytical instruments (balances, pH meters, centrifuges, spectrophotometers, microscopes). The exact mix depends on your lab type and workflow.
What’s the difference between lab furniture and lab instruments?
Lab furniture is the fixed infrastructure — benches, worktops, cabinets, and service fittings — that forms the lab’s physical platform. Instruments are the measuring and processing devices that do the analytical work. Furniture is a long-term, hard-to-change investment; instruments are more variable and often added over time.
Which worktop material is best for chemistry labs?
Epoxy resin is the default for chemistry-intensive labs. It resists solvents, oxidants, and most acids, withstands heat up to 300°C, and can be sanded and refinished. For extreme heat or acid digestion work — especially inside a fume hood — ceramic offers even greater resistance, tolerating up to about 800°C.
Can a lab operate safely without a fume hood?
Only if it handles no volatile solvents, toxic vapors, or corrosive fumes. Any lab working with those materials requires a fume hood — general room ventilation is not a substitute for capturing hazards at the source. A dry lab handling no volatile chemistry may not need one, but most chemistry and many life-science labs do.
How do I plan storage for a new lab?
Plan by content type, not spare space. Separate general storage, glassware storage (with shelving that holds vessels upright), and chemical safety storage (code-compliant cabinets for flammables, corrosives, and oxidizers). Size each category to your actual inventory, and confirm that hazardous-material cabinets meet your local safety standards.
Do all lab types need the same safety equipment?
No. Chemistry labs prioritize fume hoods and flammable storage. Biology labs prioritize biosafety cabinets and autoclaves. All labs handling hazardous chemicals need eyewash stations and emergency showers. The engineering controls differ by hazard type, but emergency equipment and appropriate PPE are near-universal wherever risk exists.
Should I buy new, used, or leased equipment?
Used equipment can make sense for durable basics like benches and simple instruments, provided you factor in calibration and inspection before purchase. For precision instruments requiring traceability, or for compliance-driven environments, new or leased equipment with warranty and service support is usually the safer choice.
How much does a complete lab set cost?
There’s no single figure — it scales with lab type, size, and instrument sophistication. The reliable approach is to budget the platform (furniture, ventilation, safety) and everyday tools first, then phase in specialized instruments as the workload grows, rather than front-loading high-end hardware.
Conclusion
A “full set” of laboratory equipment isn’t a fixed list you can copy — it’s three layers you assemble around the work your lab actually does. Layer 1 is the furniture and workspace infrastructure on which everything sits. Layer 2 is the safety and ventilation systems that keep people protected. Layer 3 is the analytical instruments that produce your results.
Get the order right. Build the platform before chasing instruments, never trade away safety for hardware, and match every surface, cabinet, and control to your specific chemistry and workflow. The chemistry lab, the microbiology suite, and the teaching room all draw from the same three layers, but the weighting is theirs alone.
The practical next step is simple: write out every procedure your lab will run, map each step to the three layers, and check for gaps before you buy anything. If you’re specifying furniture and infrastructure for a new lab or a refit, talk to Glorylab’s engineering team — sharing your layout early is the cheapest way to get the platform right the first time.