


Many lab managers buy benches and cabinets that look solid on paper. Then an acid spill stains the top, or a heavy instrument makes a bench sag. I see this often when I walk into new labs.
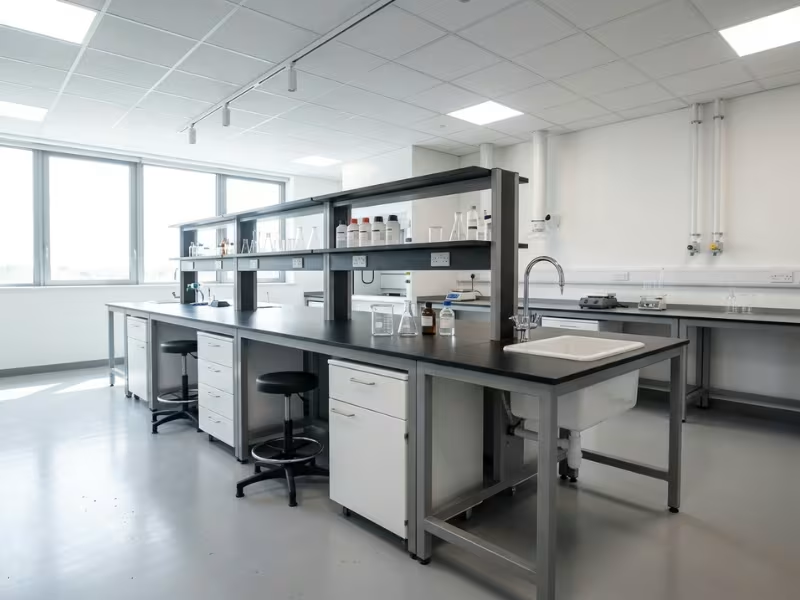
Laboratory furniture covers the benches, cabinets, fume hoods, sinks, and seating built for scientific work. Office furniture only needs to look good and hold paper. Lab furniture must resist chemicals, carry heavy loads, stay easy to clean, and connect safely to gas, water, and power.
In this guide, I show you how to judge lab furniture and choose the right setup for your space. I also point out the most common buying mistakes, so you can avoid them.
What Makes Laboratory Furniture Different
Before you compare catalogs, you need a clear yardstick. I judge every piece of lab furniture on four points. If a product fails even one, it does not belong in a working lab.
- It stands up to chemicals and moisture. A good worktop shrugs off acids, solvents, and daily wet cleaning without staining, swelling, or peeling. Ask for the supplier’s chemical resistance test data, not just a glossy sales sheet.
- It carries real loads. A centrifuge or incubator often weighs far more than people expect. Check the rated load for each bench section, not just the frame material. I always ask for the static load figure in writing.
- It stays easy to clean. Seams, open grain, and rough edges trap spills and microbes. Look for smooth, non-porous surfaces and sealed joints. You should be able to wipe a bench down in minutes, with no hidden corners.
- It works with your utilities and safety systems. Lab furniture must connect cleanly to gas, water, vacuum, power, and exhaust. It also needs to leave space for eyewash stations and clear exit paths. Check for service chases, cable trays, and cutouts that match your floor plan.
Use these four checks as your filter. They steer you away from most costly mistakes.
Start with the Lab Type, Not the Product List
Most buyers open a catalog first. I ask a different question: what kind of work happens in this room? Your lab type sets your priorities, and those priorities drive your furniture choices.
- Chemistry and wet labs care most about chemical attack and fumes. Choose epoxy resin or phenolic worktops, ventilated storage for flammables and corrosives, and enough fume hood capacity for the work. Place sinks and drip troughs close to where people actually pour.
- Biology and clinical labs focus on contamination control. Every surface must survive daily disinfectant wipes. Pick seamless, non-porous tops and tightly sealed cabinets. Leave room for biosafety cabinets, incubators, and refrigerators, which often claim more floor space than the benches.
- Teaching labs need durability, safety, and clear sightlines. Students drop glassware and lean on benches. Go for tough worktops, rounded edges, and lockable storage. Island benches with built-in utilities let one instructor watch the whole room. Plan a few accessible-height stations too.
- Industrial and QA labs value load capacity and repeatable routines. Choose steel-frame benches with high rated loads and anti-vibration tables for balances. Add ESD-safe surfaces if your team handles electronics. Mobile benches help when production lines change.
- Cleanroom and pharma labs care about particle control and compliance. Furniture must not shed, rust, or trap dust. Stainless steel, perforated shelving, and few horizontal ledges work best. Every material should handle aggressive cleaning agents and support your audit documentation.
Write down your lab type before you talk to any supplier. That one step turns a long product list into a short, sensible one.
Core Types of Laboratory Furniture and When You Actually Need Them
Once you know your lab type, the product list gets much shorter. Here are the five main furniture groups, when each one earns its place, and what to check before you sign off.
Workbenches: Pick the Layout Before the Bench
Your bench layout shapes how people move all day. Wall benches, island benches, and modular lab benches and workstations each solve a different layout problem.
- Wall benches suit small rooms and solo tasks. They hug the perimeter, keep utilities on one wall, and free up floor space for instrument rows and prep areas.
- Island benches suit teamwork and teaching. People work from both sides, and one instructor can see everyone. Plan at least 5 feet between islands, so two people can pass safely.
- Modular and mobile benches suit labs that change often. Research groups, startups, and QA teams reshuffle projects every year. With lockable casters and quick-connect utilities, you can move a mobile lab bench in an afternoon instead of a month.
For any bench, confirm three things: the rated load, the height (about 36 inches for standing work and 30 inches for seated work), and how it connects to power, gas, and data.
Fume Hoods: Protect People from Chemicals
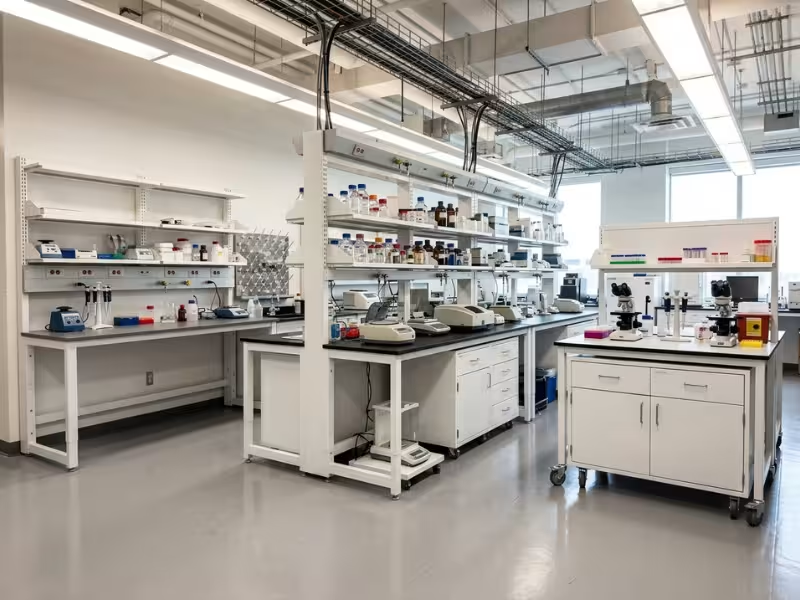
If your team works with volatile, toxic, or smelly chemicals, you need a fume hood. “Careful handling” on an open bench does not replace one.
- Ducted hoods pull air out of the building through an exhaust system. They handle the widest range of chemicals and heavy daily use. They also cost more to install because they need ductwork and a fan.
- Ductless hoods filter air through carbon and return it to the room. They fit small volumes of known, low-risk chemicals. Ask the supplier for a chemical listing, and budget for filter changes.
For either type, check the face velocity. Many labs target around 100 feet per minute at the working sash height.
One mix-up I fix often: a biosafety cabinet is not a fume hood. A biosafety cabinet uses HEPA filters to protect people and samples from biological agents. It isn’t suited for volatile chemical work. Biology labs usually need biosafety cabinets, chemistry labs need fume hoods, and some labs need both.
Storage: Let Safety Drive the Choice
Good storage keeps hazards apart and within easy reach.
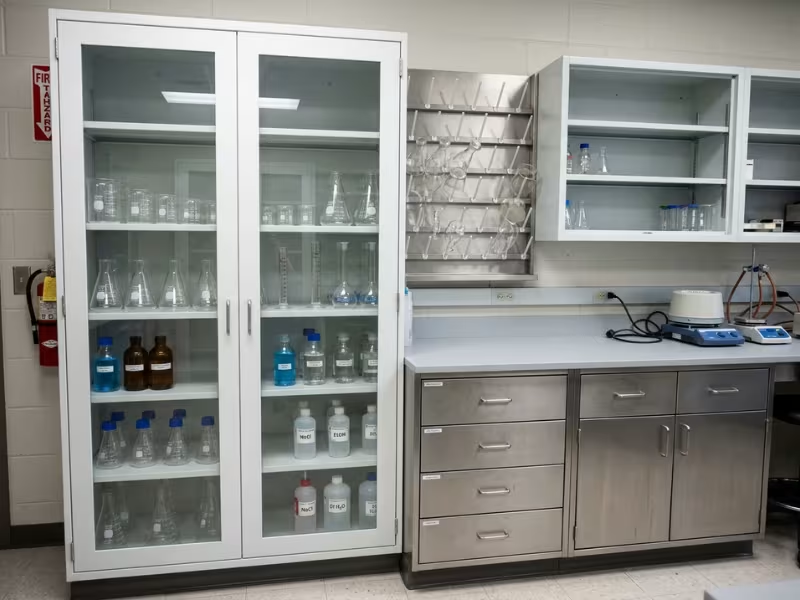
- General storage holds glassware, consumables, and tools. Base cabinets with drawers work best for heavy or frequently used items.
- Flammable storage needs approved safety cabinets with self-closing doors and raised sills. A typical cabinet holds up to 60 gallons of Class I or II liquids, so check your capacity rules.
- Corrosive storage needs cabinets with acid-resistant liners, often polyethylene. Never store acids and flammables in the same cabinet.
- Overhead cabinets suit light, dry, low-risk items. Keep liquids and chemicals below shoulder height. A bottle dropped from overhead quickly becomes a face injury.
Sinks, Fixtures, and Utilities: Plan Them First
Sinks and utilities lock in your layout. Moving a drain after construction can blow your budget.
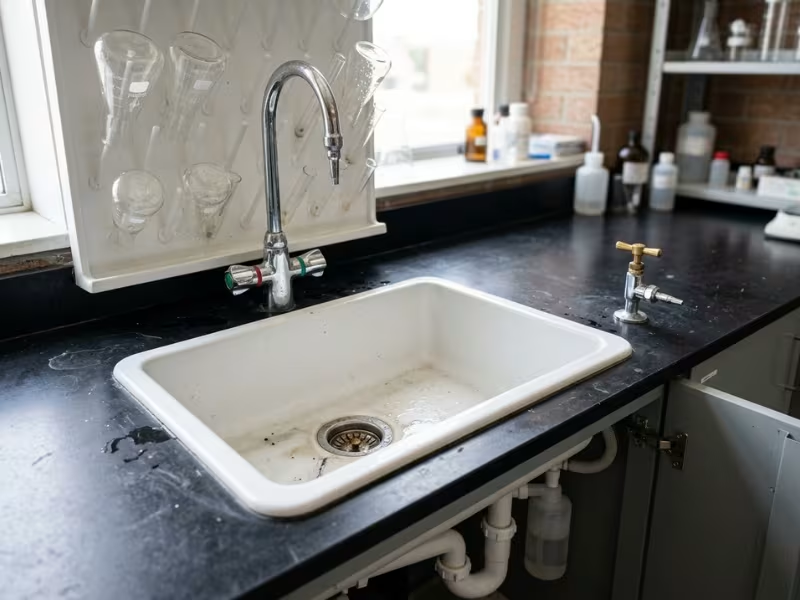
Match the sink material to the work. Epoxy resin handles most chemistry. Polypropylene suits strong acids. Stainless steel fits biology and cleanroom spaces.
For faucets, choose lab-grade fixtures with vacuum breakers, color-coded handles, and gooseneck spouts that clear tall glassware. Foot pedals or sensors help in clinical labs.
Eyewash stations and safety showers must sit within a 10-second walk of any hazard and deliver a 15-minute flush. Mark these spots on your drawings before you place a single bench.
Map gas, water, vacuum, power, data, and drains early. Your furniture should follow the utility plan, not the other way around.
Seating and Specialty Furniture: Small Items, Big Impact
These pieces often get added last, yet they shape daily comfort and data quality.
- Ergonomic chairs need adjustable height, lumbar support, and footrings for standing-height benches. Pick wipeable vinyl or polyurethane, not fabric.
- ESD seating protects sensitive electronics. Look for conductive casters and a verified resistance-to-ground rating.
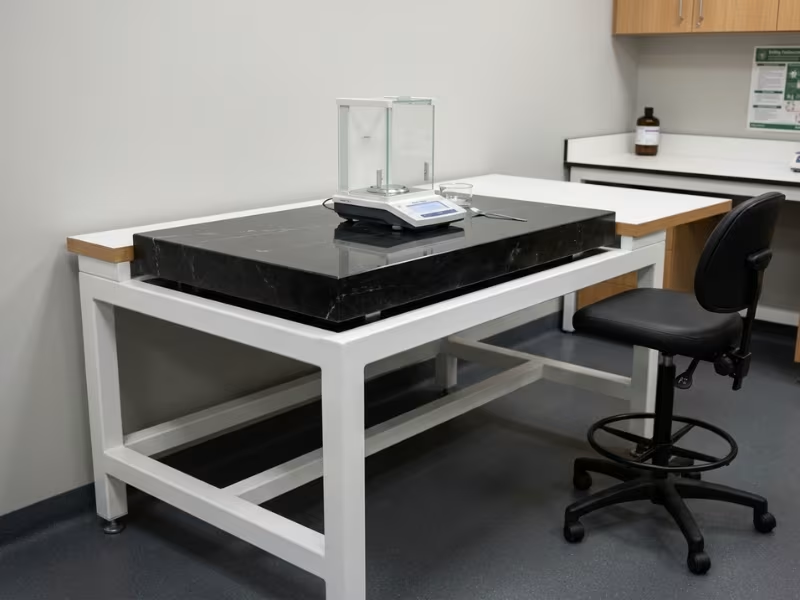
- Anti-vibration tables keep analytical balances and microscopes stable. A heavy stone slab on an isolated frame stops footsteps and HVAC hum from skewing readings.
- Cleanroom furniture uses stainless steel, usually 304 grade, with 316 for harsh disinfectants. Choose smooth welds, perforated shelves, and as few flat ledges as possible.
Worktop Materials: The Choice That Affects Daily Use the Most
Your team touches the worktop more than any other part of the lab. They spill on it, heat things on it, and scrub it every day. That is why the right lab countertops and worktops matter so much. A wrong choice shows up fast as stains, warping, or a full replacement long before the bench frame wears out.
Why Worktop Material Matters
When I review a lab plan, I check the worktop against five practical questions.
- Chemical resistance. Can it handle the chemicals your team actually uses, at the expected strength and contact time? A surface that resists dilute acids may still fail under concentrated ones or solvents left overnight.
- Heat tolerance. Hot plates, Bunsen burners, and glassware fresh from an oven all stress a surface. Some materials scorch or soften well below the temperatures your team reaches.
- Maintenance. Some tops need only a quick wipe. Others need sealing, careful cleaners, or fast spill response.
- Lifespan. A good top in the right setting can last 20 years or more. The wrong one may look tired in three.
- Replacement cost. Swapping a worktop means downtime, disconnecting sinks and utilities, and reinstalling everything. A cheap top that fails early often costs more than a better top bought once.
Material-by-Material Comparison
No single material wins everywhere. Here is when each one makes sense and when you should walk away.
- Epoxy resin. Choose epoxy for busy chemistry labs that face daily acids, bases, solvents, and heat. It handles continuous heat around 350°F and resists a very wide range of chemicals. Light scratches can often be sanded out, so it ages well. Skip it if you need mobile or lightweight benches, because a one-inch slab is very heavy. It also performs poorly with hydrofluoric acid and costs more than most options.
- Phenolic resin. Phenolic is my go-to when a lab needs strong chemical resistance at a lower cost and weight than epoxy. It works well in biology, clinical, and general research labs, and on modular benches that move. Avoid it where people use open flames or very hot equipment all day. Sustained high heat can scorch it, so use heat pads or a short epoxy section near hot zones.
- Stainless steel. Stainless fits cleanrooms, pharma, food testing, and biology labs that disinfect constantly. It is seamless when welded, sheds no particles, and handles high heat. Choose 316 grade for harsher disinfectants. Do not use it where hydrochloric acid, bleach, or other chloride-rich chemicals sit on the surface, because they cause pitting and rust spots. It also dents and shows scratches and fingerprints.
- High-pressure laminate (HPL). HPL makes sense in dry labs, electronics rooms, computer stations, and light-duty teaching spaces. It’s the least expensive and comes in many colors. Never choose it for wet chemistry. Solvents and acids attack the surface, water in the seams swells the core, and hot plates can blister it.
- Polypropylene. Polypropylene shines in highly corrosive work, such as acid digestion, etching, and plating. It resists strong acids, including hydrofluoric acid, and often comes molded with integral sinks. Keep it away from heat, since it softens at fairly low temperatures. It also scratches easily and can sag under heavy, long-term loads without solid support.
How to Choose by Use Case
Now match those materials to the work in your room. Start with your harshest daily task, not your average one.
- General chemistry labs: Use epoxy resin as your default. On a tight budget, use phenolic where it won’t be near heat. Pair either with epoxy or polypropylene sinks.
- Dry labs: HPL or phenolic covers most needs. For electronics, add grounded ESD-safe laminate. Epoxy rarely pays off here.
- Teaching labs: Phenolic resists chemicals, survives impacts, and keeps costs reasonable across many stations. Use epoxy at the demo bench or wherever burners run often.
- Cleanrooms: Use 316 stainless steel for most surfaces. If your disinfectant rotation includes chlorides, ask about phenolic options that meet your cleanroom class.
- Highly corrosive applications: Use polypropylene for acid digestion, wet benches, and HF work. Keep heat sources on nearby, heat-rated surfaces.
One habit saves my clients the most trouble. Before you order, send your supplier your top 10 chemicals with their concentrations and ask for a sample chip. Leave a few drops of each chemical on it overnight, then check the results. That simple test tells you more than any brochure.
A Practical Framework for Choosing Laboratory Furniture
When a client calls me about a new lab, I don’t open a catalog. I walk them through six steps in this order. Each step narrows your options, so by the end you know exactly what to ask suppliers for.
Step 1: Map How Work Actually Flows
Start with people, not products. Who works in the room, and how many at once? Do they stand or sit? Which experiments do they run most?
Then trace a sample’s path from the door to the waste bin. Sketch it on paper. Crossed lines and long walks show you where a layout will fail. Put related tasks side by side, and keep clean and dirty zones apart.
Step 2: List Equipment, Weights, and Utilities
Build a simple spreadsheet. List every bench-top instrument with its footprint, weight, and heat output. Flag anything that vibrates, like centrifuges or shakers.
For each item, note its needs: gas, water, vacuum, compressed air, power (voltage and outlet count), data, drains, and exhaust. This list shows which bench sections need higher load ratings and where to run service chases. I always add 20% to the outlet count. No lab I know has ended up with fewer devices than it planned.
Step 3: Match Surfaces to Your Real Risks
Rank exposure risks by zone, not for the whole room. A digestion area faces strong acids, while a balance room faces almost nothing.
Check chemicals (type, strength, contact time), heat, moisture, and any cleanroom class or disinfection routine. Then pick worktops, cabinet finishes, and sinks zone by zone. Mixing materials in one lab is normal, and it often saves money.
Step 4: Plan Layout, Clearance, and Safety Zones
With materials chosen, start placing furniture. I rely on a few rules of thumb:
- Keep main aisles at least 5 feet wide where people pass behind each other.
- Keep frequently used items within about 24 inches of the bench edge.
- Never let carts or mobile benches block eyewash stations, safety showers, or exits.
- Include at least one accessible workstation if your local code requires it.
Place fume hoods away from doors, supply air diffusers, and busy walkways. Cross drafts pull fumes out of the hood and into someone’s breathing zone. Ask your HVAC engineer to review hood locations before you lock the plan.
Step 5: Build In Room to Change
Labs change faster than buildings do. Grants end, teams grow, and new instruments arrive.
Choose modular frames where you expect turnover, and save fixed casework for sinks and hoods. Ask about overhead service carriers or ceiling-hung utility panels, so you can move benches without cutting into walls. Request access panels behind casework for valves and wiring. A small flex zone with mobile tables also holds space for the instrument nobody has bought yet.
Step 6: Compare Suppliers on Specs, Not Just Price
Quotes often look alike until you read the fine print. Ask every supplier for the same details:
- Rated load per bench section, in writing
- Worktop chemical resistance test data
- Material thickness, steel gauge, and finish type
- SEFA testing and relevant safety compliance
- Lead time, installation scope, and who handles utility hookups
- Warranty terms and spare parts availability
Then compare line by line. A low quote that leaves out installation, leveling, or utility connections usually costs more in the end. Ask for references from labs like yours, and call them.
The Most Common Buying Mistakes
Labs call me to fix the same problems again and again. Most trace back to a few early choices. Here are the five I see most, and what to do instead.
Mistake 1: Picking the Cheapest Quote
A low price often hides thin steel, a laminate top where you need epoxy, or missing installation costs. I have watched labs tear out cheap tops within two years after solvent spills lifted the seams.
Do this instead: Add installation, utility hookups, and likely replacement costs to every quote. Compare the total over 10 years, not the number on page one.
Mistake 2: Drawing the Layout Before Mapping Utilities
Many teams arrange benches on a floor plan, then discover the drain stack sits on the opposite wall. Moving a drain line or gas riser after construction can cost more than the benches.
Do this instead: Mark every drain, riser, electrical panel, and exhaust shaft before you place any furniture. Put sinks, hoods, and gas-fed benches near those points first.
Mistake 3: Treating Ventilation as an Afterthought
Buyers often order fume hoods without asking whether the building can exhaust them. One ducted hood can pull several hundred cubic feet of air per minute. Add three or four, and your HVAC system may fall behind. Doors whistle, rooms lose balance, and hoods fail their tests.
Do this instead: Bring your HVAC engineer in before you choose hood sizes. Confirm exhaust capacity, makeup air, and space for a roof fan. If energy costs worry you, ask about variable-air-volume hoods.
Mistake 4: Ignoring Load Limits and Floor Conditions
A strong bench still fails on a weak or uneven floor. A slab that dips half an inch across the room twists frames, cracks heavy tops, and throws balances off level.
Do this instead: Check floor flatness and load rating before you order. Ask for leveling feet with a generous adjustment range. Place the heaviest or most vibration-prone equipment on ground floors or near structural columns.
Mistake 5: Locking a Changing Lab into Fixed Casework
Fixed cabinets bolted to walls feel solid and permanent. That is the problem. When a new grant brings a larger instrument, you face demolition, new plumbing, and weeks of lost work.
Do this instead: Look at how much your work changed over the past five years. If the answer is “a lot,” choose modular frames, mobile base cabinets, and overhead service carriers.
What Standards and Compliance Points Should Be Checked
You don’t need to memorize every standard. You do need to confirm a few key points before you sign a purchase order. Here is the checklist I run with every client.
- SEFA compliance. Ask whether casework meets SEFA 8 and whether worktops passed SEFA chemical resistance testing. Request the actual test reports, not just a logo. For fume hoods, ask for ASHRAE 110 containment test results.
- OSHA and NFPA safety points. OSHA’s lab standard requires you to protect workers from chemical hazards, so check ventilation and storage against it. Confirm that flammable safety cabinets meet OSHA and NFPA 30 rules for capacity and self-closing doors. Ask your safety officer to review the layout against NFPA 45. Make sure eyewash stations and safety showers meet ANSI Z358.1.
- ADA accessibility. Plan at least one accessible workstation, with a work surface between 28 and 34 inches high and clear knee space. Keep sinks, controls, and storage within reach, and leave aisles wide enough for a wheelchair to turn.
- Cleanroom compatibility, where relevant. Match furniture to your ISO 14644 class. Confirm low particle shedding, smooth welds, and resistance to your disinfectants. Get material certificates for your audit file.
- Local code review. Your fire marshal may limit the amount of chemical per floor. Seismic zones may require anchored casework and restrained shelving. Ask your architect or local authority which permits apply before you finalize the order.
Put these five points in your request for quote. Suppliers who answer them clearly, with documents, usually deliver fewer surprises.
What Affects Cost More Than Most Buyers Expect
The furniture quote rarely hurts. The real surprises sit in the work around it. Here are the five cost drivers I warn every client about.
- Furniture type and material. An epoxy top costs noticeably more than phenolic and needs sturdier frames. A full stainless cleanroom package costs more again. Spend on premium surfaces only where harsh chemicals or heat demand them.
- Custom vs. modular. Custom casework looks perfect on drawings, but odd sizes bring longer lead times, engineering fees, and pricier spare parts. Modular systems use standard parts, so a mid-project change takes a phone call, not a redesign.
- Ventilation and exhaust work. This line item shocks people most. The ductwork, roof fan, controls, and makeup air behind a ducted hood can cost more than the hood itself. Get an engineer’s estimate before you settle on hood count and size.
- Utility rough-in and installation. A trade needs to install every gas outlet, vacuum line, drain, and data drop. Cutting a slab for a new drain adds demolition and delay. Ask each supplier exactly where their scope ends.
- Delivery, assembly, and future moves. Heavy tops may need freight elevators, rigging crews, or after-hours labor. Later, moving fixed casework means paying plumbers and electricians again. Mobile benches cost more up front but save money every time your lab changes.
Ask suppliers to list these five items as separate lines. Hidden costs stay hidden only when they’re bundled together.
Before You Request Quotes, Use This Checklist
Suppliers can only price what you show them. A vague request gets vague numbers that creep up later. Spend one afternoon gathering these seven items first.
- Room dimensions. Length, width, ceiling height, doors, windows, columns, and the delivery path.
- Equipment list. Each instrument’s footprint, weight, and heat output, plus anything that vibrates.
- Utility map. Existing drains, gas risers, electrical panels, and exhaust points, and what each station needs.
- Exposure risks. Top chemicals with concentrations, heat sources, and disinfectants, zone by zone.
- Storage needs. Flammable and corrosive volumes, general supplies, and cold storage.
- Compliance requirements. The SEFA, NFPA, ADA, cleanroom, and local code items that apply.
- Timeline and budget range. Suppliers can’t suggest smart trade-offs without knowing your limits.
Put all seven into one document and send the same version to every supplier. Lead times often stretch for weeks, and fume hoods take longer, so start today.
Lab Furniture FAQ
These are the questions lab managers and buyers ask me most.
What is laboratory furniture?
It includes the benches, cabinets, fume hoods, sinks, and seating built for scientific work. Unlike office furniture, it must resist chemicals, support heavy instruments, clean easily, and connect safely to utilities and exhaust systems.
What is the best material for a lab workbench?
No single material wins everywhere. Epoxy resin suits busy chemistry labs. Phenolic suits biology, clinical, and teaching labs on a tighter budget. Stainless steel fits cleanrooms, polypropylene handles strong acids, and HPL belongs only in dry labs. Always test a sample chip with your own chemicals.
What is the difference between a fume hood and a biosafety cabinet?
A fume hood pulls chemical vapors away from the user and protects people, not samples. A biosafety cabinet uses HEPA-filtered airflow to protect the user, sample, and room from biological agents. Most Class II cabinets return air to the room, so they can’t safely handle volatile chemicals.
How much does laboratory furniture cost?
Prices vary widely by size, material, and scope. The furniture itself is rarely the biggest number. Ventilation, utility rough-in, and installation often drive the total, so ask for line-item quotes.
Can lab furniture be reconfigured?
Yes, if you plan for it. Modular frames, mobile base cabinets, and overhead service carriers let you rearrange a room in a day or two. Fixed casework requires plumbers and electricians for every move.
What standards should I check before buying?
Check SEFA 8 and SEFA chemical testing, ASHRAE 110 for hoods, OSHA with NFPA 30 and 45, ANSI Z358.1, ADA, ISO 14644 for cleanrooms, and local codes. Always ask for the actual test reports.
Get the Order Right, Then Get Quotes
The labs I see running smoothly all made their choices in the same order. They defined the lab type and workflow first. Then they mapped utilities and equipment. Only after that did they pick materials and furniture. Skip ahead, and you end up paying to fix the layout later.
So start small, and start this week. Open a spreadsheet and list every instrument with its size, weight, and utility needs. Mark your drains, gas risers, power panels, and exhaust points on the floor plan. Then send that same package to at least three suppliers and ask for line-item quotes.
That one list will save you more money than any discount you negotiate.
