


A bad lab layout slows work long before anyone spots the real cause. Staff take extra steps, shared benches get crowded, and small delays repeat all day. Many labs blame people or equipment first, when the real problem is the layout.
Lab layout planning is not just about fitting laboratory furniture and instruments into a room. It shapes workflow, separates risks, and gives people enough space to work safely. In this guide, I show you how to judge a layout, spot weak points early, and plan a lab that supports both workflow and safety.
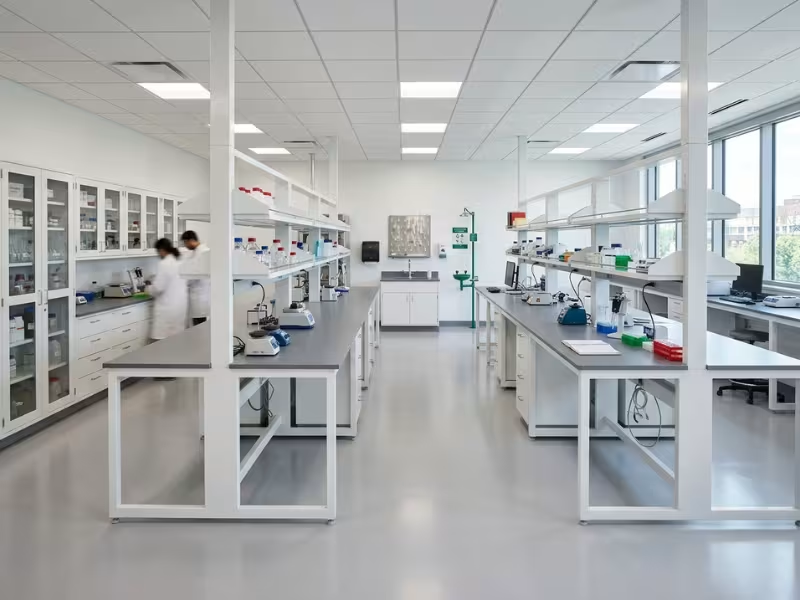
Why Some Lab Layouts Work and Others Fail
When I walk into a lab for the first time, I don’t look at the equipment. I watch how people move. Within ten minutes, the layout shows me whether it helps the team or fights it. Three patterns tell me almost everything.
Distance and crossed paths quietly eat your day. A technician who walks 30 feet to a shared balance loses little on one trip. Repeat that trip 40 times a shift, and it adds up. Crossed paths make it worse. When one person carries samples while another pushes a waste cart through the same aisle, someone has to stop and wait. These pauses rarely appear in reports, but they show up in output.
Shared spaces turn into traffic jams. One centrifuge for six people, one storage cabinet by the door, or one narrow aisle that everyone needs at 9 a.m. creates a queue. Teams often work around these choke points instead of fixing them.
Safety mistakes get locked in. You can move a stool in seconds. You cannot easily move a fume hood, a drain, or an eyewash station. When a layout blocks an exit route or puts hazards next to busy walkways, the fix often means new ductwork, new plumbing, and weeks of downtime.
Spot these patterns early, and they cost you a paper revision, not a rebuild.
Start with Lab Type and Risk Profile
Two labs can hold the same instruments and still need very different layouts. Before I sketch a single bench, I ask what kind of lab this is. The answer tells me which factor should shape the plan first.
Four drivers set the layout logic:
- User count: how many people work in the room at once
- Task repetition: how often the same work happens
- Flow: how samples and materials move
- Risk and compliance: which hazards and rules apply
An equipment list can’t tell you any of this, and each lab type weighs these drivers differently.
Teaching labs start with student count and instructor sightlines. Twenty-four students arrive at once, do the same task, and leave together. That calls for wide aisles, matching stations, and a clear view from the front. If the instructor can’t see every bench from one spot, the layout fails before class begins.
Research labs start with protocol flexibility. Projects change with each new grant. A bench may handle cell work in spring and analytical prep by fall. I plan research labs so benches, storage, and utilities can shift without calling in a contractor. That usually means modular lab benches and workstations instead of locking every station in place.
Clinical and diagnostic labs start with sample flow and contamination control. Specimens should move one way: receipt, processing, analysis, then disposal. Clean and dirty work must never cross paths. One wrong turn in the sample route can put results and patient care at risk.
QC and industrial labs start with repeatable movement and documentation. Analysts run the same tests every shift, often under audit. Their path from retained samples to instruments to records should stay short and identical. Place documentation stations beside the test area, not down the hall.
Name your lab type and its main risk before you open any equipment list. That one decision keeps the rest of the plan on track.
Map the Workflow Before You Draw the Floor Plan
Many teams start with a floor plan and an instrument list. They drop the big items in first, then squeeze the work around them. I ask clients to put the drawing away for a week, because the workflow decides where everything belongs.
Here is how I build a workflow map that a designer can actually use.
Write Down What Happens Every Day
Follow one sample through a normal day. Record each step: intake, prep, analysis, documentation, and disposal. Note who does it, where, how long it takes, and what equipment it needs.
A spreadsheet or a sticky-note wall works fine. Talk to the people at the bench, not just the manager. They know the steps that never make it into the SOP.
Separate the Four Flows
One line on a map hides too much. I split movement into four flows and draw each in its own color:
- People flow: how staff enter, gown up, move between tasks, and leave
- Sample flow: the path specimens take from receipt to final result
- Material flow: how reagents, consumables, and glassware arrive and get restocked
- Waste flow: how sharps, biohazard bags, and chemical waste leave the room
Where colors cross, you have a conflict. Waste should never travel back through clean sample routes, and deliveries should not cut across active benches.

Find the Trips That Repeat
Next, count round trips. Mark any path someone walks more than 10 times a shift. Those routes deserve the shortest distance on your plan.
Then circle the shared nodes: the balance, the centrifuge, the sink, the -80°C freezer. Several people need these at once, so each one is a likely bottleneck. Give it room for a short queue, or plan a second unit near its heaviest users.
Map Next Year, Not Just Today
Your map shows the present, but your layout must also handle what comes next. Ask three questions:
- Will staff numbers grow in the next three to five years?
- Which new instruments sit on the wish list or in a grant proposal?
- Which protocols might add steps or move to automation?
Mark those changes on a second version of the map. Reserve space for them now, even if it is just an open wall or a spare utility drop.
Once the map is solid, spatial relationships almost decide themselves. Sequential steps sit side by side, busy nodes get breathing room, and conflicting flows get separated.
Build the Layout Around Zones and Adjacencies
Your workflow map shows what happens in the lab. Zones decide where it happens. I think of a lab as a small town with a few neighborhoods. Each zone needs the right neighbors close by and the wrong ones kept at a distance.
Get these relationships right, and most layout problems never appear. Get them wrong, and no amount of new furniture fixes the daily friction.
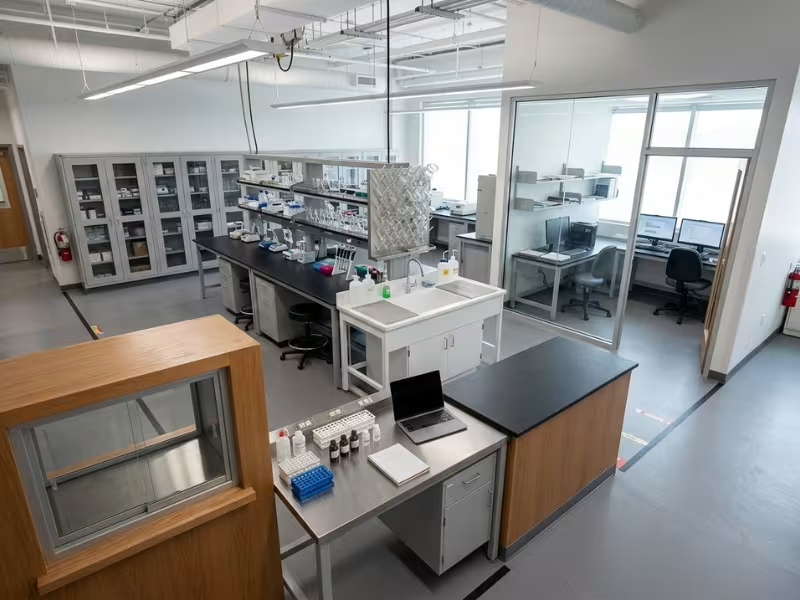
Put These Functions Side by Side
Start with the pairs that belong together. Place them well, and much of the extra walking simply disappears.
Sample receipt next to initial processing. Specimens should move from the receiving counter to first prep in a few steps. I aim for under 15 feet. A dedicated drop-off counter or pass-through window keeps couriers out of the work area, and cold-chain samples don’t sit on a cart while someone searches for space.
Wash-up next to wet work. Dirty glassware carried across a room can drip, break, and spread residue. Place the sink, drip rack, and drying area at the end of the wet bench run, away from the main entrance. Let dirty items come in from one side, and clean items leave from the other.
Shared instruments near their core users. Use the trip counts from your workflow map. If four of the six people who run the HPLC sit on the east wall, the HPLC belongs there. Move shared instruments into a central equipment room only when noise, heat, or vibration demands it.
Store near the point of use, but off the benches. I use a simple three-level rule:
- Keep daily consumables within arm’s reach, in under-bench drawers or on reagent shelves.
- Store weekly stock in tall lab storage cabinets along the perimeter.
- Keep bulk supplies in a separate storeroom.
Skip this step, and cartons slowly take over the work surface. I have seen labs lose almost a third of their usable bench length to boxes.
Keep These Functions Apart
Some neighbors cause trouble. In these cases, distance or a wall protects both people and data.
Wet work and write-up space. Place desks for reports, data analysis, and calls outside the lab or behind a glass partition. At minimum, place them in a separate zone near the entrance, where staff can work without PPE. A laptop on a wet bench picks up contamination and carries it out of the room.
Hazardous storage and exits. Never put a flammable cabinet beside an exit door. A fire there blocks the very route people need to escape. Keep flammables and corrosives along a side wall, away from the main aisle and close to the hood that uses them. Store corrosives low, below eye level.
Keep food and break areas separate from the lab proper. Eating and drinking don’t belong anywhere chemicals or biological samples are used. Plan a break room down the corridor and a handwash sink on the way out. If you don’t plan one, people end up snacking at desks inside the lab.
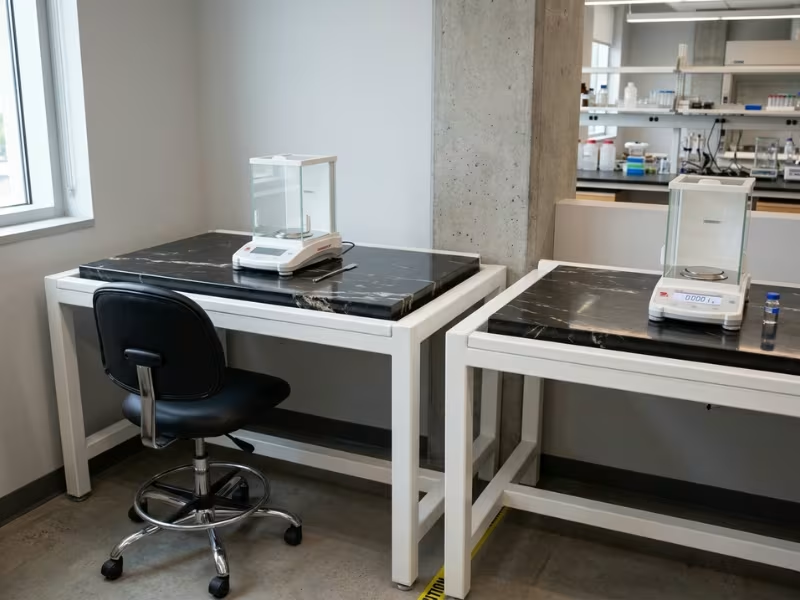
Sensitive instruments and busy zones. Analytical balances, microscopes, and optical setups react to footsteps, cart wheels, slamming doors, HVAC drafts, and centrifuges on the next bench. Give them a quiet corner, ideally near a structural column on a solid slab. Then set them on anti-vibration tables.
Design Circulation on Purpose
Once you set the zones, the space between them becomes your circulation. Treat aisles as planned elements, not leftover gaps.
Separate primary corridors from bench aisles. Primary routes carry carts, deliveries, waste, and people heading to exits. I plan these at 5 to 6 feet clear. Bench aisles, where people work back to back, need about 5 feet, and a single-sided aisle can drop toward 4 feet. Trouble starts when a primary route doubles as a bench aisle, because every cart then passes behind someone who is pouring or pipetting.
Route traffic around active work. Send deliveries and waste along the perimeter or through a dedicated end corridor. Try a quick test: trace a waste cart’s path from the door to the pickup point. If it passes behind an active bench, reroute it now.
Protect sightlines where supervision matters. In teaching labs and higher-risk areas, a supervisor should see every station from one spot. Keep island shelving low or open, and use glass panels into hazardous rooms. Clear sightlines also help when staff work alone after hours.
One last check: print the plan and draw each flow in a different color. If two lines cross inside an active work zone, move the zone, not the people.
Safety and Code Constraints That Shape the Layout
I treat safety codes as the plan’s walls, not a checklist for later. They decide where a hood can sit, how wide an aisle must stay, and which corners are off-limits. Your workflow map shows what you want. These rules tell you what you can build.
Here is how each constraint changes the drawing in practice.
Exits, Aisles, and Emergency Equipment
Egress sets your aisle widths first. Most codes require a clear exit path of at least 36 to 44 inches, and many labs need a second exit once they pass a certain size or hazard level. I mark exit routes before I place a single bench. Bench runs must stop short of those lines, and carts and freezers can’t park in them, so plan alcoves for that equipment.
Eyewash and shower access pulls stations toward the hazard. ANSI Z358.1 requires a 10-second walk to an eyewash station on the same level, with no obstacles in the way. That often works out to about 55 feet. For strong acids or caustics, I put the unit right beside the workstation. In practice, eyewash stations sit near sinks and hood rows, not behind an entrance door.
Fume Hoods and Hazardous Storage
Fume hoods need calm air, so place them in quiet corners. A door swing, a supply diffuser blowing across the sash, or a person walking past can pull fumes out of the hood. I place hoods at the far end of the room, away from doors and main aisles, and ask the HVAC engineer to move diffusers so they don’t blow across the hood face. If a hood must sit near an exit route, move the route, not the hood.
Keep hazardous storage off the escape path. Place flammable and corrosive cabinets along side walls, close to the hoods that use them. Keep acids, bases, and oxidizers in separate cabinets. That usually means planning two or three cabinet spots instead of one large one.
Accessibility and Biosafety
Accessibility reshapes bench runs and clearances. Where ADA applies, plan at least one workstation with a 28- to 34-inch work surface and open knee space. Keep a 36-inch accessible route to it, plus a 30-by-48-inch clear floor area in front. Sinks, eyewash stations, and controls must also be within reach. Adjustable-height benches handle this without losing a full run of casework.
Biosafety levels add rooms, not just rules. BSL-2 work needs a handwash sink near the exit and self-closing doors. Biosafety cabinets need the same calm air as hoods. BSL-3 adds an anteroom and controlled airflow from clean to dirty areas. Those spaces eat square footage, so confirm the containment level before you finalize the room size.
Sketch these boundaries on your plan first. Then fit your zones inside them, so the layout never has to fight the code.
Furniture, Fixtures, and Utilities: Choose for the Layout You Need
By now, your workflow, zones, and safety boundaries define the room. Furniture fills in that plan. It should never redraw it. I tell clients to pick casework last, because the right bench in the wrong spot still slows everyone down.
Fixed or Mobile: Decide by How Often the Work Changes
Fixed casework fits work that stays put. Sinks, fume hood bases, chemical storage, and heavy instrument rows rarely move. Bolted lab casework and cabinets give them stable support, tight seals, and solid load ratings.
Mobile benches fit work that shifts. Research groups, startups, and grant-funded labs often rearrange every year or two. Steel frames on lockable casters, with mobile base cabinets underneath, let a team rebuild a bench run in an afternoon.
My quick test: look at how much your protocols changed over the past three years. If the answer is “a lot,” make at least half your bench length mobile. Keep fixed pieces near drains and hoods, and let the rest of the room flex around them.
Bring Utilities to the Bench, Not the Bench to the Wall
Mobile furniture only helps if utilities can follow it. Your utility system decides how flexible the layout really is.
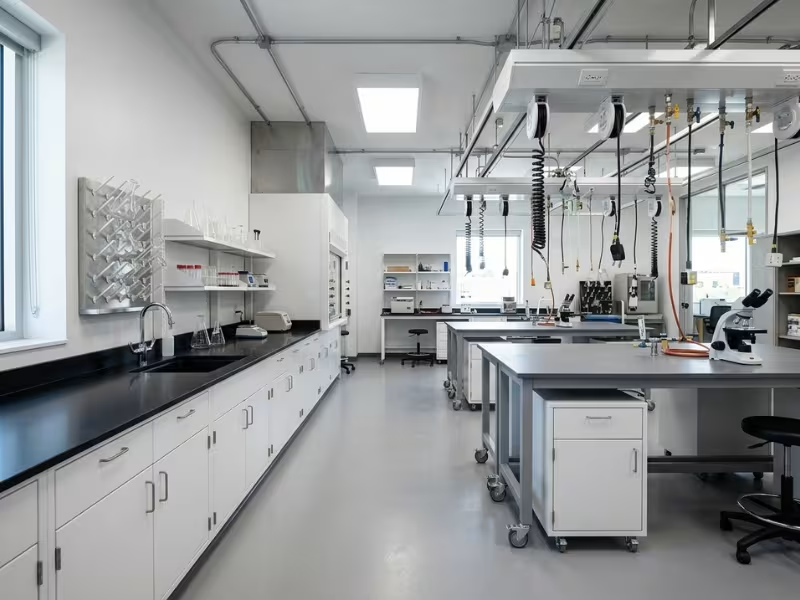
- Ceiling service panels carry power, data, gas, and vacuum overhead. Benches move freely below, and island layouts stay open.
- Drop-downs hang from a ceiling grid or service carrier. They feed specific stations, and you can relocate them without opening walls.
- Wall services cost the least and suit perimeter benches, but they lock those benches in place.
I usually combine all three. Wall services run along fixed benches, and ceiling panels go over open zones. Then I add spare outlets and capped gas or vacuum points where future instruments may land.
Work surface material affects layout in one main way. Heavy epoxy tops need sturdier frames and make frequent moves harder. Lighter phenolic tops suit mobile benches better.
Leave Room to Service What You Install
Every hood, freezer, and duct needs a technician sooner or later. If the layout blocks access, a two-hour repair turns into a two-day teardown.
- Leave about 12 inches above fume hoods and biosafety cabinets for duct connections and filter changes.
- Give -80°C freezers 4 to 6 inches of side and rear clearance, plus a clear path to roll them out.
- Add removable access panels behind casework, so plumbers can reach valves and traps.
- Keep ductwork and dampers reachable, not buried above fixed shelving.
Mark these service zones on the plan the same way you mark aisles. Furniture can’t sit there.
Layout Priorities by Lab Type
Every lab type has one layout mistake that hurts it more than any other. When I review a plan, I look for that weak spot first. Here is what each lab type fears most and how I design around it.
Teaching Labs: Gridlock and Blind Spots
A teaching lab fears the moment 24 students stand up at once. If everyone heads for the same sink or waste bin, the aisle jams and accidents follow.
Spread shared points across the room. I plan one sink and one waste station for every six to eight students, at the ends of bench runs, so lines don’t form mid-aisle. Keep at least 5 feet between islands.
The instructor should also be able to see every station from the demo bench. Keep reagent shelves low or open, and push tall cabinets to the perimeter. A shared prep room next door, with a pass-through or direct door, lets staff set up trays without walking through class.
Research Labs: A Room That Can’t Change
A research lab fears a layout built for one project. When the grant ends, fixed benches and wall-only utilities turn every change into a construction job.
Plan mixed-use benching around a standard module, often 10 to 12 feet, with ceiling drops for power, gas, and data. Each module can host wet work, instruments, or prep. Keep fixed casework at sinks and hoods, and make the rest mobile.
Researchers need desks nearby, but not in the wet area. Put write-up space in an adjacent office zone behind a glass wall, so people can watch long runs without wearing PPE at their keyboards.
Clinical and Diagnostic Labs: Crossed Paths
A clinical lab fears a specimen that doubles back. When sample paths loop or cross dirty routes, contamination risk rises and turnaround time slips.
Lay the room out in a straight line or U-shape: receipt, accessioning, processing, analysis, storage, and disposal. Each station should hand off to the next within a few steps. Place waste exits at the far end of the flow, never by the receiving counter. Give each handoff a dedicated counter or rack, so no tube waits on a random bench.
QC and Industrial Labs: Inconsistent Routines
A QC lab fears variation. If an analyst takes a different route or hunts for records, it becomes harder to defend results in an audit.
Keep the path short and identical: retained sample storage, prep, instrument, documentation. Place retained sample cabinets near the test area with clear labels, controlled access, and a documentation station beside each instrument cluster. Give each test a fixed home, and keep balances in a quiet corner away from cart traffic.
Design around the mistake your lab type fears most, and the rest of the layout falls into place.
Common Layout Mistakes That Cause Rework
Most rework doesn’t come from bad furniture. It comes from early choices nobody questioned. Each mistake below has cost a client real money, and each has a simple fix if you catch it on paper.
Designing around equipment instead of workflow. Teams place big instruments first because they’re easy to draw. Then samples zigzag across the room, and six months later someone pays to move a hood or reroute a drain.
Fix: Lock the workflow map first. Place each instrument where the process needs it, then check that spot against your utilities.
Underestimating storage. Draft plans show clean benches and a few tall cabinets. Within a year, cartons cover the worktops and creep into the aisles.
Fix: Count what you stock today and add 25-30%. Give every category a home before you set your bench length.
Ignoring maintenance access. A freezer jammed into an alcove or a hood with no room above it looks fine on move-in day. Then the first compressor failure or filter change means pulling out casework.
Fix: Draw service zones like aisles, and keep furniture out of them.
Skipping operator input. Managers and designers often sign off without asking bench staff. Staff then find the sink on the wrong side or the balance too far from prep, and they start moving things on their own.
Fix: Walk through the draft with two or three frontline users. One hour of their feedback catches problems no drawing shows.
Overcrowding the room. Squeezing in one more bench run feels like a win. Then aisles shrink below code, carts can’t pass, and inspectors flag it.
Fix: Treat aisle widths and clearances as fixed limits. If the work doesn’t fit, cut bench length or find more space.
Failing to plan for change. A layout built tightly around today’s projects breaks when a new instrument or grant arrives.
Fix: Leave a flex zone, spare utility drops, and mobile benches wherever work is likely to shift.
Catch these six on paper, and you can erase them instead of calling a contractor.
A Practical Checklist Before Finalizing the Plan
Before a plan goes out for pricing, I run it through seven checks. One empty box means it isn’t ready.
- User requirements gathered. You have written input from bench staff, managers, and EHS on headcount, shifts, and must-have equipment.
- Workflow mapped. People, sample, material, and waste flows sit on one color-coded map, with frequent trips marked.
- Zones and adjacencies defined. Every function has a zone, plus a written list of what sits together and what stays apart.
- Safety and code constraints checked. The plan shows exits, aisle widths, eyewash reach, hood locations, and storage segregation, and your safety officer has signed off.
- Utilities confirmed. Each station lists its power, data, gas, vacuum, water, and drain needs, and each need matches a real riser or panel.
- Future growth considered. The plan marks a flex zone, spare utility drops, and space for at least one new instrument.
- Walkthrough simulation completed. Two or three users have walked a full shift on a taped-out floor or 3D model, and you fixed every bump they found.
Tick each box with a date and a name, so everyone knows who confirmed what.
Lab Layout FAQ
These are the layout questions I hear most from lab managers, planners, and facility teams.
What is the minimum aisle width in a laboratory?
Most building codes require a clear exit path of 36 to 44 inches. Treat that as a legal minimum, not a working target. For bench aisles where people work back to back, I plan about 5 feet. Single-sided aisles can drop toward 4 feet, and primary corridors with carts need 5 to 6 feet. Always confirm exact numbers with your local code official.
Where should fume hoods be placed?
Put hoods where the air stays calm, usually at the far end of the room, away from doors, supply diffusers, and main walkways. Keep them out of exit routes, place flammable storage nearby along a side wall, and leave about 12 inches above each hood for duct access. Ask your HVAC engineer to check diffuser locations before you lock the plan.
What is the difference between a wet lab and a dry lab layout?
A wet lab handles chemicals, biological samples, and water. It needs sinks, drains, fume hoods, eyewash stations, chemical-resistant worktops, and separation from desks. A dry lab focuses on electronics, computing, or physical testing. It needs more power and data, cable management, cooling, and sometimes ESD protection. When you combine both, keep the dry zone near the entrance and the wet zone deeper inside.
How much bench space does each researcher need?
I start with 8 to 12 linear feet per researcher in a typical wet lab. Instrument-heavy work may need more. Count shared equipment benches separately. Teaching labs often run tighter, at about 4 to 6 feet per student station.
Can you reconfigure an existing lab without major construction?
Often, yes. Mobile benches, mobile base cabinets, and ceiling drop-downs let you rearrange a room in days, not months. Drains, fume hoods, and gas risers set the limits, so keep those in place and rearrange everything else around them. If your utilities only come from the walls, an overhead service carrier usually costs far less than moving plumbing.
How often should you reassess a lab layout?
Review it once a year with the people who work at the bench. Also reassess whenever you add staff, buy a major instrument, change a protocol, or take on a new hazard. Boxes on worktops, carts in aisles, and lines at shared equipment all signal that the layout no longer matches the work.
Plan the Flow, Then Pick the Furniture
Effective lab layouts follow the same order. Map the workflow first. Then group functions into zones and decide what belongs together and what should stay apart. Next, fit those zones inside your safety and code limits. Only then choose benches, casework, and utilities. Change that order, and you pay to fix it later.
Your next step takes one afternoon. Follow a sample through a normal day and draw the paths for people, samples, materials, and waste. Then write a short adjacency list with two columns: “keep close” and “keep apart.”
Bring both pages to your first planning meeting. They will help you build a better lab than any catalog can.
