


Why Your Dental Lab Bench Affects More Than Comfort
Many lab owners want faster output from their technicians, so they question skill first. But I have walked through many labs where talented people lose time with every reach.
The bench often causes the slowdown. Technicians hunch over fixed-height tops and hunt for burs. Dust settles on fresh work. Weak lighting hides margins and shade details. Cluttered surfaces and slow task switching eat up the rest of the day.
These problems spread beyond one station. A poorly designed bench drags down your whole workflow, from the first model to the final polish.
This guide won’t hand you a spec sheet. Instead, I’ll show you which features truly affect efficiency, fatigue, and work quality. You’ll learn how to evaluate any bench, what to prioritize, and how to upgrade without wasting budget.
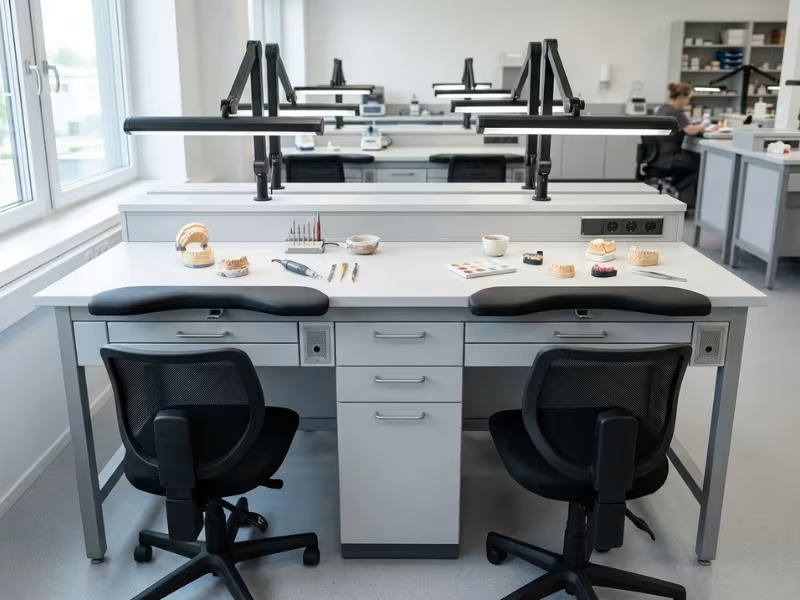
What Makes a Dental Lab Bench “Good” in Real Work
Most bench brochures compete on features: more drawers, more outlets, more attachments. When I walk into a busy lab, I don’t count features. I watch how the technicians move.
That’s where you see the truth. A good bench does four jobs at once:
- Support precision. It offers a steady surface, clear sightlines, and a solid hand rest for margin and wax work.
- Reduce physical strain. It lets technicians keep their shoulders relaxed and necks neutral through a full shift.
- Keep tools and materials within reach. Items used every few minutes sit right where the hand expects them.
- Keep the workspace clean and consistent. It controls dust, debris, and clutter, so every case starts from the same baseline.
Miss one, and the others suffer. Perfect lighting won’t help if a technician twists twenty times an hour to grab a handpiece. A premium worktop loses its value when dust coats every finished crown.
Use these four points as your filter. When a supplier shows off a new add-on, ask one question: which of these four jobs does it improve? If the answer is none, put that budget toward something your team will feel every day.
Start With the Workflow, Not the Bench Specs
Before I open any catalog with a client, I ask one question: what does a normal day at this station look like?
That answer shapes everything. A bench that suits a ceramist can slow down a denture team. Whether you compare dedicated dental stations or broader lab benches and workstations, identify your main work mode first. The features below will then show you exactly where to spend.
For Crown and Bridge Work
Your technicians spend hours on tiny margins and contact points.
Put lighting first. You need bright, shadow-free light directly over the hand rest. Next, choose a height and arm support that keep forearms steady and necks upright. Then keep burs, wax instruments, and handpieces within forearm reach. If a technician stands up to grab a tool, the layout has failed.
For CAD/CAM or Digital Labs
Here, the bench works like a docking station. Scanners, monitors, and milling connections all compete for space and power.
Check outlet count and placement first. Then look at data ports and cable routes. Choose a modular frame you can rearrange when a new scanner or printer arrives. Fixed layouts age fast in digital labs.
For Removable Prosthetics or High-Material Handling
Dentures and partials mean acrylic dust, plaster, and constant trimming. The mess builds up fast.
Make local dust extraction your top priority. Then set up clear zones for active materials, backup supplies, and waste. A worktop that wipes clean quickly after every case saves real minutes each day.
For Multi-Technician Labs
When five or ten people share the floor, consistency beats any single feature.
Standardize the layout so every station keeps tools in the same spot. Any technician can then step up to any bench and work at full speed. New hires learn faster, and covering for a sick colleague stops being a puzzle. Pick a design you can replicate easily as the team grows.
The Bench Features That Matter Most
With your work mode in mind, you can judge features by real impact. I’ve ranked these from the changes your team will feel most to the ones that matter only in certain setups.
1. Adjustable Height and Ergonomic Positioning
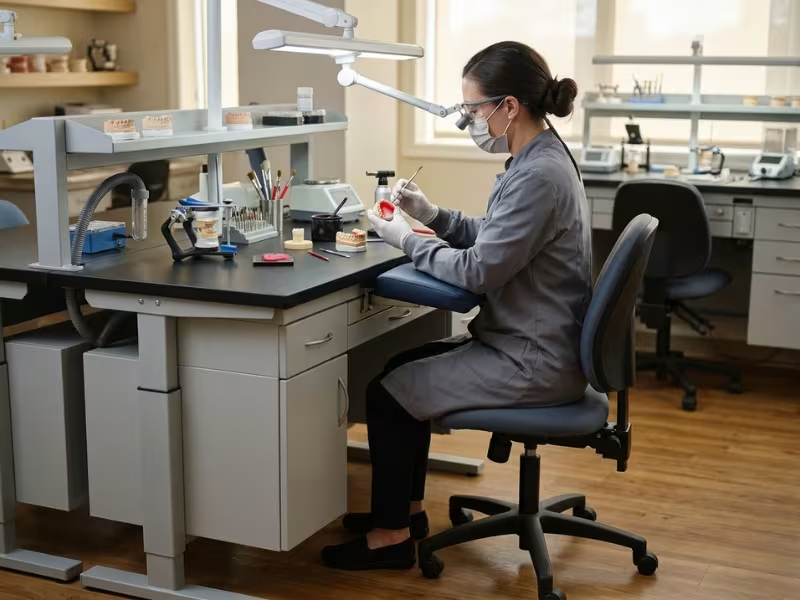
A fixed-height bench forces technicians to adapt to it. They lean forward, lift their shoulders, and hold their forearms in the air. After eight hours, neck pain, tight shoulders, and wrist fatigue follow.
Picture a technician at 10 a.m. She waxes a crown and wants the surface high, with her eyes close to the work. Ten minutes later, she trims a die and needs a lower surface for force and control. Then she checks shade and sits back for a wider view. One fixed height can’t serve all three tasks.
Detail work like waxing, margin finishing, and ceramic layering reacts most to height. Trimming and polishing tolerate small mismatches better.
Height adjustment is only part of ergonomics. Check three more things:
- Elbow position. Forearms rest on a support, with elbows near 90 degrees and shoulders relaxed.
- Sightline angle. Technicians look down at a slight angle without bending their necks.
- Foot clearance. Feet sit flat, with no drawers or frame bars in the way.
Seating plays an equal role. Pair each station with lab chairs and stools that match the bench height and support the back and feet.
Watch your team for one week. Rolled-up towels used as arm rests, frequent stretching breaks, or people perched on stool edges all move this feature to the top of your list.
2. Dust Extraction and Air Control Near the Work Zone
Many lab owners tell me room ventilation handles their dust. It doesn’t. By the time a ceiling system pulls in particles, they have already passed the technician’s face and landed on the bench.
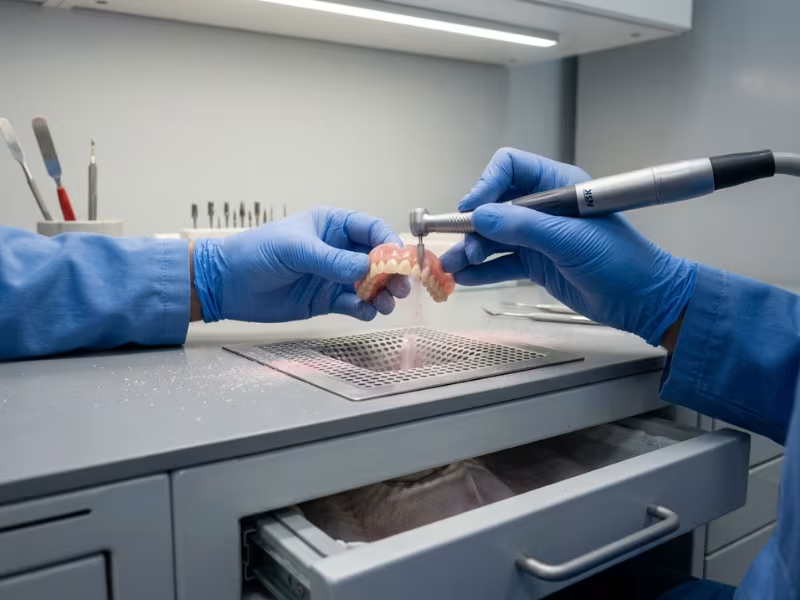
Local extraction captures dust right where the bur meets acrylic, zirconia, or plaster. That gives you three wins:
- Fine particles stay out of the breathing zone.
- Less debris settles on finished work and tools.
- Technicians see the contact point clearly without stopping to blow off dust.
When you evaluate a bench, check these details:
- Suction position. The intake sits close to the working point, usually just in front of or below the hands.
- Maintenance. Filters and bins come out in seconds. If cleaning takes twenty minutes, nobody does it on schedule.
- Hand clearance. If a bulky nozzle blocks wrist movement, technicians push it aside, and then it protects nobody.
Test it in person. Run a handpiece on scrap acrylic and watch the dust. If a cloud drifts upward, the system isn’t doing its job.
3. Lighting That Supports Precision Work
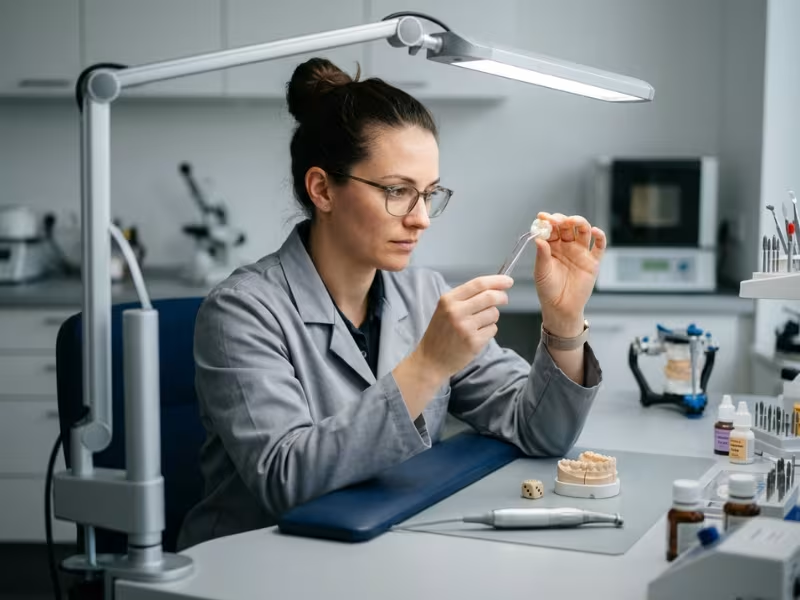
I treat lighting as a working tool, not an accessory. When light falls short, the eyes work harder, and quality slips on every case.
Three qualities set good bench lighting apart:
- Shadow-free coverage. Wide or dual light sources fill the area around hands and instruments from more than one direction.
- Adjustable angle. A flexible arm lets technicians move the light instead of their bodies.
- Stable brightness. Steady, flicker-free LED output reduces eye strain.
Good light shapes two results. The first is color judgment. Look for a CRI of 90 or higher and a color temperature near daylight, around 5,000 to 6,500K. The second is edge recognition. Clear light helps technicians catch open margins, small chips, and rough contacts before a case leaves the bench.
Here’s a quick test. Hold a finished crown under the bench light and rotate it slowly. If the margin blurs at any angle, your lighting needs work.
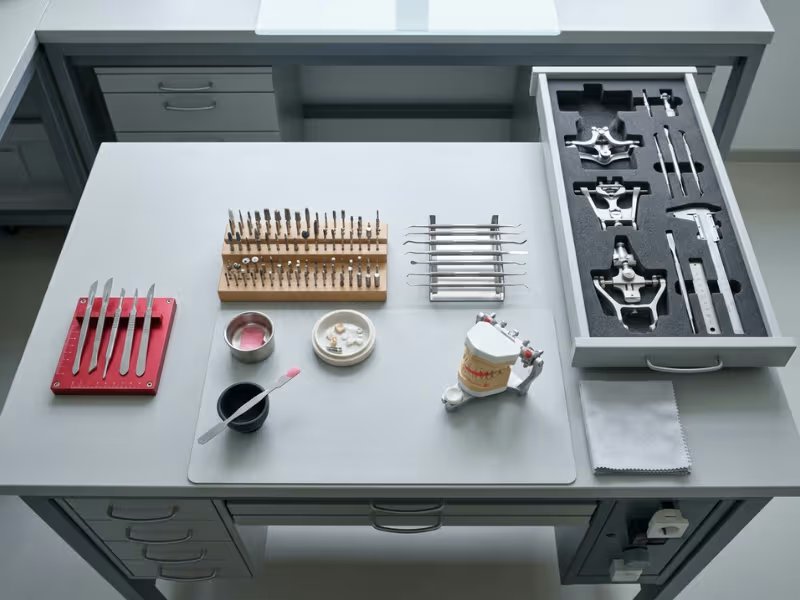
4. Tool Storage That Reduces Motion Waste
Small movements waste more time than big ones. A technician who reaches, searches, and turns fifty times a day loses hours every month.
|
Poor Layout |
Smart Layout |
|---|---|
|
All tools in one deep drawer |
Tools sorted by how often you use them |
|
Technician stands or twists to reach |
Frequent tools sit within forearm reach |
|
Sharp blades mixed with general items |
Sharp tools in a dedicated, marked holder |
|
Storage judged by capacity |
Storage judged by access |
Good storage puts each item where the hand expects it. Organize by frequency:
- Every few minutes: Handpieces, burs, and wax instruments go on the surface or in a top rack.
- A few times a day: Measuring tools and articulators go in upper drawers or side shelves.
- Rarely: Backup stock goes in lower cabinets or shared lab storage cabinets outside the active work zone.
- Hazardous: Scalpels and blades get their own holder, away from the hand path.
Watch one technician for an hour and count how often they leave their seat. That number tells you whether your storage helps or hurts.
5. Surface Material and Worktop Durability
Worktop material seems minor until a cheap surface starts to peel or stain. Then you face repairs, downtime, and a station nobody wants.
Ask four practical questions:
- How often do you clean? Daily disinfection calls for a non-porous surface that won’t swell or crack.
- What chemicals touch it? Monomers, solvents, and disinfectants can soften or discolor weak laminates.
- How much wear does it take? Trimming and heavy instrument use demand scratch and impact resistance.
- What does upkeep cost? Some surfaces need resealing. Others just need a wipe.
Phenolic resin, epoxy resin, and stainless steel handle most dental lab conditions well. When you compare lab countertops and worktops, match the material to your toughest daily task. A durable top costs more up front, but it saves you from replacements and lost production later.
6. Material Staging and Waste Zones
When active materials, spare supplies, and waste share one space, technicians stop to sort all day. Each pause breaks concentration.
I set up three zones on every bench:
- Active zone. Only the materials for the current case.
- Backup zone. Spare consumables close by but out of the way, so technicians restock without leaving their seat.
- Waste zone. A separate bin or port for trimmings and used wax, off to the side and never in front of the hands.
This protects workflow continuity, not just appearance. When every item has a fixed home, technicians move from step to step without losing rhythm.
Zoning matters most during fast task switches. Picture a technician moving from model trimming to crown waxing in the same hour. Without zones, plaster dust lands in fresh wax, and rework follows.
Look for side trays, pull-out shelves, or built-in waste ports. These keep zoning easy on busy days.
7. Power and Data Access for Modern Lab Equipment
For a traditional station, power access rarely tops the list. For a CAD/CAM lab, you can’t skip it.
Digital benches hold scanners, monitors, computers, and sometimes printers. When outlets sit far away, extension cords tangle behind equipment and cross the floor. You get trip hazards and a cluttered surface.
Check these points:
- Outlet placement. Outlets sit at or just above surface level, near the equipment.
- Cable management. Trays, channels, or grommets keep cables off the worktop.
- Data access. Built-in USB or network ports let you connect a scanner without crawling under the bench.
- Surge protection. Sensitive digital equipment needs a buffer against power spikes.
If you plan to add digital equipment soon, choose a bench with spare capacity now. Retrofitting power later costs more than specifying it at the design stage.
Which Features Should You Prioritize First?
Few labs replace every bench at once. Most of my clients have a fixed budget and one problem that keeps coming back. So start with that problem, not the catalog.
Name your biggest pain point, then follow the matching path. Each list runs in order of impact.
When Your Technicians Are Worn Out
Sore necks, afternoon slowdowns, and more remakes late in the shift all point to fatigue.
- Height and posture. Fix this first. A technician in a neutral position holds precision longer.
- Lighting. Clear light stops people from leaning in to see.
- Tool accessibility. Once posture and light are right, cut the reaching and twisting.
When Cleanup Eats Into Production
Your workflow leaks time if your team spends the last 30 minutes of each day wiping down benches or keeps finding plaster in fresh wax.
- Dust extraction. Capture debris at the source, and half the mess never forms.
- Material and waste zones. Give every item a fixed home so technicians stop sorting mid-case.
- Surface material. Choose a top that wipes clean fast and survives daily disinfectant.
When Digital Equipment Fights for Space
Tangled cords, monitors balanced on boxes, and scanners shared across stations signal a bench built for an older lab.
- Power and data access. Bring outlets and ports up to surface level first.
- Modular layout. Pick a frame you can rearrange when new equipment arrives.
- Cable and equipment positioning. Route cables away from the hands and set screens at eye level.
Some labs face two of these problems at once. In that case, I always start with fatigue. Tired technicians make mistakes that no clean surface or extra outlet can fix.
A Simple Checklist for Evaluating Any Dental Lab Bench
Take this list to every showroom visit or supplier demo. Better yet, sit at the bench and run a real task while you check each point. Ten minutes of hands-on testing tells you more than any brochure.
|
Question to Ask |
What a “Yes” Looks Like |
|---|---|
|
1. Can the technician maintain a neutral working posture? |
Elbows near 90 degrees, shoulders relaxed, feet flat. |
|
2. Are the most-used tools reachable without repeated twisting? |
Handpieces, burs, and wax instruments sit within forearm reach. |
|
3. Is dust controlled close to the source? |
The intake sits near the hands, and no cloud drifts up during a trim test. |
|
4. Does lighting support shade and detail work? |
Shadow-free, adjustable, flicker-free light with a CRI of 90+. |
|
5. Are materials staged without cluttering the main work area? |
Active and backup materials each have a fixed spot. |
|
6. Is waste separated from active work zones? |
A bin or port sits off to the side. |
|
7. Can the surface tolerate daily cleaning and chemical exposure? |
A non-porous top that resists monomers, solvents, and disinfectants. |
|
8. Do power and cable routes support equipment instead of blocking work? |
Surface-level outlets, with cables tucked into trays. |
|
9. Can you empty filters and clear trays in under a minute? |
Parts slide out by hand, with no tools needed. |
|
10. Could you copy this layout at every station? |
A modular design any technician can step into. |
Now count your “no” answers. One or two usually point to a targeted upgrade, like a new light or a better tool rack. Three or more tell me the bench works against your workflow. At that point, replacing it often costs less than patching it piece by piece.
Common Buying Mistakes to Avoid
I’ve seen labs spend serious money on new benches and end up slower than before. The cause is rarely a bad product. It’s usually one of these five decisions.
Buying for looks instead of workflow. A sleek bench looks great in a showroom. But if the drawers hit a technician’s knees or the hand rest sits too far back, it slows every case. Run a real task at the bench before you sign anything.
Paying for features nobody uses. Built-in magnifiers, motorized trays, and extra monitor arms all add cost. Ask your team which tools they touch daily. If a feature won’t get used at least weekly, leave it off the order.
Ignoring differences in body size. A bench that fits a 5’2″ technician won’t fit a 6’1″ colleague. Shared stations need adjustable height, footrests, and movable arm supports.
Treating dust as a room problem. An HVAC upgrade feels like a big fix, yet particles still reach the technician’s face first. Budget for capture at each bench, then let room ventilation handle what’s left.
Adding storage without rethinking access. More drawers often mean more searching. Map who uses what and how often. Then place storage to match that pattern.
FAQ
What is the most important feature in a dental lab bench?
No single feature wins for every lab. A ceramist and a denture technician face very different demands.
Still, most labs see the biggest gains from three things: ergonomic height, quality lighting, and dust control at the source. Together, they protect your technicians’ bodies, eyes, and lungs, and they shape precision on every case.
Can an older dental lab bench be upgraded instead of replaced?
Often, yes. If the frame feels solid and the top holds up, targeted add-ons can extend its useful life:
- An adjustable LED task light with a high CRI
- A clamp-on or under-bench dust collector
- A tool rack or drawer organizers sorted by use
- An adjustable arm rest and footrest
- A surface-mounted power strip with cable trays
Replacement makes more sense when the fixed height doesn’t fit your team or the top has cracked, stained, or swollen.
What bench features matter most in a digital dental lab?
In a CAD/CAM setup, the bench becomes home base for scanners, monitors, and computers. That moves power and connectivity to the top of the list.
Look for surface-level outlets, built-in data ports, surge protection, and cable trays. A modular frame matters just as much, since digital equipment changes fast. Mount screens at eye level so technicians don’t tilt their necks down for hours.
How do I know if my current bench is reducing efficiency?
Watch your team for a few days. Look for these warning signs:
- Technicians stand or twist to grab tools many times an hour
- Rolled towels or boxes serve as arm rests or monitor stands
- Dust coats finished work by midday
- Remakes climb late in the shift
- End-of-day cleanup takes more than 20 minutes
Two or three of these signs mean the bench costs you time on every case. Run through the checklist above to find which fix comes first.
Choose the Bench Around the Work, Not the Other Way Around
A dental lab bench does more than keep technicians comfortable. The right one cuts the small reaches, twists, and pauses that drain hours each week. It keeps your team fresh through the afternoon and helps them deliver the same quality on the last case as on the first.
So don’t start with a catalog. Start with your own lab floor.
Spend one week watching how your technicians work. Count how often they leave their seats. Note where dust collects, where people lean in to see, and where cleanup drags. Then run each station through the checklist.
Your biggest pain point tells you what to fix first. If you’re planning a larger fit-out, review bench structure, worktops, seating, and storage together as one connected laboratory furniture system. Let the work shape the bench, and the bench will start working for you.
