


Many buyers see a lab bench as the simplest piece of laboratory furniture they will buy. It is not. The wrong bench can create safety risks, limit equipment support, slow daily work, and raise replacement costs later.
I often see labs focus on brand or price first. But in many projects, the supplier is not the real mistake. The bench type, surface, or configuration simply doesn’t fit the work.
In this guide, I will help you judge the main types of lab benches and workstations, along with work-surface materials and setup options. That way, you choose a bench that fits the lab instead of forcing the lab to fit the bench.

What Actually Determines the Right Lab Bench
When a client asks which bench to buy, I skip the catalog. Instead, I ask them to walk me through a normal day at that bench. Five answers shape almost every decision.
- The work itself. Titration, cell culture, weighing, soldering, and student demos each ask different things of a bench. A surface that suits pipetting may fail under a hot plate.
- Chemical, heat, and moisture exposure. List the harshest things that will touch the top: strong acids, solvents, open flames, hot autoclave trays, or constant splashes from a sink. These narrow your material shortlist fast.
- Equipment weight and vibration. A 300-pound incubator stack needs a different frame than a row of pipettes. Analytical balances and microscopes also need a base that won’t transmit footsteps or the shake from a nearby centrifuge.
- Utility needs. Count the outlets, gas taps, water lines, vacuum points, and data ports each station needs. A bench that can’t carry or reach its services forces messy workarounds.
- Future change. Ask whether your protocols, team, or instruments will shift in the next few years. If they will, a bolted-down run may cost you later.
Notice what’s missing from this list: brand, color, and price. Those still matter, but only after the job is clear.
I use the same rule on every project. Application comes first. Then you choose the material, structure, and configuration that serve it.
What a Lab Bench Is and Why It’s Not Just a Table
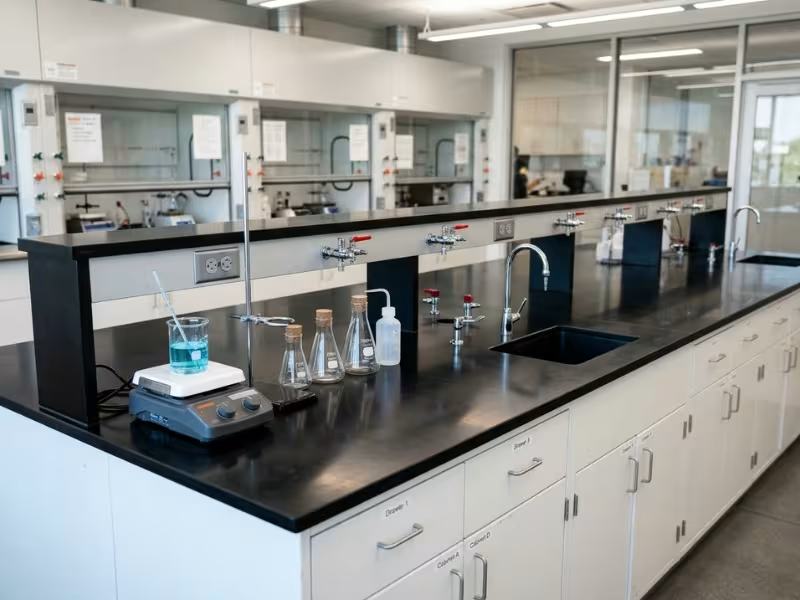
A lab bench looks simple from across the room. Up close, it works as a system with four parts: a steel or wood frame, a work surface, base cabinets or drawers, and often a reagent shelf or service spine.
Each part has a job. A solid frame carries several hundred pounds per section without sagging or wobbling. Many benches also bring power, gas, water, vacuum, and data to the point of use.
The work surface takes the most punishment. It must resist acids, solvents, heat, and moisture, and stay easy to clean day after day.
That’s where an office desk or shop workbench falls short. A desk holds a laptop and a coffee cup. A workbench takes tools and impact. Neither one handles chemical spills, steady loads, and utility demands at the same time.
I treat every lab bench as equipment, not furniture.
Main Types of Lab Benches and When They Make Sense
Bench types aren’t styles. Each one solves a different layout problem. When I review a plan, I match each type to the work it will host, not to how it looks in a rendering.
Here’s how I decide which type earns its spot.
Island Benches: Built for Shared, Open Work
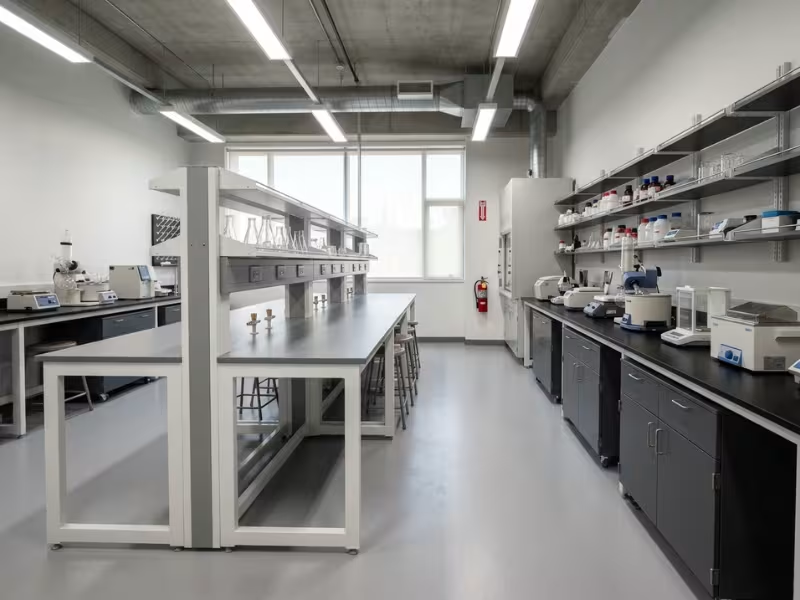
Island benches stand in the middle of the room, with access from two or more sides. They suit teaching labs, research groups, and any space where several people work at once and need to talk across the bench.
The main advantage is access. Four to eight people can share one island, and a center reagent shelf or service spine feeds both sides. Islands also keep sightlines open, which helps instructors and supervisors.
The limits come from utilities. Water, gas, and drains must come up through the floor or down from the ceiling. That adds cost and locks the island in place. Islands also need wide aisles on every side, about 5 feet where people work back to back, so they eat floor space fast.
Wall Benches: The Workhorses Along the Perimeter
Wall benches run along the room’s edges. I use them for instrument rows, sink runs, storage, and any work that depends on wall services.
Their biggest strength is easy access to utilities. Power, gas, water, and drains already run in the walls, so hookups cost less. Wall runs also use space well. Shelves and wall cabinets stack above the worktop, and base storage fits below.
The trade-off is reach. Only one person can work at each section, and they face a wall, so teamwork gets awkward. Wall services also tie benches down. Moving a sink run later often means opening walls and floors.
Mobile and Modular Benches: For Labs That Keep Changing
Mobile benches roll on lockable casters. Modular benches use frames, legs, and worktops you can rearrange or resize. Both suit research labs, startups, core facilities, and shared spaces where projects change every year or two.
The payoff is flexibility. A team can rebuild a bench run in an afternoon, add a station for a new hire, or clear floor space for a large instrument. Many modular frames also adjust in height, which helps with seated work and ADA needs.
That flexibility depends on utilities, though. Without ceiling service panels or drop-downs, a mobile bench still stays tied to the nearest outlet. Mobile frames often carry less weight than fixed casework, and casters don’t suit heavy or vibration-sensitive equipment. I keep these benches away from sinks and fume hoods, where fixed casework works better.
Specialty Benches: When the Task Sets the Rules
Some work needs a bench built around one job. Put a standard bench in these spots, and you risk bad data, damaged parts, or failed audits.
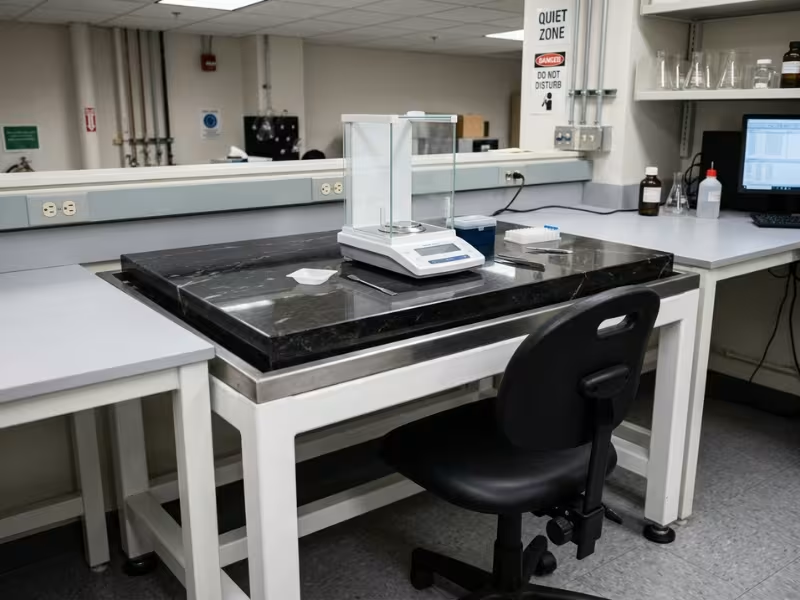
- Anti-vibration benches isolate a heavy marble or granite slab from the frame. I place analytical balances, microscopes, and optical setups on anti-vibration tables like these. They support one instrument well, but they aren’t general work surfaces.
- Cleanroom benches use stainless steel or other low-particle materials, with open frames and few seams. They clean easily but cost more and offer little hidden storage.
- ESD-safe benches add grounded worktops and wrist-strap points for electronics work. They protect circuit boards but aren’t suitable for wet chemistry.
- Sink-equipped benches pair a chemical-resistant top with built-in lab sinks and pegboards, plus a faucet. They anchor wash-up zones, but they need fixed plumbing, so plan their location early.
- Task-specific stations handle jobs like weighing, titration, or PCR setup. They speed up repeat work but adapt poorly when the task changes.
Most labs end up with a mix. Wall benches carry the services, and islands host shared work. Mobile benches fill the zones likely to change, and specialty benches sit exactly where the task demands them.
Work Surface Materials: Where the Biggest Mistakes Usually Happen
Most bench regrets I see start at the worktop. The frame holds up fine, but the surface stains, swells, cracks, or warps within a year or two. In almost every case, the material was fine. It just ended up in the wrong room.
Before comparing materials, it helps to know what a worktop actually has to survive.
Why the Surface Takes the Hardest Hits
A worktop faces five tests every day:
- Chemical resistance: acids, bases, solvents, stains, and disinfectants
- Heat tolerance: hot plates, Bunsen burners, and hot glassware straight from the oven
- Cleanability: no seams or pores where residue and microbes can hide
- Durability: dropped tools, heavy instruments, and constant wiping
- Lifecycle cost: what you pay over 10 to 15 years, not just on delivery day
A cheap top that needs replacing in three years often costs more than a better one you buy once. Replacement also means downtime, disconnected utilities, and a contractor in your lab.
How the Five Main Materials Really Compare
Each of these lab countertops and worktops has a clear home. Trouble starts when buyers push a material beyond its intended use.
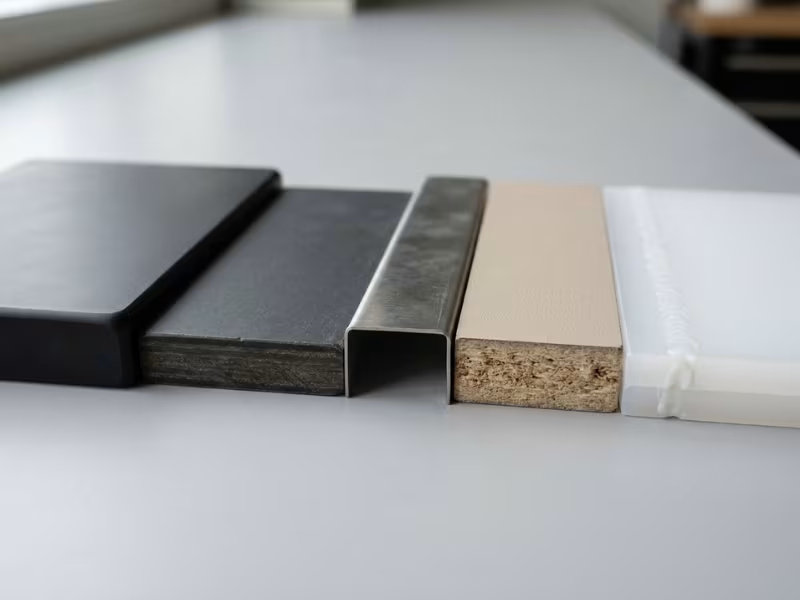
Epoxy resin comes as a solid cast slab, usually about 1 inch thick. It handles strong acids, solvents, and continuous heat up to roughly 350°F better than almost anything else. It also hides minor scratches, and you can sand them out. However, it’s heavy and costs more. The common mistake: putting epoxy on mobile or lightweight frames. The weight strains casters and makes every move a two-person job.
Phenolic resin starts as layers of kraft paper that manufacturers press together with resin. It weighs about half as much as epoxy and resists most lab chemicals, moisture, and bacteria. It also costs less. Its weak spot is sustained high heat. Buyers go wrong when they put phenolic under hot plates that run all day. Use a heat-resistant pad, or choose epoxy for that station.
Stainless steel, usually grade 304 or 316, cleans easily and tolerates high heat. Good welds keep it seamless, which makes it a favorite for sterile and pharma work. But chlorides attack it. Hydrochloric acid and repeated bleach wipes can pit 304 over time. It also scratches, dents, and conducts electricity. The mistake I see most: choosing 304 for a lab that sanitizes with bleach daily. Specify 316, or switch disinfectants.
High-pressure laminate (HPL) puts a decorative layer over a particleboard or MDF core. It’s the budget choice, and it works well in dry spaces. The problem is water. Once moisture reaches a seam or an unsealed edge, the core swells and the top lifts. I never put standard HPL beside a sink or in a wet chemistry run, even when the quote looks attractive.
Polypropylene resists acids that defeat other surfaces, including hydrofluoric acid. That makes it the standard choice for acid digestion and trace metal work. It’s also light, and fabricators can weld it into seamless trays. The trade-off is heat. It softens at around 180°F, so a hot plate sitting directly on top will warp it. Keep heat sources on ceramic or epoxy inserts.
Matching the Material to the Work
Here’s how I pair surfaces with real lab scenarios. Treat these as starting points, then check them against your actual chemical list.
Wet chemistry: Epoxy resin is the default. It handles solvents, strong acids, and hot plates. If the lab runs HF or heavy acid digestion, add polypropylene at those stations. Avoid HPL here entirely.
General biology and research: Phenolic resin usually wins. It resists disinfectants, stays light enough for modular frames, and costs less than epoxy. Add an epoxy section only where staff use high heat or aggressive solvents.
Cleanroom and sterile work: Choose stainless steel, ideally 316 with welded seams and coved edges. It survives repeated wipe-downs and sheds no particles. Confirm your cleaning agents first, because chlorine-heavy products shorten its life.
Teaching labs: Phenolic handles student wear, frequent cleaning, and tight budgets well. For high school or college chemistry rooms with burners and hot plates, epoxy often justifies the extra cost. I don’t recommend HPL for any teaching space that has sinks.
Electronics and dry labs: HPL, or an ESD-rated laminate, makes sense here. Water and chemicals rarely come into play, so the low cost goes further. For static-sensitive work, specify a grounded ESD surface rather than standard laminate.
One habit saves most buyers from a bad choice. Write down the five harshest substances and the hottest item that will touch the bench. Then send that list to your supplier with your quote request. A good vendor will match the material to the list, not whatever sits in stock.
Fixed vs. Modular Benches: Flexibility Has a Cost, but So Does Rigidity
Buyers often frame this as “solid versus flexible.” I frame it as a bet on how much your lab will change. Both options cost money. They just bill you at different times.
Fixed casework fits work that stays put. Sink runs, fume hood bases, chemical storage, and heavy instrument rows rarely move. Bolted lab casework and cabinets under a continuous worktop give them high load ratings, tight spill seals, and the most storage per foot. For a QC lab that runs the same methods for years, or a chemistry teaching room, fixed casework is usually the smarter buy.
Modular and adjustable-height benches pay off where change is likely. Research groups, startups, and core facilities often rearrange every year or two. A modular frame lets you add a station or clear space for a new instrument in an afternoon. Adjustable-height frames also support seated work and ADA stations without custom builds.
The trade-offs show up in four places:
- Storage: Fixed runs offer continuous base cabinets. Modular setups rely on mobile pedestals, which hold less, so plan extra perimeter storage.
- Relocation: Moving a fixed run means a contractor, disconnected plumbing, and patched floors. A modular bench moves easily, but only if power and gas come from the ceiling.
- Installation: Fixed casework needs leveling, anchoring, and on-site fitting. Modular frames usually go up faster.
- Lead time: Custom fixed casework often takes longer to build. Standard modular parts tend to ship sooner. Confirm both with your vendor before you set a move-in date.
One warning: a heavy epoxy top on a modular frame cancels much of its flexibility.
Which labs regret rigid setups most? Research labs that fit every wall around one current project come first. When the grant ends, the next team inherits benches that suit nobody. Fast-growing startups come next, followed by shared core facilities whose instrument lists never stop changing.
My test is simple. List what changed in your lab over the past three years. If staff, instruments, or protocols shifted more than once, go modular in open zones and keep fixed casework at sinks and hoods. That mix usually costs less over the bench’s life than either extreme.
How to Choose a Lab Bench: A Practical Selection Framework
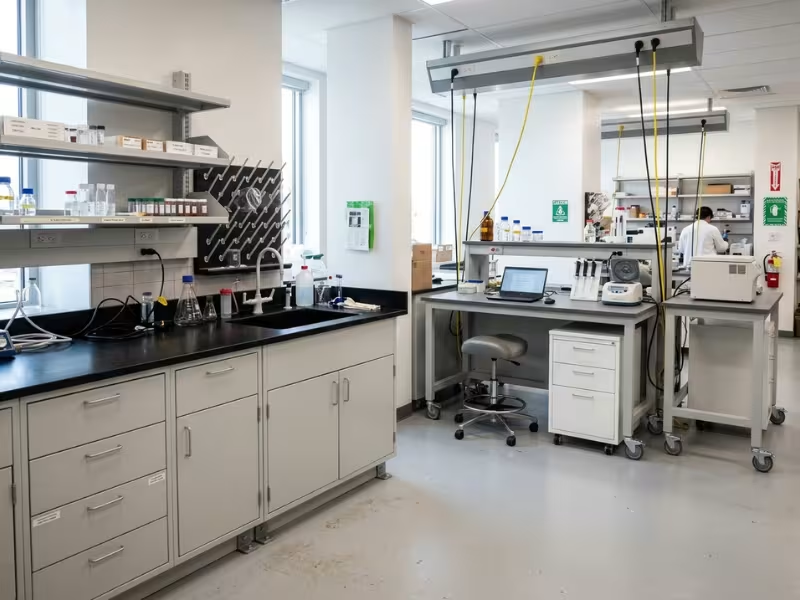
Knowing what matters is one thing. Turning it into a purchase order is another. I take every client through the same six steps, in this order, and I ask them to finish each one on paper before moving on.
Each step gives you something concrete to hand to a supplier.
Step 1: Define What the Bench Will Support
Write one line for each bench run. Name the task, the equipment, and the people. For example: “Wall run B: titration and sample prep, two hot plates, one pH meter, three users.” Or: “Island 2: 24 students, intro chemistry, Bunsen burners.”
Note how many hours the bench sees each day. A bench that one analyst uses for four hours wears very differently from one that three shifts share.
If a run serves two jobs, list both. Then flag which job sets the tougher demand. That job decides the spec.
Step 2: Confirm Exposure and Performance Demands
Now put numbers on each line. Pull your chemical inventory and mark the five harshest substances for each run. Record the hottest item, how long it sits on the top, and whether the surface stays wet.
Next, add up equipment weight. Then add 25% for samples, glassware, and the day someone leans on the edge. Ask suppliers for the load rating per linear foot, not per bench.
Mark balances, microscopes, and optical setups as “vibration-sensitive.” That label keeps them off mobile frames and casters.
Step 3: Check Layout, Utilities, and Clearances
Tape the bench footprint on the floor before you order. Wall benches usually run about 30 inches deep, and double-sided islands often run 60 to 72 inches. Then walk the space during a busy hour.
Check four things:
- Aisles: about 5 feet where people work back to back, and never less than your code’s egress width
- Doors and corridors: confirm a 12-foot worktop can fit through the door and make the turn
- Eyewash and showers: keep the path clear and within a 10-second walk
- Service points: mark where each outlet, gas tap, drain, and vacuum line will connect
A bench that blocks an eyewash station fails inspection, no matter how good it looks.
Step 4: Decide How Much Flexibility You Really Need
Go run by run. Sinks and fume hood bases get fixed casework. Use modular frames for open zones you expect to change.
Then check seated work. If staff sit for long tasks, or ADA applies, plan at least one adjustable-height station with a 28- to 34-inch surface. Leave out base cabinets at those spots to keep knee space open.
Don’t pay for flexibility you’ll never use. But don’t bolt down zones you already know will change.
Step 5: Build a Realistic Cost Picture
The bench price often covers only part of the bill. Ask every vendor to quote these lines separately:
- Freight and crating, especially for heavy epoxy tops
- Installation, leveling, and anchoring
- Plumbing, gas, and electrical hookups
- Reagent shelves, service spines, sinks, and faucets
- One future reconfiguration, with an estimate for year three
Compare totals, not unit prices. A cheaper bench that needs on-site cutting and a second plumber visit can easily cost more by move-in day.
Step 6: Compare Vendors on Specs, Not Just Price
Send every supplier the same spec sheet from Steps 1 to 4. Then compare their answers line by line.
Request worktop samples and test them yourself. Drip your harshest chemicals on each one, leave them overnight, and wipe them clean. Read each warranty for what it leaves out, such as heat damage or chemical staining. Get lead times in writing, and ask for two references from labs like yours. Finally, ask how each vendor handles custom sizes, sink cutouts, and awkward corners.
Pay attention to which vendor asks you the most questions. That supplier usually builds the bench that fits.
Best Bench Choices by Lab Scenario
The same bench can thrive in one room and fail in the next. So I size up every scenario the same way: what matters most, which setup fits, and which mistakes keep showing up.
Here’s how that plays out in five common labs.
Chemistry Labs: Built to Take Heat and Acid
Top priority: chemical resistance and heat tolerance, with built-in utilities.
Best direction: Fixed steel-frame casework with epoxy resin tops. Add polypropylene at acid digestion or HF stations. Run gas, vacuum, and water through a center service spine or wall run, and put a cup sink within reach of every station.
Most common mistake: Buying great worktops but skipping utility planning. Staff then run hoses across the bench to a distant tap. That clutter causes spills and trips.
Biology and General Research Labs: Keep Your Options Open
Top priority: versatility and easy cleaning today, plus room to adapt later.
Best direction: Modular steel frames with phenolic resin tops. Phenolic handles daily disinfectant wipes and stays light enough to move. Keep fixed casework at sinks, and use mobile pedestals in open zones.
Most common mistake: Specifying epoxy everywhere “to be safe.” It adds weight and cost and locks the room in place. Most biology work never needs that level of protection.
Teaching Labs: Tough, Simple, and Easy to Reset
Top priority: durability, a controlled budget, and simple upkeep across hundreds of users.
Best direction: C-frame or fixed steel benches with phenolic tops for biology and general science. Use epoxy in chemistry rooms with burners and hot plates. Choose rounded edges, sealed sink cutouts, and lockable drawers for each student group.
Most common mistake: Choosing high-pressure laminate to stretch the budget in a room with sinks. Water reaches the seams, and the tops swell within a few semesters.
Electronics and Instrumentation Labs: Ground It, Steady It, Power It
Top priority: ESD protection, stability, smart power layout, and a dry setting.
Best direction: Rigid steel frames with ESD-rated laminate tops, grounding points, and wrist-strap jacks. Add a rear power rail with several outlets per station. Place balances and optical setups on anti-vibration tables.
Most common mistake: Treating standard laminate as ESD-safe. It looks the same, but it can’t drain static away from circuit boards. Ask for the surface resistance rating in writing.
Cleanrooms and Sterile Settings: Fewer Places for Dirt to Hide
Top priority: easy cleaning and low particle shedding.
Best direction: 316 stainless steel tops with welded seams and coved edges, on open stainless frames. Swap enclosed base cabinets for open shelving or wire racks. Fewer joints, ledges, and fasteners mean fewer places for contamination to settle.
Most common mistake: Pairing a stainless top with painted steel or wood cabinets underneath. Paint chips and enclosed boxes trap dust. Choosing 304 steel for a room that uses bleach daily causes problems too.
Find your scenario, then check your draft spec against its common mistake. That five-minute check catches most costly errors before you request a quote.
Common Buying Mistakes to Avoid
Most bench problems I get called in to fix start with the order form, not the factory. These six mistakes show up in labs of every size. Each has a simple rule to prevent it.
1. Choosing by price alone. Two quotes can differ by 30%, and the cheaper one looks like a win. Then the gap shows up later: thinner steel, no leveling feet, extra freight and hookup charges, or a top that stains within a year.
Fix: Compare the total installed cost over 10 years, line by line. Don’t compare the price per bench.
2. Underestimating load and vibration. Buyers count the instrument, then forget the samples, glassware, and accessories that pile up around it. The frame sags, or the balance reading drifts every time someone walks by.
Fix: Add up the real equipment weight, then add 25%. Ask for load ratings per linear foot, and keep sensitive instruments off mobile frames.
3. Ignoring future reconfiguration. A bench run built tightly around today’s project becomes tomorrow’s obstacle. Moving bolted casework later means a contractor and lost lab time.
Fix: Use modular frames in zones likely to change, and keep fixed casework at sinks and hoods.
4. Overlooking clearances and safety access. A bench that fits on paper can still block an eyewash station, narrow an exit aisle, or get stuck at the door.
Fix: Tape the footprint on the floor and check every aisle and emergency route. Measure each door and turn on the delivery path.
5. Focusing on the surface but not the frame or base. Many buyers spend hours choosing between epoxy and phenolic, then accept whatever frame comes with the top. A heavy epoxy slab on a light frame flexes. Painted steel next to a sink rusts at the welds.
Fix: Specify frame gauge, finish, leg style, and base cabinet construction as carefully as the worktop.
6. Forgetting maintenance access and utility integration. Benches often go in before anyone asks how a plumber will reach the trap or where the gas line enters. Staff then run extension cords and hoses across the worktop.
Fix: Plan service spines, removable back panels, and outlet locations with your facility team before you sign.
Each fix costs little during planning. After installation, the same fix needs a crew, a budget request, and days your lab can’t spare.
Questions to Answer Before You Request Quotes
Before I send any client to a vendor, I give them a one-page list of six questions. Answer each one in writing. Your quotes will come back faster, be closer in scope, and be much easier to compare.
- What work happens at this bench? Name the task, the number of users, and the hours per day. “Sample prep, three users, two shifts” tells a supplier far more than “general lab use.”
- What chemicals, heat, or moisture will it face? List the five harshest substances and the hottest item that touches the top. Note whether the surface stays wet near a sink.
- What equipment will sit on it? Write down each instrument’s weight, then add 25% for samples and glassware. Flag balances and microscopes as vibration-sensitive.
- What utilities does it need? Count the outlets, gas taps, water lines, drains, vacuum points, and data ports each station needs.
- Does the space need to change later? Mark which runs stay fixed and which zones may shift within three years.
- What dimensions and clearances can’t change? Measure walls, columns, door openings, and aisle widths. Also measure the distance to the nearest eyewash station.
Attach a simple floor sketch to your answers. Then send the same package to every vendor, so each quote responds to the same brief.
Lab Bench FAQ
These questions come up in nearly every bench quote I review. The honest answer usually starts with “it depends,” so here’s what each one depends on.
What is the best material for a lab bench?
No single material wins everywhere. Your chemicals, heat sources, and moisture levels decide which one fits.
Epoxy resin suits wet chemistry with solvents and hot plates. Phenolic resin fits most biology and teaching labs. Stainless steel works for sterile rooms, and polypropylene handles strong acids like HF. Use laminate only in dry spaces. Start with your five harshest substances, then choose the surface.
What is the difference between epoxy resin and phenolic resin?
Epoxy is a solid cast slab. It handles continuous heat up to about 350°F and harsh chemicals, but it’s heavy and costs more.
Phenolic weighs about half as much and costs less. It resists most chemicals, moisture, and bacteria, but it doesn’t tolerate sustained high heat well. Choose epoxy for hot, aggressive work. Choose phenolic for modular frames and general use.
What is the standard height and depth of a lab bench?
Standing benches usually sit about 36 inches high. Seated benches run closer to 30 inches. ADA stations need a 28- to 34-inch surface with open knee space.
Wall benches typically measure about 30 inches deep, and double-sided islands run 60 to 72 inches. Your tasks and users matter more than any standard, though. Staff who pipette for hours may need adjustable-height frames.
Can lab benches be relocated or reconfigured?
Yes, if you planned for it. Modular and mobile benches can move in an afternoon, especially when ceiling service panels or drop-downs supply power and gas.
Fixed casework tells a different story. Benches tied to sinks, drains, and wall gas lines need a contractor to move them. Heavy epoxy tops also make every move harder.
How much clearance do you need between lab benches?
Most codes set a minimum exit path of 36 to 44 inches. Treat that as the floor, not the target.
I plan about 5 feet for back-to-back workstations and about 4 feet for single-sided aisles. Main routes with carts need 5 to 6 feet. Keep the path to every eyewash station clear, and confirm final numbers with your local code official.
Do lab benches need anchoring?
It depends on the bench type and your location. Anchor fixed casework to the floor or wall, especially under heavy equipment or tall reagent shelving. In seismic zones, local codes often require anchoring for benches and shelves alike.
Mobile benches don’t anchor, but staff should lock the casters during use. Anti-vibration tables need a level, solid floor. Bolting them to a wall can carry building vibration straight to the balance.
Match the Work First, Then the Bench
The right lab bench starts with the job, not the catalog. Match the application first. Then choose the surface, frame, and configuration that serve it.
In most labs I visit, the bench doesn’t fail because it lacks specs. It fails because someone misjudged the scenario.
Before you compare samples or quotes, write four lists: your harshest chemicals, your equipment loads, your utility needs, and your fixed clearances. Send those lists to every vendor. The bench that answers them best will serve your lab longest.
