


Many lab projects run into trouble long before anyone orders a fume hood or a centrifuge. The real problem starts earlier, when teams pick the wrong lab type.
I have seen this mistake cost owners months and serious money. A team plans a “general lab,” then learns it needs containment. Or it builds a cleanroom when a simple testing lab would do.
Lab type drives almost every decision that follows. It shapes your airflow and pressure control. It sets your layout and how people and samples move. It decides which utilities you need, from gas lines to DI water. It also defines your safety rules and how much compliance work your team will carry every day.
Get the type right, and design moves faster. Get it wrong, and you pay for rework. Once you know your lab type, you can plan the right laboratory furniture, utilities, and workflow for the space.
This guide helps lab managers, researchers, and project teams sort out what they really need. It covers the main lab types, their key differences, and a practical method for choosing the right one before design begins.
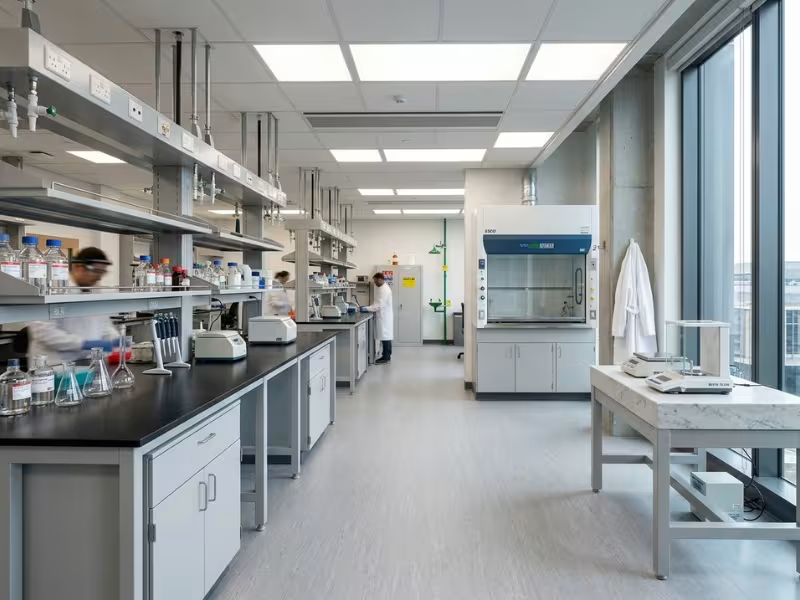
Why Lab Type Matters Before Design Begins
Before anyone sketches a floor plan, you need to know what kind of lab you’re building. That one answer shapes everything that follows.
A lab is not an office with sinks. It’s not a factory floor with benches, either. Offices move people and paper. Industrial spaces move products. A lab moves samples, hazards, and air, and each one needs its own path.
When I start a new project, I ask the team to walk me through a normal workday before we talk about square footage. Their answer quickly tells me six things:
- Workflow: how samples, staff, and waste travel through the space
- Hazards: chemical, biological, particulate, or nothing serious
- Ventilation: standard air changes, fume hoods, directional airflow, or full containment
- Utilities: gas, vacuum, DI water, backup power, and special drainage
- Equipment: light benchtop instruments or heavy, vibration-sensitive systems
- Compliance level: simple internal rules or strict audits and daily records
Here’s the catch. People use the same word, “lab,” for spaces that share almost nothing.
A research lab needs room to change. A clinical lab needs speed and traceability, because every sample ties back to a patient. A chemical lab revolves around fume hoods and safe storage. A cleanroom puts contamination control above everything else, from how people dress to how they walk in.
Put these four side by side, and you’re looking at four different buildings. Treat them as one, and your design starts on the wrong foot.
The Main Types of Laboratories at a Glance
You don’t have to read every section to find your starting point. Scan this table first, then jump to the lab type that sounds most like your daily work.
When clients ask me where they fit, I tell them to ignore the name on the door. Look at what your team actually does all day, and find the row that matches.
|
Lab Type |
Primary Purpose |
Typical Hazards / Control Level |
Core Design Priority |
Common Settings |
|---|---|---|---|---|
|
Research |
Explore new ideas and methods |
Varies by project; low to moderate |
Flexibility and easy reconfiguration |
Universities, R&D centers, startups |
|
Analytical & Testing |
Produce accurate, repeatable results |
Low to moderate; contamination risk to samples |
Instrument stability and sample flow |
Environmental, food, and materials labs |
|
Clinical & Diagnostic |
Test patient specimens |
Biological; moderate |
Fast turnaround and traceability |
Hospitals, reference labs |
|
Biosafety (BSL-1 to BSL-4) |
Work safely with infectious agents |
Biological; low to extreme containment |
Containment, pressure control, access |
Public health, vaccine, and pathogen research |
|
Chemical |
Handle, mix, and react chemicals |
Toxic, flammable, corrosive; moderate to high |
Fume control and safe storage |
Pharma, chemical plants, academic labs |
|
Cleanroom |
Protect products from contamination |
Particulates; strict ISO-classified control |
Filtered air, gowning, pressure zones |
Semiconductor, pharma, precision manufacturing |
|
Teaching |
Train students in basic methods |
Low; tightly supervised |
Durability, visibility, simple safety |
Schools, colleges, training centers |
A few tips as you read it:
- Two rows fit? That’s normal. Many facilities mix types, such as a research lab with a small cleanroom suite. Apply the strictest rules only where they’re needed.
- Watch the hazards column closely. It drives cost more than any other factor.
- Wet vs. dry runs across every row. It’s a separate question, and we cover it below.
Types of Laboratories by Function
Each lab type gets a different amount of space below. Some are simple to plan. Others, like biosafety labs and cleanrooms, cause the most costly mix-ups, so we look at them more closely.
Research Labs: Built to Change
Research labs exist to explore. Next year’s project may look nothing like this year’s, and the room has to keep up.
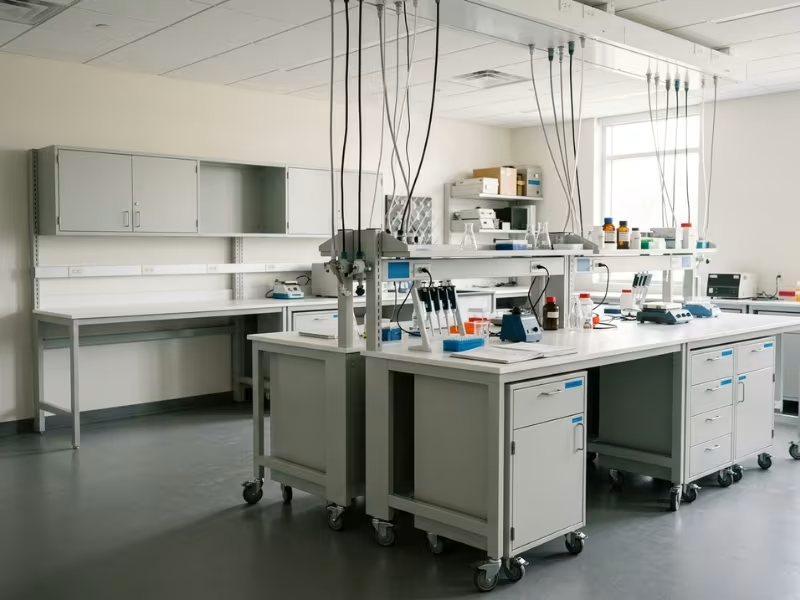
When I plan one, I don’t lock the team into a fixed setup. I push for modular casework, mobile lab benches and workstations, and utilities fed from overhead service carriers or ceiling panels. A researcher can then roll a bench away and plug in a new instrument without calling a contractor.
A repeating planning module helps too. Many projects use a bay about 10’6″ wide, so walls, benches, and ducts can shift in clean, predictable steps.
You’ll find these labs in universities, corporate R&D centers, and startup incubators. The goal isn’t tight control. It’s a workflow that can adapt. Keep shared support rooms, such as glass wash and equipment rooms, close to every bay.
Analytical and Testing Labs: Same Result, Every Time
A research lab asks, “What happens if?” A testing lab asks, “What’s the exact answer, and can we repeat it?” That shift changes the design.
These labs depend on accuracy, repeatability, and throughput. Picture an environmental lab running hundreds of water samples a week, a food lab checking for pathogens, or a materials lab stress-testing metal parts.
When I design one, I focus on three things:
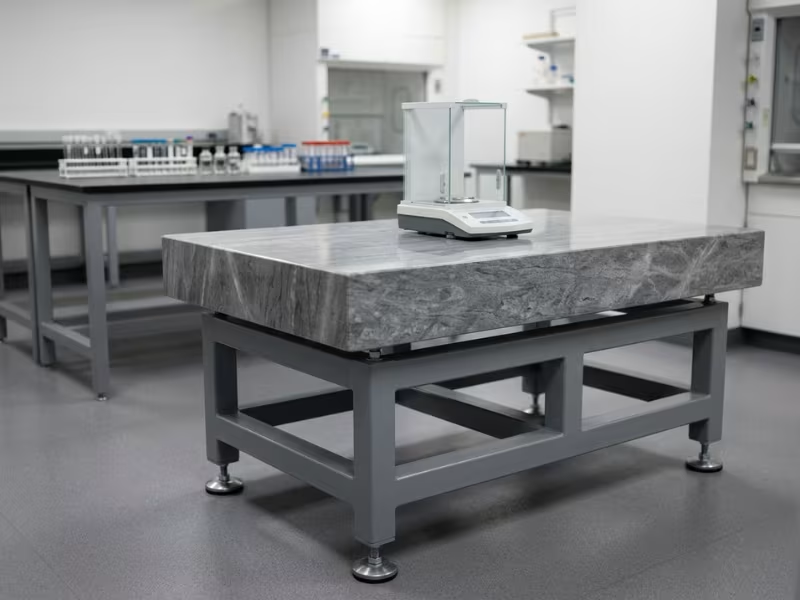
- Instrument stability. Balances, mass specs, and microscopes need steady temperature, low vibration, and clean, dedicated power. Sensitive balances often perform far better on dedicated anti-vibration tables than on standard bench surfaces.
- Sample flow. Samples should move in one direction, from receiving to prep to analysis to storage, with a clear chain of custody.
- Contamination control. A dirty prep area next to a sensitive instrument can quietly ruin your data.
Flexibility matters less here. Standard methods, fixed instrument zones, and consistent routines win. Many of these labs also work toward ISO/IEC 17025 accreditation, which rewards that discipline.
Clinical and Diagnostic Labs: Every Sample Has a Name
The big difference in a clinical lab is simple. Every tube connects to a patient waiting for an answer.
That’s why these labs focus on specimen flow, turnaround time, and traceability. A research lab can lose a day and recover. A clinical lab that loses a sample may delay a diagnosis.
I map the space around three stages:
- Pre-analytical: receiving, barcoding, sorting, and spinning samples
- Analytical: running tests on automated analyzers
- Post-analytical: reviewing, reporting, and storing samples
Each stage should flow into the next with almost no backtracking. In busy hospital labs, I often plan for automation tracks and pneumatic tube stations to cut handling time and errors.
Contamination control works in two directions. You protect staff from blood and body fluids, and you protect samples from cross-contamination. Handwash sinks, clear clean and dirty zones, and biosafety cabinets for higher-risk work all matter.
These labs must comply with programs such as CLIA, CAP, or ISO 15189, depending on location. The practical design takeaway: build in tracking, controlled storage, and space for records from day one.
Biosafety Labs: Containment That Scales Up
People misunderstand this type more than any other. A biosafety lab is not just “a lab that works with biology.” It’s a lab built to contain specific infectious agents, and the design depends on how dangerous those agents are.
The four biosafety levels work like a ladder. Each step adds new layers of protection.
- BSL-1: Low-risk microbes that rarely cause disease in healthy adults. Standard practices, open benches, a handwash sink, and lab coats are enough.
- BSL-2: Moderate-risk agents, such as many common human pathogens. You add restricted access, biosafety cabinets for aerosol-producing work, self-closing doors, and autoclave access.
- BSL-3: Serious agents that can spread through the air. The room needs negative pressure, so air always flows inward. You also need double-door entry, exhaust that never recirculates, sealed wall and ceiling openings, and respiratory protection.
- BSL-4: Dangerous agents with no reliable treatment. Staff use positive-pressure suits or Class III cabinets. The lab sits in an isolated zone or separate building with dedicated air systems, HEPA-filtered exhaust, exit showers, and full liquid waste decontamination.
Why are the gaps so big? As risk rises, the building itself becomes a safety barrier, not just the gloves and the cabinet. That affects five design areas:
- Pressure control: Air must move from clean zones toward contaminated ones, never the reverse.
- Access: Entry moves from simple door locks to airlocks with full logging.
- Air handling: Systems need backups, alarms, and filtered exhaust.
- PPE: Protection grows from lab coats to full suits, so you need space for gowning.
- Waste: Handling moves from bagging and autoclaving to on-site treatment of every liquid.
My advice: never “round up” to BSL-3 just in case. That jump can multiply your build and running costs. Match the level to your agents, and confirm it early with a biosafety officer.
Chemical Labs: Air, Storage, and Spills
Chemical labs and analytical labs can look alike, but they focus on different things. An analytical lab measures. A chemical lab makes, mixes, and reacts, creating fumes, heat, and waste.
Here’s what I treat as non-negotiable:
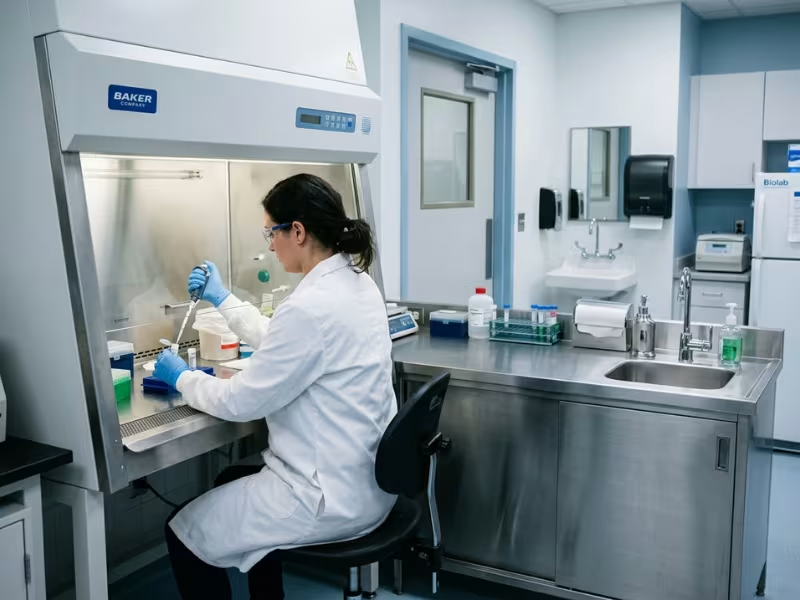
- Fume control. Fume hoods are the room’s core. Plan their number, size, and location first, because they drive exhaust and makeup air. Many projects target a face velocity of around 80 to 120 feet per minute, based on hood type and local rules.
- Storage segregation. Keep acids away from bases and oxidizers away from flammables. Use vented cabinets for corrosives and rated cabinets for flammables. Write your chemical list early, because it decides how many cabinets you need.
- Spill response. Place eyewash stations and safety showers within about 10 seconds of travel from hazard zones. Add spill kits and chemical-resistant floors.
Surfaces matter just as much. Choose lab countertops and worktops that match your heat, chemical, and cleaning demands. Epoxy resin and ceramic handle harsh work far better than general-purpose tops.
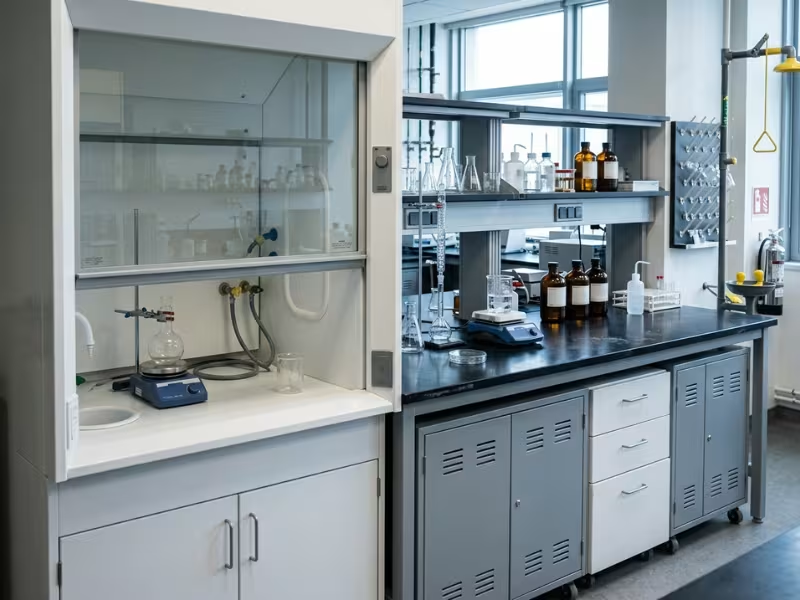
Cleanrooms and Controlled Environment Labs: A Different Set of Priorities
Many people think a cleanroom is just a lab that’s been cleaned harder. It isn’t. A cleanroom follows a different set of priorities.
In most labs, the main goal is to protect people from the work. In a cleanroom, the main goal is often to protect the work from people. One skin flake or stray fiber can ruin a microchip wafer or a sterile drug batch.
The system runs on ISO cleanliness classes from ISO 14644-1, ranging from ISO 1 (cleanest) to ISO 9. Each class caps airborne particles per cubic meter. ISO 5, for example, allows about 3,520 particles at 0.5 microns or larger. Pharma sites often use GMP grades alongside ISO classes. Choose the class first, and the rest of the design follows.
That class drives four key systems:
- Air filtration: HEPA or ULPA filters, high air change rates, and sometimes one-way airflow over critical areas
- Pressure control: Cleaner rooms usually sit at higher pressure, so air flows outward toward dirtier zones
- Gowning: Staged changing rooms where staff put on suits, hoods, booties, and gloves in a set order
- Personnel and material flow: Separate routes and pass-throughs, so dirty items never cross clean paths
You’ll find cleanrooms in semiconductor plants, pharma production, medical devices, and precision optics.
One warning I share often: some spaces need both product protection and biocontainment, such as certain cell therapy suites. Those projects need careful pressure planning, so bring in specialists early.
Teaching Labs: Safe, Simple, and Tough
A teaching lab isn’t built for maximum flexibility. It’s built to help one instructor guide 24 students safely through the same experiment, week after week.
I design these rooms around a few basics:
- Clear sightlines: The instructor should see every bench from the front, so I often use island benches.
- Durable materials: Epoxy resin or phenolic tops, tough fixtures, and casework that survives years of heavy use
- Repeatable setups: Matching stations, so every group has the same tools
- Simple safety: Central emergency shutoffs for gas and power, visible eyewash stations, and limited hazards on hand
A demo station at the front and secure prep rooms nearby keep the space running smoothly.
Wet Labs vs. Dry Labs: The Question Behind Every Type
This question applies to every lab type above, and it often matters most for your budget.
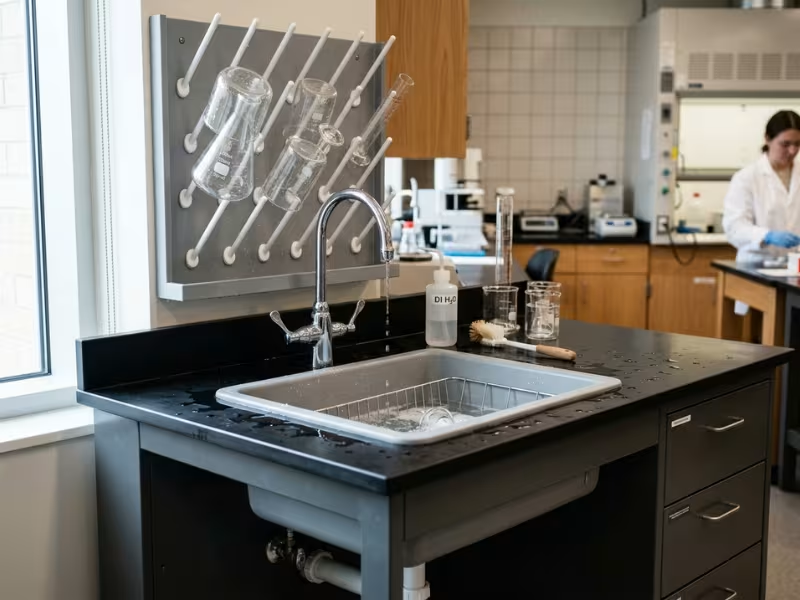
A wet lab handles chemicals, liquids, biological samples, and gases. It needs drains, fume hoods, strong ventilation, and chemical-resistant surfaces. In wet process areas, well-matched lab sinks and pegboards make daily washing, drainage, and glassware handling much easier.
A dry lab focuses on computing, electronics, data, and instrument analysis. It needs steady power, cooling, cable management, and often ESD-safe surfaces. Plumbing and exhaust needs drop sharply.
In practice, most projects are hybrid. A biotech team may run wet benches next to a dry room full of sequencers and servers. Keep wet and dry zones separate but close, and give each only the systems it needs. That one decision can save more money than almost any equipment choice.
What Actually Changes from One Lab Type to Another
Lab type labels are easy to learn. The harder question is what each type forces you to build differently. In my projects, the answer comes down to four areas.
Layout and Workflow: Follow the Sample
I start every layout by tracing one sample from the loading dock to the waste bin. That single path tells me more than any wish list.
- Sample flow: Testing and clinical labs need one-way movement. Backtracking invites mix-ups.
- People flow: Staff routes shouldn’t cut through hazard zones. In BSL-3 suites and cleanrooms, people enter and exit in set sequences.
- Clean/dirty separation: Keep prep, wash-up, and waste away from sensitive instruments.
- Support space adjacency: Keep glass wash, autoclaves, cold rooms, and storage within about 50 feet of the main benches in busy labs.
A research lab can live with some crossover. A clinical lab or cleanroom can’t.
Ventilation and Environmental Control: Where Most Differences Begin
If you remember one point from this guide, make it this one. Air separates most lab types. Change the hazard, and you change how air must move.
I sort it into four levels:
- Standard ventilation: Dry labs and many teaching rooms. Fresh air, comfort cooling, and basic exhaust, much like an office.
- Directional airflow: Chemical and most wet labs. Air flows from corridors into the lab, then out through fume hoods, with no recirculation.
- Containment: BSL-3 and above. Negative pressure, alarms, interlocked doors, and HEPA-filtered exhaust. If a fan fails, the system must fail safe.
- Cleanroom control: The goal flips. Positive pressure pushes particles out, and filtered air may change dozens or even hundreds of times per hour.
Instrument labs add tight temperature and humidity ranges. All of this explains why HVAC often becomes the largest line item in a lab budget, and why labs can use several times more energy than offices.
Utilities and Equipment Infrastructure: Match the Depth to the Work
Utilities are where budgets quietly grow. Not every lab needs the full menu.
- Gases: Nitrogen, compressed air, and CO2 serve most wet labs. Specialty gases need monitored cylinder storage or gas cabinets.
- Vacuum: Chemistry and biology benches use it often. Dry labs rarely do.
- DI or purified water: Analytical and clinical labs depend on it. Confirm the purity grade, because ultrapure water costs far more.
- Emergency power: Freezers, incubators, containment fans, and analyzers need backup.
- Special power: Sensitive instruments need dedicated circuits and UPS units. Heavy equipment may need three-phase service.
- Drainage: Chemical labs need acid-resistant piping and neutralization. High-containment labs need effluent treatment.
My rule is simple: give each zone only what it uses. Running gas to every bench “just in case” adds cost now and maintenance later.
Safety and Compliance Burden: The Cost You Pay Every Day
Construction ends. Compliance doesn’t. The more specialized your lab, the heavier its daily operational demands.
A dry lab or teaching lab carries a light load: basic training, a chemical inventory, and routine inspections. Move into clinical, BSL-3, or cleanroom work, and the load climbs fast. Your team may need to:
- Log room pressure, temperature, and humidity
- Certify fume hoods and biosafety cabinets on schedule
- Track training, gowning qualifications, and access records
- Validate equipment and document every deviation
I’ve watched cleanroom teams spend nearly as much effort documenting work as doing it. Automated monitoring and properly sized gowning rooms help. Before you commit, ask a blunt question: who will run this every day, and do we have the staff?
A Practical Framework for Choosing the Right Lab Type
Knowing the lab types is only half the job. Picking the right one takes a clear method. I walk every client through these five steps before anyone draws a floor plan.
1. Describe the Work, Not the Industry
When a client says, “We’re a biotech company,” I ask a better question: What does your team actually do all day?
“Biotech” can mean cell culture, protein work, gene sequencing, or pure data analysis. Each points to a different lab. List your top five activities, how often they happen, and what materials they use. “Grow cells and run PCR daily” tells a designer far more than “life sciences.”
2. Name Every Hazard and the Control It Demands
Your hazard list writes the first draft of your building. I sort hazards into five groups:
- Chemical: Solvents, acids, and flammables call for fume hoods, rated storage, and spill gear.
- Biological: Microbes, cell lines, and patient specimens set your biosafety level.
- Particulate: Dust that harms people or products requires filtration and may require a cleanroom class.
- Electrical: High-voltage gear, lasers, and static-sensitive parts need special circuits and grounding.
- Thermal: Furnaces and cryogens raise cooling loads and may require oxygen monitoring.
Add quantities. Ten liters of solvent and 200 liters lead to very different rooms.
3. Map Workflow, Throughput, and Staffing
Next, trace how people, samples, and equipment move. Ask three questions:
- How many samples or experiments do you run each day or week?
- Is the work deep and one-off, or high-volume and repeated?
- How many people work at once, and across how many shifts?
A research group running a few long experiments needs bench space and quiet. A testing lab handling 500 samples a day needs straight-line flow, staging areas, and maybe automation. A simple flow diagram often reveals your lab type faster than any spec sheet.
4. Be Honest About How Much Flexibility You Need
Flexibility sounds free. It isn’t.
Early-stage R&D teams change direction often, so mobile benches and overhead utilities pay for themselves. A routine testing lab runs the same methods for years, and constant reconfiguration just burns budget.
Plan for the next likely change, not every possible one. Add spare electrical capacity and room for one more fume hood. Don’t build a BSL-3-ready shell for a team with no plans for that work.
5. Bring in Specialists Before the Layout Is Locked
Teams skip this step more than any other, and it hurts the most. Once walls and ducts land on paper, every change costs real money. Gather this group early:
- Lab planner: Turns workflow into a working layout and bench plan
- MEP engineer: Sizes air, power, plumbing, and gas, often your biggest cost drivers
- Safety or compliance advisor: Confirms hazard controls, biosafety level, or cleanroom class
- Architect with lab experience: Fits everything into the building without surprises
I once watched an early MEP review catch a ceiling too shallow for the planned ductwork. That catch saved weeks of redesign.
Common Planning Mistakes to Avoid
Even with a solid framework, projects drift off course. These four mistakes show up in my project reviews again and again.
Treating a Lab Like an Office Retrofit
An empty office floor looks like a bargain until the engineering review begins.
Many wet, chemical, and higher-control labs need far more outside air and exhaust capacity than an office can provide. Office floors often carry a design load of about 50 pounds per square foot, while labs with heavy instruments may need 100 or more. Ceiling height is the hidden trap, because office plenums rarely fit large ducts, drains, and gas piping together.
Before you sign a lease, check structural capacity, floor-to-floor height, roof space for fans, and shaft room for new risers. If two fail, keep looking.
Overbuilding for Compliance “Just in Case”
Fear pushes specs higher. A team doing BSL-2 work asks for BSL-3 “to be safe.” A process that fits ISO 7 suddenly gets ISO 5.
An ISO 5 zone can need several times the airflow of an ISO 7 room. That means bigger fans, more filters, higher energy bills, and more certification and records every year. Staff also end up gowning for tasks that never needed it.
Tie every compliance level to a named agent, product, or regulation. If no one can state the reason, don’t build it.
Underestimating Ventilation and Utility Costs
Teams usually price benches and instruments first. Then the MEP estimate arrives, and the room goes quiet.
In many labs, mechanical, electrical, and plumbing systems account for close to half of construction cost. Late changes cause the biggest surprises: three extra fume hoods, a larger transformer, a neutralization tank no one planned. Each fume hood also becomes a major long-term energy load if you don’t manage its airflow carefully.
Lock your hood count and utility list early, and request an MEP cost check at the concept stage. Low-flow hoods, variable air volume controls, and heat recovery can trim running costs.
Choosing Specialization or Flexibility Without a Clear Operating Model
This mistake plays out both ways. One team builds a highly specialized lab for a single program, and then the program ends. Another builds full flexibility, and the mobile benches never move.
Both share one root cause: no one decided how the lab would actually run. Before design starts, write a one-page operating model that answers five questions:
- Who uses the lab?
- What hours does it run?
- How often will the setup change?
- Who handles maintenance?
- Who pays for it?
Those answers tell you how much specialization or flexibility you can really support.
How Priorities Change by Lab Type
The first table helped you find your lab type. This one shows what that choice demands in airflow, utilities, flexibility, and daily compliance work. Find your row and use it to set realistic budget and staffing expectations.
|
Lab Type |
Main Design Priority |
Ventilation Demand |
Utility Complexity |
Flexibility Level |
Typical Compliance Burden |
|---|---|---|---|---|---|
|
Research |
Adaptable workflow |
Moderate to high |
Moderate to high |
High |
Moderate |
|
Analytical & Testing |
Accuracy and repeatability |
Moderate |
Moderate to high |
Low to moderate |
Moderate to high |
|
Clinical & Diagnostic |
Turnaround and traceability |
Moderate |
High |
Low |
High |
|
Biosafety (BSL-1 to BSL-4) |
Containment |
Low to extreme |
Moderate to very high |
Low |
Moderate to very high |
|
Chemical |
Fume control and storage |
High |
High |
Moderate |
High |
|
Cleanroom |
Contamination control |
Very high |
High |
Low |
Very high |
|
Teaching |
Safety and supervision |
Low to moderate |
Low to moderate |
Low |
Low |
FAQs
What are the main types of laboratories?
Most labs fall into seven functional groups: research, analytical and testing, clinical and diagnostic, biosafety, chemical, cleanroom, and teaching. Each also sits somewhere between wet and dry. Many facilities combine two or three types, so pin down your main type first and plan special zones around it.
What is the difference between a wet lab and a dry lab?
A wet lab handles liquids, chemicals, biological samples, and gases. It needs sinks, drains, fume hoods, and chemical-resistant surfaces. A dry lab runs computers, electronics, and instruments, so it needs stable power and cooling but far less plumbing and exhaust. Most modern projects mix both.
How is a clinical lab different from a research lab?
A research lab explores open questions, so it values flexibility. A clinical lab tests patient specimens, so it values speed, accuracy, and traceability. Clinical labs follow a fixed, one-way workflow and must meet accreditation requirements from programs such as CLIA or CAP, which adds daily record-keeping.
What is the difference between a biosafety lab and a standard biological lab?
A standard biological lab may work with cells, plants, or harmless microbes. A biosafety lab contains specific infectious agents and carries a rating from BSL-1 to BSL-4. At BSL-3 and above, the building itself becomes a barrier, with negative pressure, airlock entry, and filtered exhaust. Your list of agents sets the level, not your field of study.
Can office space be converted into a laboratory?
Yes, but not every office works. Dry labs and light wet labs convert most easily. Check floor load capacity, floor-to-floor height, roof space for exhaust fans, and room for new risers in shafts. If two of the four checks fail, keep looking.
What design features does every lab need?
Every lab needs a few basics:
- Ventilation matched to its hazards
- A handwash sink near the exit
- Durable, easy-to-clean work surfaces and floors
- Clear separation between clean work and waste
- Emergency gear sized to the risk
- Enough power, with backup for critical equipment
Let your lab type drive every feature beyond this list.
Start With the Work, Then Pick the Lab
The best lab projects I’ve worked on all started the same way. The team knew exactly what it needed before anyone opened a drawing set.
Follow this order:
- Define the work and its hazards. List your real tasks, materials, and quantities.
- Map the workflow. Trace how samples, people, and waste move each day.
- Choose the lab type. Let the first two steps decide, not the industry label.
- Plan design, equipment, and compliance. Now your planner and engineers have solid ground to build on.
Still unsure which type fits? Don’t guess. Use the two comparison tables above, or build a simple needs checklist covering hazards, utilities, throughput, and staffing. Bring it to your first planning meeting.
That one page can save you months of rework.
