


A chemistry lab countertop is not just a place to set things down. It faces acids, solvents, hot glassware, and hard daily cleaning. A standard work surface cannot keep up for long.
I see the cost of a wrong choice often. Surfaces etch, stain, and swell. Spills creep into seams, and cleaning gets harder every month. Trapped residue can taint the next experiment. Some labs end up replacing their tops years too early.
I have helped many labs find countertops that hold up under real use. In this guide, I show you how to match materials to your chemical exposure, heat load, and daily work. That way, you can choose with facts, not guesswork.

What Actually Determines the Right Chemistry Lab Countertop
Most lab managers open with the same question: “Which material is best?” I always turn it around. What will this surface face every day? That answer tells me more than any brochure.
These are the six factors I check before I name a single material.
Chemical exposure. List the acids, bases, solvents, and oxidizers that touch the surface, plus their strength. A top that handles dilute acetic acid may cloud under hot nitric acid or soften after years of acetone.
Spill frequency and severity. An occasional drop is very different from daily splashes at a titration station. Routine spills attack seams, edges, and sink rims first.
Heat. Think about hot plates, burners, and glassware fresh from the oven. Some surfaces handle steady warmth but crack or scorch under direct flame or sudden heat.
Impact and load. Dropped clamps, benchtop fume hoods, and heavy instruments all stress the surface. Check both point loads and long-term weight.
Cleaning and contamination control. Harsh disinfectants and daily scrubbing wear surfaces down. If trace residue could skew your results, you need a non-porous top with few seams.
How the bench gets used. Wet chemistry, instrument work, and mixed-use benches each need something different. An HPLC bench rarely takes the abuse a wet bench does.
Together, these factors form your exposure profile. Let that profile drive your choice, not what the lab down the hall bought. Popular materials earn their reputation, but they still fail when they end up in the wrong spot.
Why Chemistry Labs Need Different Countertop Standards
Laminate, granite, and quartz work well in offices and kitchens. In a chemistry lab, I watch them break down fast. Laminate seams swell after a few spills. Natural stone etches under acids. The resin binder in quartz can yellow or scorch near a hot plate.
Much of the confusion comes from mixing up two different ideas. Occasional resistance means a surface survives a quick wipe-up of a mild chemical. Long-term durability means it holds up to repeated contact, stronger reagents, and heat, year after year. Many product sheets prove the first and quietly imply the second.
Chemistry work also raises the bar for daily care. You clean more often and with harsher agents. Any porous spot or open seam can trap residue and carry it into the next test. A surface that needs regular sealing becomes a weak point, because one missed cycle lets chemicals soak in.
Service life shifts too. A kitchen counter can last 20 years under light use. A chemistry top has to aim for a similar lifespan while taking far heavier abuse.
The Main Countertop Materials Used in Chemistry Labs
Four materials cover most of what I specify for chemistry labs. Each one solves a specific problem, and each one fails when it ends up in the wrong place. I’ll spend the most time on epoxy and phenolic because most projects come down to those two. Stainless steel and polypropylene matter in narrower situations, and a few other materials show up mainly in support areas.
Epoxy Resin: The Wet Chemistry Workhorse
Epoxy resin countertops are cast as one solid, uniform slab. The material looks the same from top to bottom, so a scratch never exposes a weaker core. That makes epoxy my default starting point for heavy wet chemistry.
Where it excels:
- Strong resistance to most acids, bases, and common solvents
- Good heat tolerance, with many products rated for continuous exposure around 350°F
- Non-porous surface with no sealing needed
- Molded sinks and drip grooves that keep seams to a minimum
Where people misuse it: Some labs install epoxy in instrument rooms or dry support areas. It works there, but they pay for chemical performance they never use. Others assume it handles every reagent. Concentrated oxidizers, such as hot nitric or chromic acid, can dull and stain the surface over time. Hydrofluoric acid attacks it outright.
Where long-term problems show up: Epoxy is heavy, often about 10 pounds per square foot at one inch thick. It needs solid base cabinets. It can also chip at the edges if someone drops a heavy clamp or ring stand. Abrasive scrubbing slowly dulls the finish. Minor chips can be filled and buffed, but deep damage usually means replacing a section.
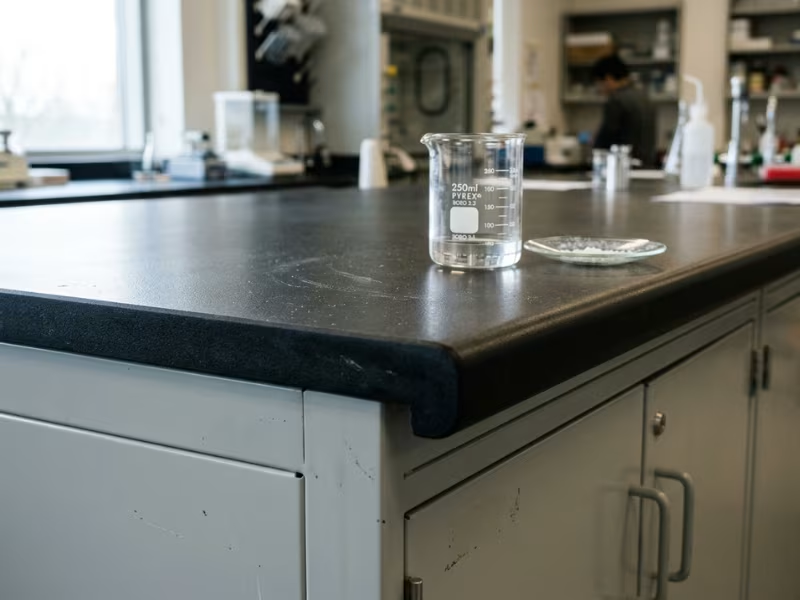
Phenolic Resin: The Balanced All-Rounder
Manufacturers make phenolic resin countertops by pressing layers of resin-soaked kraft paper under heat and pressure. The result is lighter and tougher than epoxy, and it often costs less. When a client needs one surface that does many jobs well, I often steer them here.
Where it excels:
- Good resistance to most lab chemicals at typical concentrations
- Close to half the weight of epoxy at standard thicknesses, which makes it easier to install and replace
- Strong impact resistance with less chipping
- A solid fit for teaching labs, instrument benches, and mixed-use rooms
Where people misuse it: The biggest mistake I see is putting phenolic at high-heat stations. It handles warm glassware fine, but direct flame or a hot plate left running can scorch it. It also struggles under routine contact with concentrated acids, especially at elevated temperatures.
Where long-term problems show up: Watch the edges and cutouts. A deep gouge can expose the darker paper core. Poorly sealed sink cutouts can also let moisture creep into the layers. Inspect these spots once a year, and phenolic will serve a long time.
Stainless Steel: Clean and Tough, but Not Universal
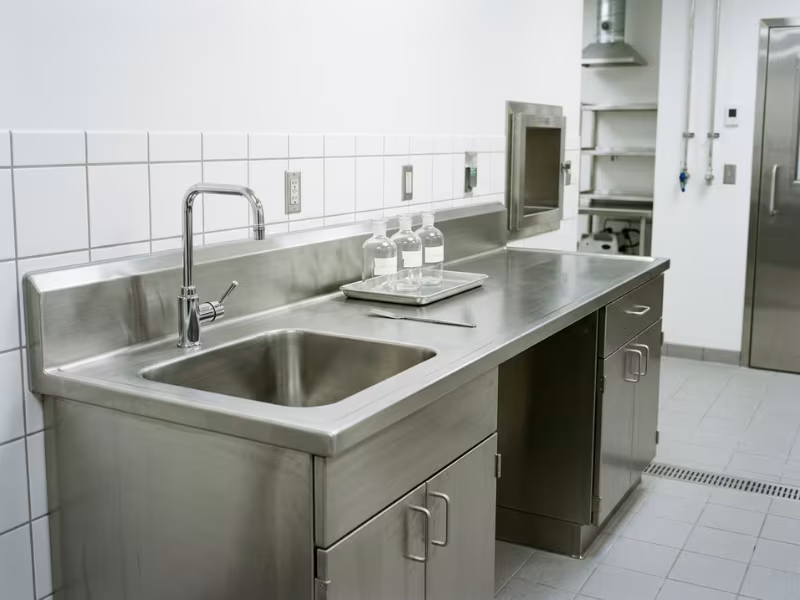
Stainless steel earns its place where cleanliness and heat tolerance matter most. I specify it for sterile prep areas, radioisotope work, pharmaceutical support spaces, and benches that face extreme heat.
Where it excels: It handles high heat, resists impact, and cleans down to a near-sterile finish. Seamless welded tops with integral sinks leave few places for residue to hide.
Where people misuse it: Many buyers assume stainless resists all chemicals. It doesn’t. Hydrochloric acid, bleach, and other chloride sources cause pitting and corrosion. Even Type 316, which handles chlorides better than 304, still suffers under regular acid exposure. For a busy acid bench, I rarely recommend it.
Where long-term problems show up: Expect scratches, dents, and pitting near sinks where chlorides collect. Stainless also conducts heat and gets noisy under glassware. Some users simply find it uncomfortable to work on all day.
Polypropylene: The Specialist for Harsh Acids
Polypropylene fills a gap no other common material covers. It stands up to hydrofluoric acid, concentrated sulfuric acid, and many aggressive acid mixes. Those chemicals would ruin epoxy or stainless steel over time.
Where it excels: I use it for acid digestion areas, metal plating labs, semiconductor wet benches, and HF work. It welds seamlessly, so sinks, backsplashes, and spill lips become one continuous piece.
Where people misuse it: Heat is its weak point. Polypropylene starts to soften well below the temperatures epoxy handles, so keep hot plates and burners on a separate surface. It also reacts poorly to some aromatic and chlorinated solvents. Check your solvent list before you commit.
Where long-term problems show up: Long, unsupported spans can sag or bow over time. The surface also scratches easily, and those scratches can hold residue. Proper support underneath and gentle cleaning tools solve most of these issues.
Other Materials: Fine for Support, Risky for Bench Work
You’ll also see solid surface, engineered stone, and concrete in some lab proposals. I keep these off demanding chemistry work surfaces, and I’m upfront with clients about why.
- Solid surface works well for dry write-up areas, but solvents and hot glassware can soften or scorch it.
- Engineered stone offers a polished look. However, its resin binder can discolor under heat, and some chemicals will stain it.
- Concrete needs regular sealing. One missed cycle lets acids etch the surface and soak into the pores.
These materials suit offices, break rooms, and dry support zones. For any bench that sees real chemical exposure, choose one of the four materials above.
Epoxy vs Phenolic: The Comparison Most Buyers Actually Need
Nearly every chemistry lab project I quote reaches the same fork: epoxy or phenolic. Both are excellent materials. Both also let buyers down when they land on the wrong bench. Here is how I walk clients through the choice, one factor at a time.
Chemical resistance. Epoxy wins on depth. It handles a wider range of acids, bases, and solvents. It also holds up better when spills sit for a while. Phenolic covers most everyday reagents at normal strengths. The gap shows up with concentrated acids and long contact times. If your team runs digestions or finds dried spills the next morning, lean toward epoxy.
Plenty of chemistry happens above room temperature, so heat deserves a hard look next.
Heat tolerance. Epoxy is the safer pick near hot plates, burners, and ovens. Many epoxy tops handle continuous heat around 350°F. Phenolic copes with warm glassware, but a hot plate left running can scorch it. My rule is simple. If a heat source stays on the bench all day, that bench gets epoxy.
Weight and fabrication. Phenolic often weighs close to half as much as epoxy. That matters in older buildings, upper floors, and tight freight elevators. Installers can cut phenolic on site with standard carbide tools, so late layout changes cause less pain. Epoxy usually arrives as factory-cast pieces with molded sinks and drip edges. Field cuts take more time and skill.
Weight and fabrication also shape the number most buyers check first.
Cost. Phenolic often costs less per square foot. Its lighter weight also trims freight and labor. But look past the quote. A scorched or etched phenolic top at a wet bench can cost you more over ten years than epoxy would have. Price the full service life, not just the purchase order.
Repair and replacement. A technician can fill and buff minor epoxy chips so they nearly disappear. Deep cracks usually mean replacing a section, and matching seams takes care. Phenolic resists chipping better. However, deep gouges reveal the darker core, and you can’t really hide them. The upside is that light phenolic panels are quick to swap out.
Best-fit applications. Here is where the comparison pays off:
|
Factor |
Epoxy Resin |
Phenolic Resin |
|---|---|---|
|
Chemical resistance |
Broader, better for strong reagents |
Good for typical concentrations |
|
Heat tolerance |
Higher, suits hot plates |
Moderate, avoid constant heat |
|
Weight |
Heavy |
Often close to half the weight |
|
Field fabrication |
Harder |
Easier |
|
Upfront cost |
Higher |
Lower |
|
Best use |
Wet chemistry, general acid work, heat stations, sink runs |
Teaching labs, instrument benches, mixed-use and mobile tables |
Many of my best projects use both materials. I use epoxy on wet benches and heat stations. Phenolic covers instrument rows, write-up areas, and teaching benches. That split protects the surfaces that need it most while keeping the budget under control elsewhere.
How to Match Countertop Materials to Chemistry Lab Scenarios
Material specs only tell part of the story. On a site visit, I look at what happens at each bench and match the surface to that work. Below are the five scenarios I see most. For each one, I cover the priority I set, the material I lean toward, and the mistake buyers repeat.
General Wet Chemistry Labs
Chemical and heat resistance come first here. These benches handle titrations, extractions, and reflux setups. Spills sometimes sit until someone notices, and hot plates often run for hours.
I start with epoxy resin for these spaces. It covers the widest range of reagents and handles steady heat. Pair it with molded sinks and drip grooves so spills drain away instead of pooling at seams.
The most common mistake is splitting the difference to save money. Some buyers put phenolic on the main wet benches and plan to “be careful.” Within a few years, I find scorch rings by the hot plates and dull patches where acids sat overnight.
Teaching Chemistry Labs
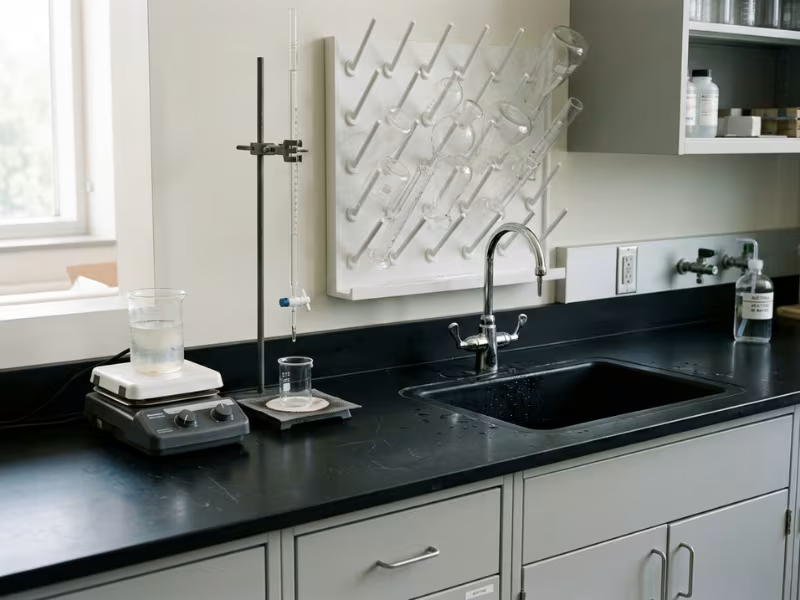
Students change the math. They usually work with milder, diluted reagents. But they also drop glassware, scrape stools, and forget to wipe up. Here I balance durability, budget, and easy upkeep.
Phenolic resin is often my first suggestion. It resists impact, weighs less, and costs less across 20 or 30 student stations. For the instructor’s demo bench or any station with open flames or strong acids, I switch to epoxy.
The mistake I see most is buying research-grade surfaces for every student bench. Fume hoods, eyewash stations, and better sinks usually make better use of that money.
Analytical or Instrument-Heavy Labs
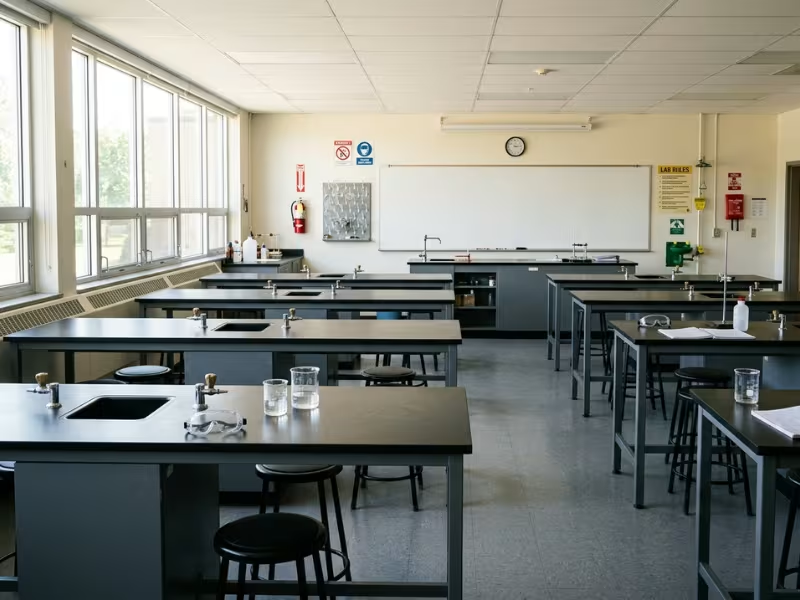
In HPLC, GC, and spectroscopy rooms, I ask one question first. Does this bench really need high chemical resistance? Usually, the answer is no. Stability, flatness, and easy cleaning matter more.
Phenolic works well here. It stays flat, supports most benchtop instruments, and cleans without fuss. If sample prep happens beside the instruments, I add a short epoxy section for that zone only.
Buyers often overspec these rooms with epoxy everywhere. Others overlook vibration and load. A heavy mass spectrometer on a long, thin span can sag and drift. Check the cabinet support as closely as the top.
Acid-Heavy or Highly Corrosive Environments
Hydrofluoric acid, hot concentrated sulfuric acid, aqua regia digestions, and plating baths call for a different approach. Corrosion resistance outweighs everything else.
Polypropylene is my go-to here. It handles HF and harsh acid mixes that would etch epoxy or pit stainless steel. Welded sinks and raised spill lips keep acid contained in one seamless piece.
The classic error is assuming epoxy covers it all. Another is forgetting about heat. Polypropylene softens near hot plates, so I place heat sources on a separate, heat-rated surface or use insulated digestion blocks.
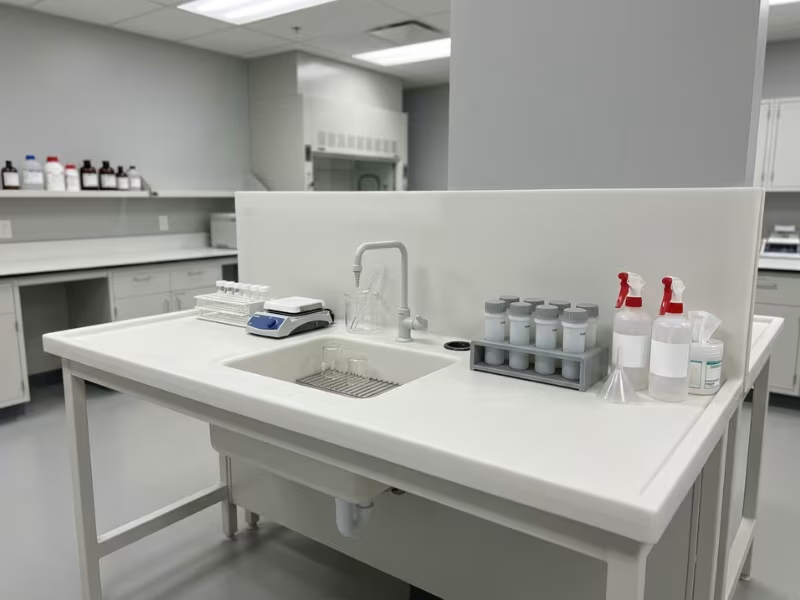
Clean, Low-Contamination, or Support Spaces
Sterile prep rooms, cell culture areas, glassware wash stations, and radioisotope benches prioritize cleanability and low residue. A stainless steel laboratory worktop fits well here. Welded seams and integral sinks leave few hiding spots. The surface also withstands heat from nearby autoclaves and drying ovens.
Write-up desks, storage counters, and break areas need far less. Phenolic or even solid surface works fine in these zones.
The big mistake is cleaning stainless with chlorine bleach. Chlorides pit the surface, and those pits trap the very residue you wanted to avoid. Use a compatible disinfectant, or rinse thoroughly after bleach. And skip chemistry-grade tops where nobody handles chemicals.
How to Choose: A Practical Countertop Selection Framework
When a client asks me to spec a new lab, I don’t open a catalog first. I walk through six steps in order. Each step narrows the field, so you end up with one or two clear options instead of five.
Step 1: List the chemicals you actually use.
“Chemistry lab” tells a supplier almost nothing. Pull your chemical inventory and your most common protocols. Note each reagent, its concentration, its temperature, and how long it usually sits on the bench.
Flag the outliers. One weekly HF digestion or a daily hot nitric acid wash can change the whole decision. Send that list to every supplier, and ask for resistance data on your specific reagents, not a generic chart.
Chemicals only cause part of the wear on a surface. Heat and physical stress cause the rest.
Step 2: Define heat and mechanical demands.
Count the heat sources on each bench. How many hot plates run at once, and for how long? Does anyone use Bunsen burners? Do people set glassware straight from a drying oven onto the top?
Next, look at impact and load. People drop ring stands, clamps, and heavy flasks. Some benchtop instruments weigh several hundred pounds. Write down the heaviest item and where it sits. Your supplier needs that number to size the top and the support below it.
Step 3: Separate primary work surfaces from secondary support surfaces.
Now map your lab as zones. Primary surfaces take direct chemical and heat exposure, such as wet benches, sink runs, and digestion areas. Secondary surfaces handle lighter jobs, such as write-up desks, instrument rows, and storage counters.
Give each zone only the grade it needs. On many projects, I put epoxy or polypropylene on about a third of the benches and phenolic on the rest. That split often frees up budget for better sinks or extra fume hood space.
Once you know where each material goes, the price conversation gets more honest.
Step 4: Compare lifecycle cost, not just initial price.
A cheaper top that fails in six years costs more than a pricier one that lasts twenty. Estimate the full picture for each option:
- Expected service life under your exposure profile
- Yearly upkeep, such as sealing, refinishing, or repairs
- Replacement cost, including removal, disposal, and reinstallation
- Downtime while benches sit out of service
Downtime often hurts most. A two-week bench shutdown in a busy research or QC lab can cost more than the countertop itself.
Step 5: Check fabrication, seams, sink integration, and installation.
This step brings good specs into real buildings. Ask the supplier where the seams will fall and how they will join the sections. Keep seams away from sinks and high-spill zones whenever possible.
Confirm the sink type and fit. Molded epoxy sinks, welded polypropylene sinks, and drop-in sinks age differently. Review edge profiles, drip grooves, and backsplash details too.
Then measure the delivery path. Long epoxy slabs may not fit through older doorways or freight elevators. Upper floors may have load limits. Custom pieces can also take eight weeks or more to arrive, so build that into your schedule.
Step 6: Request samples and test your assumptions.
Never buy from a spec sheet alone. Ask for samples of every material on your shortlist, then test them in your own lab. If you’re still building that shortlist, browsing a range of lab countertops and worktops side by side helps you see which materials fit your zones.
I give clients a simple method. Place drops of your harshest reagents on a sample, cover each with a watch glass, and wait 24 hours. Rinse, then look for etching, swelling, or color change. Set a hot beaker on another sample. Scrub one with your usual cleaning agents. Run every test inside a fume hood with full PPE, and follow your lab’s own safety rules for HF and other high-hazard reagents.
A few minutes of hands-on testing can spare you from a mistake you would live with for the life of the lab.
Common Mistakes When Choosing Chemistry Lab Countertops
Most countertop failures I inspect don’t come from bad materials. They come from good materials in the wrong spot. I see the same six mistakes on project after project, and you can avoid every one of them.
Choosing by price alone. The lowest bid looks great on a purchase order. Then the top starts to etch, the seams lift, and you pay for removal, new material, and two weeks of lost bench time. I ask buyers to compare quotes by cost per year of service, not cost per square foot. That one change reshuffles most shortlists.
Trusting the “chemical resistant” label. Every supplier uses this phrase. It means little until you know which chemicals, at what strength, and for how long. A “chemical resistant” top may shrug off dilute acids yet cloud under hot nitric acid or swell after daily solvent contact. Ask for test data that matches your reagents. If a supplier can’t provide it, treat the claim as marketing.
Overbuying for low-exposure areas. Epoxy on a write-up desk or a balance table doesn’t protect anything. It just eats budget. I’ve watched labs spend thousands on premium tops in rooms where the harshest chemical is an alcohol wipe. Put that money into fume hoods, better sinks, or the benches that take real abuse.
Using one surface everywhere. A single material across the whole lab feels simple. In practice, you either overpay in quiet zones or underprotect the busy ones. Walk the room, mark each bench by its actual job, and assign materials zone by zone. A wet bench, an instrument row, and a storage counter rarely need the same top.
Ignoring heat. Buyers often focus on chemicals and forget the hot plate that runs eight hours a day. Heat damage shows up as scorch rings, warping, or fine cracks near burners. List every heat source before you pick a material. Keep heat-sensitive tops like polypropylene well away from them.
Overlooking sinks, seams, and edges. These details cause more early failures than the flat surface ever does. Watch for:
- Seams placed right beside a sink or titration station
- Poorly sealed sink cutouts that let moisture creep into the core
- Square edges that chip under daily bumps
- Missing drip grooves that send spills straight onto cabinet doors
Ask for shop drawings and review every seam and cutout before fabrication starts. Ten minutes with those drawings can add years to your countertop’s life.
Installation and Maintenance Considerations
A great countertop can still fail early if the install goes wrong. I’ve seen premium epoxy crack within a year because nobody checked the cabinets underneath.
Get the installation right. Ask your installer to level every base cabinet before the top goes on. An uneven base twists the slab and stresses the seams. The frame matters as much as the top, so choose lab benches and workstations rated for the weight of your countertop and equipment. Support long spans at the intervals the manufacturer lists, especially under heavy instruments or polypropylene. Make sure the crew bonds and fills each seam fully. An open seam turns into a chemical trap.
Once the top is in, daily habits decide how long it lasts.
Clean with the surface in mind. Use mild detergent and water for routine wipe-downs. Pick disinfectants your manufacturer approves. Skip scouring pads and abrasive powders, since they dull epoxy and scratch polypropylene. If you use bleach, rinse with clean water afterward. Leftover residue pits stainless steel and can stain resin tops. Wipe up spills quickly.
Inspect the weak spots. Flat surfaces rarely fail first. Check phenolic sink cutouts for loose sealant once a year. Look along epoxy edges for chips, and fill them before they spread. If you use concrete or stone anywhere, reseal it on schedule.
Even “low-maintenance” materials come with rules.
Follow the manufacturer’s guidance. Each brand tests its own formula, so heat limits and approved cleaners vary. Keep the care sheet near the sink and share it with new staff. Ignoring it can also void your warranty.
Questions to Answer Before Requesting Quotes
I can usually tell within five minutes whether a buyer has done this homework. Prepared buyers get sharper quotes, faster. Everyone else gets generic pricing and a round of follow-up calls. Answer these six questions first, and send your answers with every quote request.
1. What chemicals contact the surface most often?
Name your top five to ten reagents, with their strength and typical contact time. “Various acids” won’t get you a useful quote.
2. Are spills occasional or routine?
A few drips a week and daily splashes at a sink run call for very different materials.
3. Is high heat part of the workflow?
Note every hot plate, burner, and oven-hot piece of glassware, plus how long each one stays on the bench.
4. Is the surface for wet chemistry or support tasks?
Wet benches need tougher tops. Write-up desks and instrument rows usually don’t.
5. Are sinks, cutouts, or integrated fixtures required?
List sinks, faucets, gas valves, and electrical outlets. Each cutout affects price, seam layout, and lead time.
6. Do all zones need the same material?
Probably not. Mark up a floor plan by zone so suppliers can quote each area on its own.
Keep your answers to a single page. That way, every supplier quotes the same job, and you can compare their numbers fairly.
FAQ
What is the best material for a chemistry lab countertop?
No single material wins everywhere. For general wet chemistry, I start with epoxy resin. It handles the widest range of everyday reagents and steady heat from hot plates. Phenolic fits teaching labs and instrument benches. Polypropylene takes over for hydrofluoric acid and hot concentrated acids. Stainless steel suits sterile and high-heat support areas. Your chemical list and heat load should pick the winner, not the catalog.
What is the difference between epoxy resin and phenolic resin?
Epoxy is a solid, cast slab. It resists stronger chemicals and handles more heat, with many products rated around 350°F for continuous exposure. Phenolic uses layers of resin-soaked kraft paper pressed together. It’s much lighter, resists chipping better, cuts easily on site, and usually costs less. I put epoxy where hot plates and harsh reagents live. Phenolic goes on lighter-duty and mixed-use benches.
Is stainless steel good for chemistry labs?
Yes, in the right spots. It works well in sterile prep rooms, glassware wash stations, radioisotope areas, and next to autoclaves or drying ovens. It cleans easily and shrugs off heat. However, hydrochloric acid, bleach, and other chloride sources pit it over time. I rarely place stainless on a busy acid bench.
Can one countertop material work for both teaching and research labs?
It can, but it seldom makes the smartest buy. Teaching labs use milder reagents yet take more bumps and drops, so phenolic often fits. Research labs run stronger chemicals and longer heat cycles, which favor epoxy. If both share a building, choose by bench function, not by department. Put epoxy on wet benches and demo stations, and use phenolic everywhere else.
What affects the lifespan of a chemistry lab countertop?
Five factors decide most outcomes:
- How well the material matches your actual chemicals
- Heat exposure, especially hot plates left running all day
- Install quality, including level cabinets, proper span support, and fully filled seams
- Cleaning habits, since abrasive pads and unrinsed bleach wear surfaces down
- Detailing at sinks, cutouts, and edges
When the match is right and the care is consistent, epoxy and phenolic tops often serve 15 to 20 years or more.
Do all lab areas need the same countertop material?
No, and treating them the same usually wastes money. Map your lab by zone. Wet benches, sink runs, and digestion areas need chemistry-grade tops. Instrument rows, write-up desks, and storage counters need far less. On many projects, only about a third of the benches need premium material. The savings can fund better sinks or extra fume hood space.
Choose for the Work, Not the Brochure
Every countertop I’ve seen fail early shares one trait. Someone picked it for a label, not for the work on that bench. Your exposure profile should drive the choice. Marketing claims shouldn’t.
The priciest material isn’t always the right one. The best top is the one that fits your chemicals, heat, and daily tasks, bench by bench.
Start with a single page. List your chemicals, your heat sources, and what each surface does. Then test samples in your own lab and request quotes. That order keeps you in control of the decision.
